Section 18 - Fuel Tank Construction (Part 2)
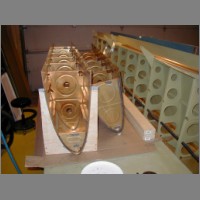
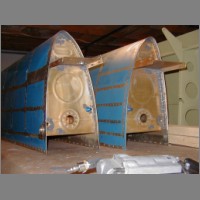
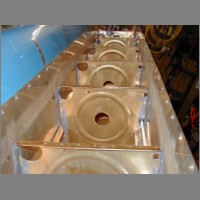
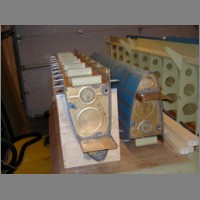
Added 11/07/2004 - 379.8 Me Hours, 415.2 Total HoursTank pre-assembly went very fast, but
working with the proseal definitely adds a LOT of time over what the
outboard leading edge takes. I was getting worried that I was
missing something....I was well into the wing kit and nowhere near the
500 hours for the kit that people had told me. Now I can see
where some of that time goes. All in all though, I don't think
it's going to be nearly 500 hours to do the wing kit.....I'll probably
be at or just over the 500 hour mark when I finish the wing kit, is
more likely. (No tailcone final assembly, or fiberglass work done)
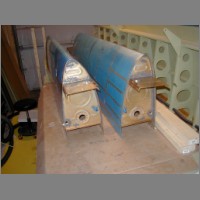
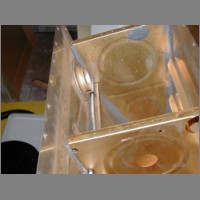
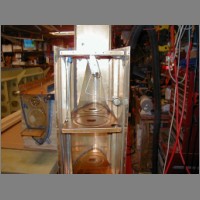
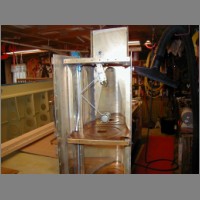
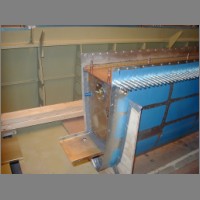
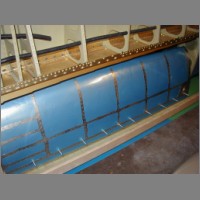
Now I need to test my fuel tanks for leaks. Van's sells the $5.00 test kit, which I sure wish I would have bought beforehand, but I didn't. I did make a big mistake today. I went out and put caps in the holes of the tanks, put a balloon on the vent tube, and blew into the ports until the balloon started to fill up. To my surprise, the proseal on the top corners by the bulkhead, and just above the tank attach brackets, wasn't set firm enough yet and I blew pinhole leaks in those spots. Got a syringe, and some fresh proseal and injected those spots. Hopefully....probably, it'l turn out ok now once it cures.
BIG LESSON LEARNED: When you're done with your tanks, don't be impatient. Let them sit for a week before you do anything regarding pressure or vacuum.
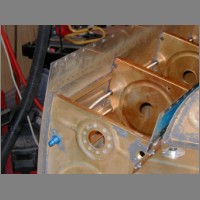
Regarding Proseal quantity, for the record I can now say that I'm glad I did it how I did. I had 2 brand new cans of proseal on hand for doing the tanks. I easily used 1.5 cans of it. For someone who's never built tanks before, I can see how maybe I used a little more than an expert, but I still think you'd have a hard time coming in under 1 can. It does look like you could buy 2 cans when starting the kit, and use some for the trailing edges in the tailcone kit, and still be able to do tanks. I kept mine in the freezer, and I am sure the shelf life would go up high enough to last that long, as long as you build the tailcone and the tanks within the same year.
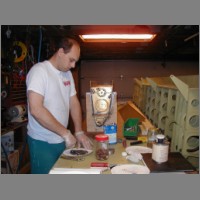
As for technique, I know some of you used precision scales to mix proseal by weight. In my opinion, I can't see this as all that necessary. I mixed mine on paper plates, with craft sticks (big popsicle sticks from walmart...the thicker ones), and I had flattened one tip with the beltsander. By weight, the white stuff is heavier than the black, but I eyeballed it trying to do a 10:1 ratio by volume and on my first can I came out dead on....I ran out of black at the same time and quantity as white. My 2nd can looked to be running that way too. After mixing one batch carefully, you can also get a visual clue as to the ratio by checking the color of the mix. I also believe that the stuff will cure either way. If you're off a bit, it'll just take a bit longer, but with much of the kit left to go, I don't see that as a problem.
I think people had great ideas for application, using cow syringes, and zip-loc bags, and cake decorators. I think that would be super, if you have a couple of people on hand so you can mix it, fill your applicator, and work together. Working alone, I was constantly hustling to make sure I could get it all applied and assembled in reasonable time before it thickened too much. I just applied mine with the 1/2" wide craft sticks. regular popsicle sticks would be great for small areas. You end up smoothing it out and trying to ensure that you have coverage anyway. Also, I can't imagine how much of a pain in the butt it would have been to try to clean out a cake decorator after each use. A syringe would probably be just perfect though, if you're willing to spend the cash. They were $4.50 for 3 of them here in town, and given how many days I used them, I'd have gone through about 10 in this project. When working with proseal, my advice is to make EVERYTHING disposable (except clecos). I went through about 150 latex gloves (which hold up ok to MEK for short times), and 150 vinyl gloves. The vinyl I used whenever I'd be getting full of it, like mixing, and placing rivets. The vinly are the cheapest.
Currently, I am ready to re-order from Harbor freight. Medium latex 36117-8VGA are $3.49/100, Large Latex 36118-2HFH are $4.99/100, Large vinyl 8935-3VGA are $1.99/100. Some of those part numbers are priced according to the "order from printed catalog" link. So be sure to have tons of gloves on hand before you start. I also went through 1.25 gallons of MEK with all of the cleanup I did, and soaking my clecos. Get it at the paint supply store. Try to mix small enough quantities to give yourself time to finish, but large enough so you're never short.
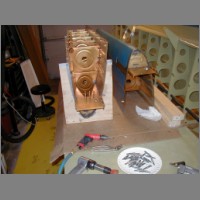
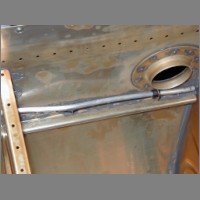
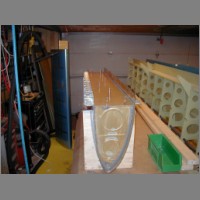
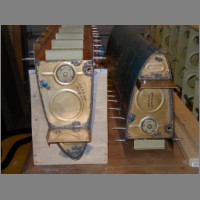
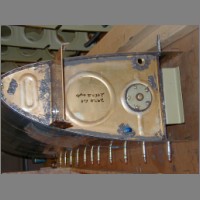
The fuel sending unit went in real well. Just make sure when you're doing the float bending that you pay attention to which is the top and which is the bottom of the tank. I'm pretty good, spatially, yet I still bent my 2nd float up instead of down, and had to re-bend it. The 4-1/8" and 4" distance are pretty critical, so try not to be off by even 1/8" if possible.
Now I need to test my fuel tanks for leaks. Van's sells the $5.00 test kit, which I sure wish I would have bought beforehand, but I didn't. I did make a big mistake today. I went out and put caps in the holes of the tanks, put a balloon on the vent tube, and blew into the ports until the balloon started to fill up. To my surprise, the proseal on the top corners by the bulkhead, and just above the tank attach brackets, wasn't set firm enough yet and I blew pinhole leaks in those spots. Got a syringe, and some fresh proseal and injected those spots. Hopefully....probably, it'l turn out ok now once it cures.
BIG LESSON LEARNED: When you're done with your tanks, don't be impatient. Let them sit for a week before you do anything regarding pressure or vacuum.
Regarding Proseal quantity, for the record I can now say that I'm glad I did it how I did. I had 2 brand new cans of proseal on hand for doing the tanks. I easily used 1.5 cans of it. For someone who's never built tanks before, I can see how maybe I used a little more than an expert, but I still think you'd have a hard time coming in under 1 can. It does look like you could buy 2 cans when starting the kit, and use some for the trailing edges in the tailcone kit, and still be able to do tanks. I kept mine in the freezer, and I am sure the shelf life would go up high enough to last that long, as long as you build the tailcone and the tanks within the same year.
As for technique, I know some of you used precision scales to mix proseal by weight. In my opinion, I can't see this as all that necessary. I mixed mine on paper plates, with craft sticks (big popsicle sticks from walmart...the thicker ones), and I had flattened one tip with the beltsander. By weight, the white stuff is heavier than the black, but I eyeballed it trying to do a 10:1 ratio by volume and on my first can I came out dead on....I ran out of black at the same time and quantity as white. My 2nd can looked to be running that way too. After mixing one batch carefully, you can also get a visual clue as to the ratio by checking the color of the mix. I also believe that the stuff will cure either way. If you're off a bit, it'll just take a bit longer, but with much of the kit left to go, I don't see that as a problem.
I think people had great ideas for application, using cow syringes, and zip-loc bags, and cake decorators. I think that would be super, if you have a couple of people on hand so you can mix it, fill your applicator, and work together. Working alone, I was constantly hustling to make sure I could get it all applied and assembled in reasonable time before it thickened too much. I just applied mine with the 1/2" wide craft sticks. regular popsicle sticks would be great for small areas. You end up smoothing it out and trying to ensure that you have coverage anyway. Also, I can't imagine how much of a pain in the butt it would have been to try to clean out a cake decorator after each use. A syringe would probably be just perfect though, if you're willing to spend the cash. They were $4.50 for 3 of them here in town, and given how many days I used them, I'd have gone through about 10 in this project. When working with proseal, my advice is to make EVERYTHING disposable (except clecos). I went through about 150 latex gloves (which hold up ok to MEK for short times), and 150 vinyl gloves. The vinyl I used whenever I'd be getting full of it, like mixing, and placing rivets. The vinly are the cheapest.
Currently, I am ready to re-order from Harbor freight. Medium latex 36117-8VGA are $3.49/100, Large Latex 36118-2HFH are $4.99/100, Large vinyl 8935-3VGA are $1.99/100. Some of those part numbers are priced according to the "order from printed catalog" link. So be sure to have tons of gloves on hand before you start. I also went through 1.25 gallons of MEK with all of the cleanup I did, and soaking my clecos. Get it at the paint supply store. Try to mix small enough quantities to give yourself time to finish, but large enough so you're never short.
The fuel sending unit went in real well. Just make sure when you're doing the float bending that you pay attention to which is the top and which is the bottom of the tank. I'm pretty good, spatially, yet I still bent my 2nd float up instead of down, and had to re-bend it. The 4-1/8" and 4" distance are pretty critical, so try not to be off by even 1/8" if possible.
|
|
|
|
|
|
|
|
|
|
|
|
|
|
|

|
|
|
|
|
|