More Painting Now 99% White!
Added 10/23/2005 - Updated 10/28 - 1219.4 approx. Total hours (1048.1 By Me)It was another incredibly long week of painting prep. With all the fiberglass tip fairings, there's quite a bit to fill and prepare if you choose to fill the seams between the fairing and the control surface. I worked late into the nights on a few days to try to ensure that I'd be completed by Friday for painting. It was apparent that I'd have to take Friday off to finish the last bit, and I worked on everything hard right up to painting time....still not 100% satisfied that every last spot was ready. I took the time to fill any dings that I had created along the way, such as that stinkin' Vertical stab center nose rib that causes everyone problems. The way I "fixed" it was to gently tap it with the round end of a ball pean hammer and turn the outward dent to an inward dent. After that, it was able to be filled with some filler and sanded to smooth. The finished product is actually great. You can hardly tell, and I'm sure you couldn't from any distance, that the dent was ever there.
At the paint booth, I caved into the perfectionism that both Bob and I were shooting for and we filled a couple more spots quickly even after the primer was mixed. I knew there were still a couple of suspect places that I'd have liked to perfect, but don't expect me to tell you where they are anymore...you'll have to look hard for them.
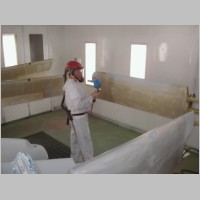
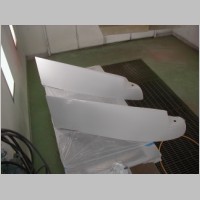
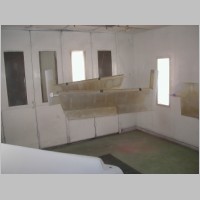
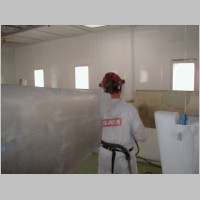
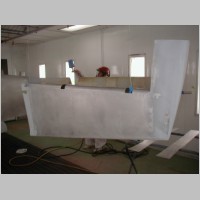
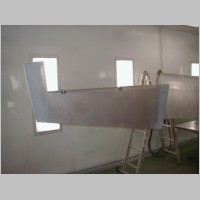
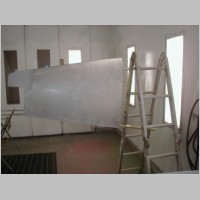
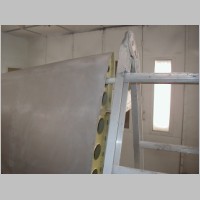
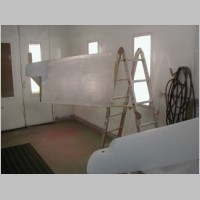
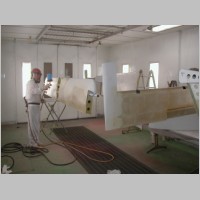
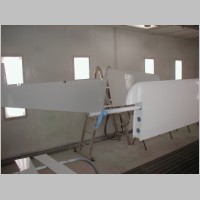
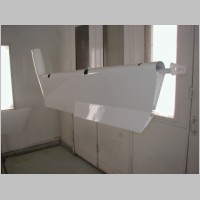
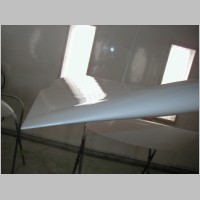
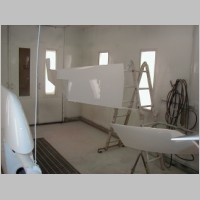
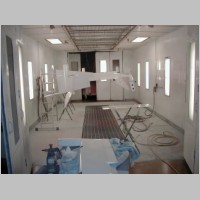
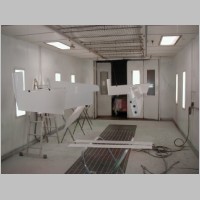
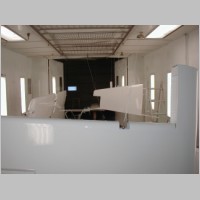
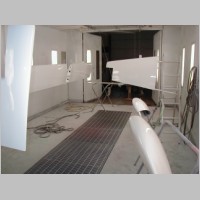
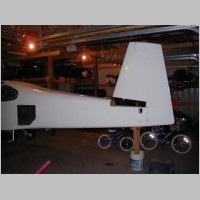
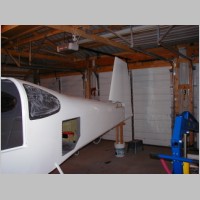
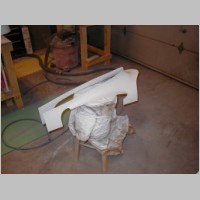
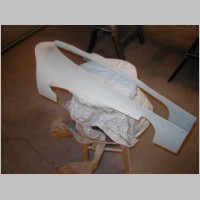
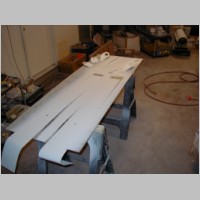
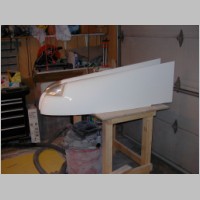
The painting itself both went smooth, and not smooth, at the same time. Here's why: Hanging the parts was easy. This booth had a ceiling vent system with metal bars to tie everything to. I had a ton of .040 safety wire that we used to hang all of the parts. This whole process went real well. The photos below will be helpful for you to see how you can hang these things. Make special note to the vertical stab. That one took some thinking but ended up being great. I tried to keep all items with leading edge up, so that any runs (there were basically NONE) would not cause a big goober on the tip. As a side note, having 2 people for the painting process helps a LOT, because with the lightness of the parts, I was able to help rotate and flip parts around or keep them stable as needed. The Horizontal stabilizer hanging was the best. No, that bar doesn't go all the way thru...it's the 4' approx extra scrap pieces from the aileron pushrods....one on each end. With the HS hung that way, I could spin it as needed to allow the trailing edge to be painted, or the back side of the tip fairings.
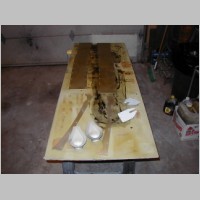
Now for the downsides. You can tell that the booth gets crowded when you try to paint this much of the plane at the same time. That can be a problem. It was handy for me to be there to swing parts out of the way from Bob's respirator hose and allow him to move around without so much worry of touching parts. It happend a few times, even with that care. For those buying PPG, Don't use DU5 hardnener, buy the DCX61. The reason is, it's more useful for various mixtures. You need it when you seal the parts, and you can use it for painting too. One of my negatives was that I had a nearly full can of DU5 to use up, so I used that on the first coat of paint. That didn't go so good. I *think* we mixed the paint up fine, but it sure didn't seem to spray as good as we were used to. I could see when it went on that it looked dry....and we still ran through the first gun full in record time. Then, when starting the 2nd gun load, it came out way too thick. No idea why, other than maybe either bad mixing, or something with the DU5, but it didn't spray great. We added some reducer and then it sprayed reasonably well for the rest of the coat. Also, during the first coat we stopped because the HS looked like it had lots of dust on it. Strange, there wasn't dust from anything in the booth. Well, we figured out that with so many parts in the booth, overspray was actually an issue. Painting a car would be much easier. So, be aware of how you hang things to help prevent overspray. We ended up stopping the painting for a minute, and using tack cloths on everything. The wingtips we had originally tried to paint on a table...BAD idea. It was hard to get at that rib inside the tip without hanging it off of the table, but WORSE was that the spray that hit the table bounced up and stuck to the tip, causing bumps of overspray. So, we stopped what we were doing and used 400 grit wet/dry paper and DX330 as the lube and sanded the tips. Now they were smooth again (this was after the primer/sealer, but before the paint) So, be aware of how the parts are coming out and try to fix everything you can right away.
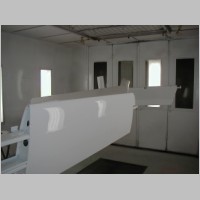
On the 2nd coat, we mixed some extra paint and used the DCX61....and I donated the DU5 to the paint shop. That mix sprayed perfectly. As it went on, I could look into the reflecting light and ensure that the coat was even, and covered very well, and was wet. It went very well from there on....almost the whole time. As we got nearly done with the painting, I was weaving my way in and out of a gap between parts and I bumped my shoulderblade up against on of the parts, causing a defect in an area about 8-10" wide and 8-10" tall. DANG! I growled about that one for a while, but Bob just kept saying "We'll fix it, don't worry." So I tried not to. We went over it with a couple more light coats, then as we were finiishing up, we tried something else. You may see in a couple of the later photos that one of the Elevators is horizontal. I torqued on the wire on the bellcrank handle and added a couple other wires, to allow me to try to hang it horizontal. That allowed us to flow on a bit of extra paint without causing a run. We then left it and cleaned up for the night....turning on the 3,000,000 BTU heater for a short time, bringing the booth to over 150 degrees.
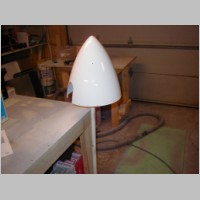
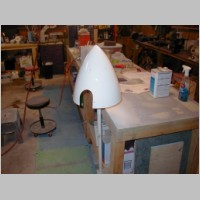
Coming in a couple days later to pick the parts up, Bob got there a couple minutes before me, and he had some polishing compound and a buffer going, working on that spot that I hit. I would never have believed it, but he was able to polish that paint so well that it's like it never happened. Maybe the slightest spot is visible, but not without really looking for it. So, the painting is now almost all done. In the next day or two, I'll be painting the prop spinner, the tail intersection fairing, the lower wing root panels and a couple other small parts. Then the White is all done. If my engine mount comes back, so I can hang the engine for weight balance, I'll be able to haul the plane to the booth next weekend and we'll be painting on the stripes. Those will be a tiny bit different, being a Base/Clearcoat process. *Additional tip: If you have something you need to buff out, try to do it within a few days of spraying the paint. If you wait 30 days, it'll be MUCH harder to buff out....the paint will be very hard.
One other note: I was working hard on the tail intersection fairing and think I have a process that does a good job filling the pinholes. Here's how: First, squeegie on an ultra-thin layer of polyester filler. You only really want to get it in the pinholes for the most part, or you'll just be sanding longer. Next, sand it all down, and then degrease it. Next, spray it with a bit of spray polyester. I used Standox, but there are other basically identical materials that are under other names that cost less. When you spray this, if you see a pinhole, fill it up with the spray. This stuff sands really nice, so after a coiuple hours, sand it all smooth again, getting rid of any runs. Now, you still may see pinholes (especially after you blow it off and wipe it with DCX330), but there will be very few of them. So, squeegie a thin layer of poly fill into the pinhole, and re-sand again. By this time, you should have all of the pinholes gone, and it'll be ready for the primer/sealer.
About Primer: Don't even bother trying to buy K36 by the quart for the first load of K36. If you're spraying PPG, you're going to use a ton of this stuff, for both primer/surfacer, and primer/sealer. I know that I've gone through at least 5 quarts, but probably 6 or more. On the other hand, don't buy any more than 1 gallon of DX1791/1792...I have plenty left after doing the whole exterior.
|
|
|
|
|
|
|
|
|
|
|
|
|
|
|
|
|
|
|
|
|
|
|
|
Pictures Added 10/26
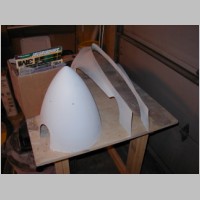
Just wanted to show how I hung these parts for painting. Also, since I didn't do the nutplates for the wingtip lens screws before painting, I didn't use pounded rivets. I used some CCR264-SS-3-2 rivets instead. They are a #40 compatible flush pop rivet. The stem will pull through, but the rivets will look plenty nice when you're done. Also, I plan to add a couple more screws around the lens area on the front half at least, so the lens is held more securely.
|
|
|
|
|
|
|
|