Aug. 21st Update
Windshield - Windshield Fairing - Cowling Hinges - Engine Mount
Gear Legs - Wheels - Aux. Battery Choice
Added 8/21/2005
- 888.7 approx. total hours (795.3 By Me)
The past few days have been flying
by pretty quickly. After suffering through the door windows
without a full understanding of the process, the experience gained paid
off. The windshield was my 3rd window attempted. I'm glad I
did it this way, as the 2 rear ones were the hardest to do. More
below.
I'll save the commentary for each section, so scroll on down...
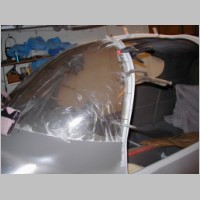
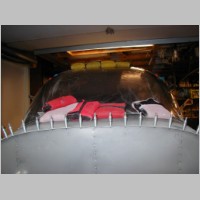
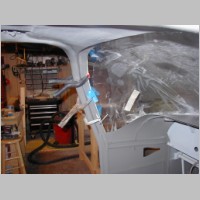
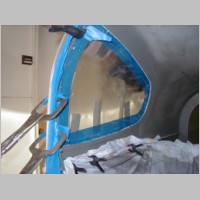
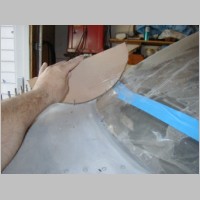
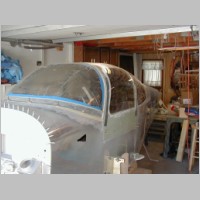
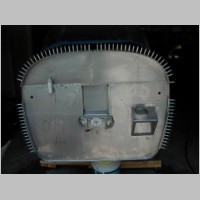
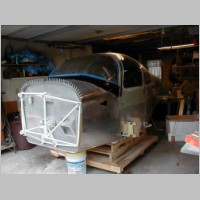
Windshield
The windshield turned out to be very easy. Part of this
was because it was the only window that I hadn't under-trimmed, so it
was ready to install as-is when I got there. We clamped it all in
place a few times the night before to check how it all looked and make
sure everything was masked well. We practiced laying it up and
what things we would do step by step. Once we started, the entire
process from the start of glue mixing to the completed removal of the
tape inside took only 50 minutes...so things move really fast, and it
works GREAT this way.
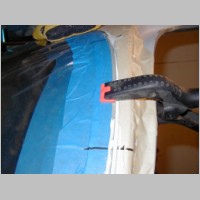
We masked about 1/16" from the edge of the window "frame" on the
inside, and about 1/4" from the edge on the outside. The
windshield originally had fit pretty well, but I did notice that about
6" in front of the rear Right side corner had a larger gap between the
windshield and the fuselage front deck. There wasn't much I could
do about that, and there wasn't really a good way to push it in during
gluing to correct this. (If I pushed in by hand, I could make it
slightly better because the right corner would move back a tiny bit.)
In retrospect, if I'd have known how things were going to turn
out, I would have maybe stood some boards next to the plane leaning on
the window or something...anything to push it in a tiny bit more.
You'll see why on the "Fairing" section. All it took to
secure the windshield was 3 clamps on each side, and some weights on
the top. On ALL of my windows, there is NOT a single place with
an air gap in the glue seal, so I'm very happy with that. After
laying the windshield on, and clamping it, I immediately went to
work on the inside, pushing down and making that fillet right away.
This is an important step, as it thins the glue so it's easier to
peel the tape. This time, within 15 minutes, I was pulling the
tape on the inside of the window. You just let it get to the
point where that thinned area you pushed on won't smear when you touch
it. It''ll look fairly dry, and like I say, it only takes about
10-15 minutes, so by the time you get things clamped it's almost time.
Then, pull the tape. Try to make sure when you pull the
tape that you don't let any glue "stringers" get on the plexi...but
they'll come off OK if you get them as soon as you're done removing
tape. Also, if you have to loosen the clamps to remove the tape,
don't re-clamp any harder than original, or you'll push in a bead of
sealant.
As for shim washers, I don't remeber using any on the windshield, I
used 2 per door on either the front or rear upper corner (I can't
remember which corner), and I used them all the way around on the rear
windows.
After you get the inside tape pulled, you can either do the outside, or
wait a while and do the outside. Either way, it'll be pretty dry
within an hour or two. Within 2 hours, you can easily remove the
clamps.
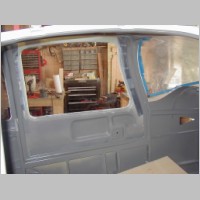
The rear windows were a big pain, mainly from a pressure standpoint.
The glue in most all cases for the other windows, was poured on.
I ran the edge of the cup against the window, and poured it into
a nice line down the flange. On the rear windows, this worked for
the top, and the bottom, but not the sides...it ran too much. So,
for these, you pour towards the TOP of the flanges on the top and
bottom. On the sides, I kind of poured and dished it out with the
stick. Hard to describe, but it worked. It was much messier
than the others though. When you clamp the rear ones, try
to clamp where a washer is. In between the washers, you'll
actually clamp and squeeze the window too tight, and it'll bow in
further than the washers would allow.
Anh told me a couple times that he wished he'd had more windows to
do.....Well, I won't go that far, 'cuz I think that pretty much says
he's nutso, but I will say that the gluing of the windows, once you
learn these tips I put together, really aren't a bad job.
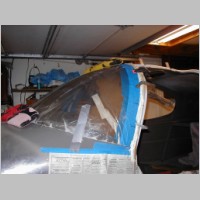
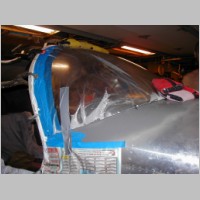
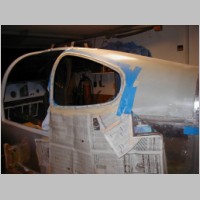
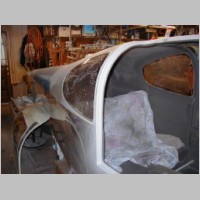
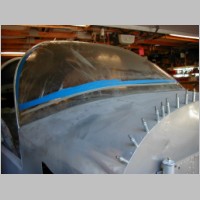
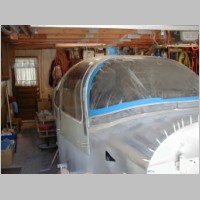
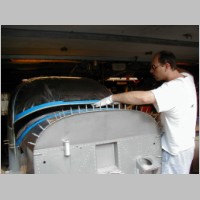
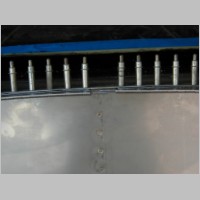
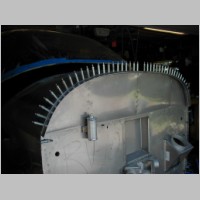
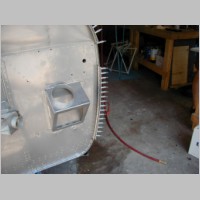
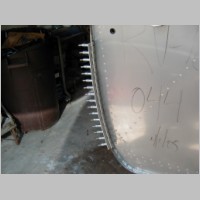
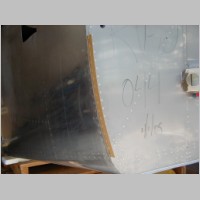
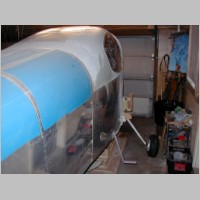
Fairing
Now here's a case of the best-laid plans not working exactly as
you want. The fairing prep isn't hard at all. I just taped
it off using 3M fine line tape...originally I had taped in the curve
for the paint line, but then figured out that it wasn't quite time yet.
So, I re-taped. I sanded the front deck, and the
windshield. I created those retaining clips and clecoed them in.
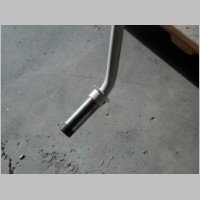
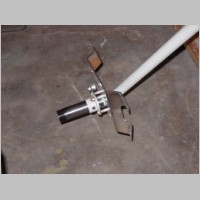
I created my 7" radius marking tool to mark the line on the
windshield and the cowling. All was set. I used Laser
Printer toner to color the epoxy black...this looks nice from the
inside, as opposed to the white fiberglass....at least that's what I
hear, so I used that tip from the list. Worked great for me.
Doesn't take much toner, either.
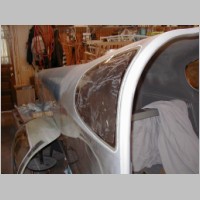
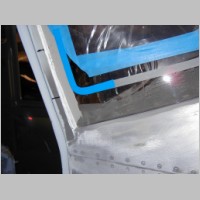
So, after the prep was done, I mixed my fillet material. First
was the microlight from West System (I hope that was the right stuff,
although I'm sure it's OK.) That stuff was tan colored, and my
toner was black. The result was a nice grey/brown tone, that
coincidently was a FANTASTIC match for my interior paint. I
pushed that under the bottom of the windshield to make the fillet, and
scraped it flush with the plexy, removing any that I got on the plexi,
so it would have pure black later. It ended up pushing inside
just the smallest amount, and my wife said it made a very nicely made
bead on the inside that looked great.
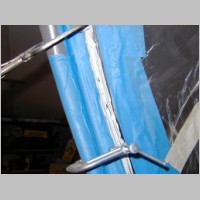
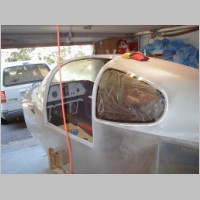
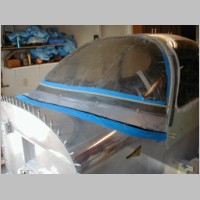
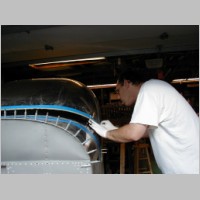
After that hardened a bit, I went to town on the E-Glass. (The
E-Glass is not included in the kit. See Scott Schmidt's page at http://scottandranae.smugmug.com/gallery/518426/2/22210526/Large for a photo) See my Options
page for more info on it. I purchased the standard roll for about
$30, and I have a TON left over. Probably enough for a couple
more windshields. So, if you're coming to this stage, touch base
with me and I can probably sell off what's left of my roll.
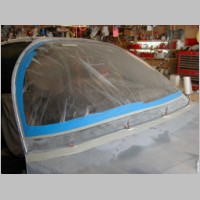
The theory is, you start with a 1/2" strip, and go to 3/4", 1", 1.25",
1.5", 1.75", 2", and so on until you get to the full width, with each
layer centered on the one below. You cut strips between 36" and
42" long, and butt them together in a staggered-seam arrangement.
I found, in practice, this didn't work As smooth as I'd have
liked. I did get the rolling cutter RTY-2/G tool from ACS (p/n 01-00299) before
I started. That worked great for cutting the strips. The
problem is, you need to cut them after you fill with epoxy, and once
you fill with epoxy, and you get full of the stuff, it's hard to cut
precision widths. So, I eyeballed each width as best I could,
and applied it to the windshield. It didn't take too many layers
before I started to see that it seemed to look too thick on the upper
or lower half, and started to adjust the positioning a bit. Then,
it was no longer centered, and things fell apart rapidly...if you were
concerned with precision positioning. It seemed to be working out
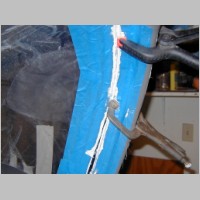
by winging it though, so I proceeded. Per Anh's suggestion, I
didn't run every strip all the way back. (You can easily add too much
to the rear corners and just end up having that much more to sand off.)
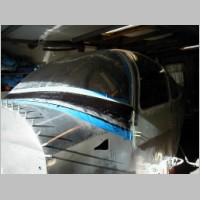
When I got close to the top edge, I laid a nice wide strip up
right up to the tape line and dribbled a little resin on the tape to
make sure I wouldn't just have that rough fiber sticking right off the
window. (I haven't pulled the tape or sanded it down yet, so I
hope things are all fine.) Then I still laid up a little down
below so the bottom half looked finished too. All in all, I think
I have a fairing that's not going to take an extreme amount of sanding
to complete. There is one issue though...
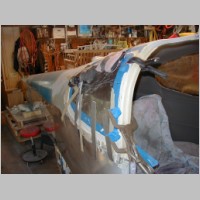
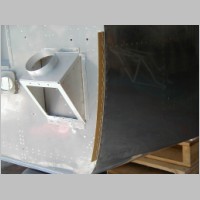
If you remember above, I had a larger gap on the right side of the
window. That gap turned out to be a problem here, as the fairing
really bows outward on the right side, and leaves a bulge on the right
side of the plane. So, what's going to end up happening is I'll
have to correct that
by sanding, and I'm going to end up sanding so I'll have a fairing
that's very thin or even slightly into the plexi on the right side in
about the middle of the fairing. Then I'll have to resin over it
and final sand again. I'm not sure how extreme it'll be,
but I'll have more pictures after sanding. Again though, this was
a windshield defect or something, that perhaps only could have been
corrected when trimming the windshield originally, by shifting the
windshield Left or something....or, slightly improved during gluing by
adding some stress to the plexi to hold it down tighter while the glue
cured.
So the fairing is done (except for sanding), and it wasn't an extremely
hard job so far. The worst of it is in the future repair.
If there's one MAJOR
engineering screwup on the -10, it's got to be the windows, and most
importantly, the front windshield. If you ever crack one, or have
a
bird strike that causes replacement to be necessary, you're really
screwed. You're going to have to RIP the fairing off, destroying
the paint on your front deck, and then GRIND the window away from the
canopy frame. At that point you could prep the area and glue in
another one, and create a new fairing, but you'll have to repaint the
cabin top and front deck. I've replaced a windshield in a
Beechcraft, and it takes about a day, and is not a hard job. I
think that changing a windshield on the -10 would take you about 3
days, and time in a paint booth added to that.
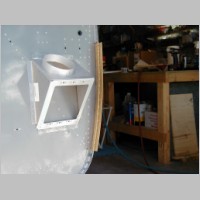
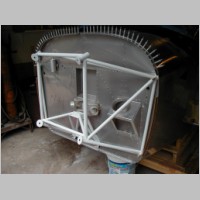
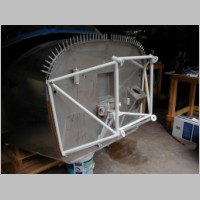
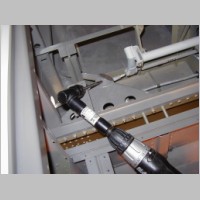
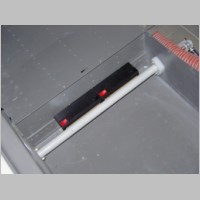
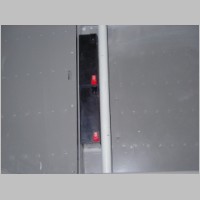
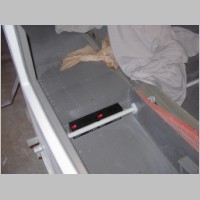
Cowling Hinges
The cowling hinges weren't hard at all. The
first hangup though, is the shim material. The plans call for
.020 shim stock, 1/2" wide, with the longest being 15". Problem
is, they don't provide any .020. If you got the trim bundle with
the empennage, you'll have some .015, and .025, and that should work
fine....but hopefully you saved some. It's also not ideal,
because you have to cut it into strips, and without a metal shear, this
takes care to keep a good straight line...otherwise each successive
strip will have larger errors than the last.
After cutting the shims and hinges, it was a straightforward
match-drill. I then pulled a top hinge pin to see how hard they'd
be to re-install, and it was a tough thing to get in. I was
reminded by Anh though that the pins get removed and replaced with
steel ones that are a tiny bit smaller, and will be easier to install.
I had almost made the decision to use Camlocs. At present,
I riveted in the side hinges after alodining, but left the top cleco'd
so I can think it over. You need the side ones on before you do
the engine mount, or you'll have a couple of rivets that will be tough
to get. I also left the bottom hinges off, as those are
definitely either getting screws and nutplates, or camlocs. I've
heard that most people will have eyelets or pins break after time, I
don't want that. Stein warned me about this, and then a few weeks
later, his pin broke and he couldn't get a way to remove it....now that
really would stink.
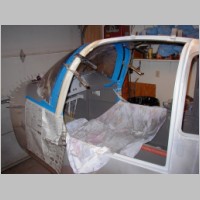
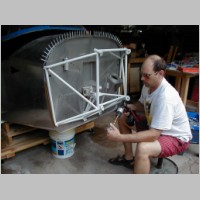
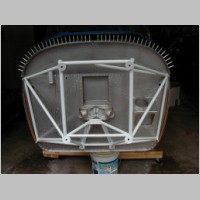
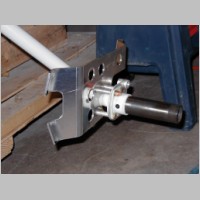
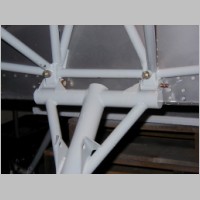
Engine Mount and Gear Legs
The engine mount was one of the easier things to install, since
I had a helper. The top bolt goes in first on one side, and then
you match drill the rest, starting with the other top one. I
found that my holes were fairly centered. After drilling the
first hole, I had to pull on the mount and push on the fuselage a bit
to line up the 2nd top one, but that one drilled fine. Then the
bottoms I pulled on a little, but I wasn't about to pull and flex the
mount too much, so I let the hole go where it wanted. It's about
1/32" or 1/16" max off from center on the outer lower holes. The
inner lower holes were worse. When I drilled these, the
pre-drilled holes were JUST inside the bottom of the holes being
drilled. I couldn't possibly stretch the mount that far, so I
just drilled them. They still seem pretty well centered in the
areas where the bolts need to go for strength, so it should be just
great.
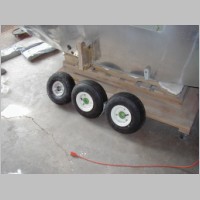
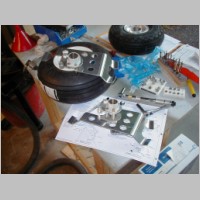
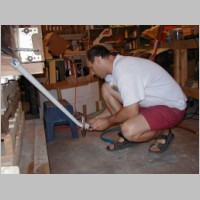
After the mount, I started on the gear legs. They slid in very
hard, at first, so I put a light coat of grease on them, and that
helped a bit. It takes a bit of playing to get the holes to line
up on the top for final drilling. I used a pick to feel the
inside of the holes and the leg so I could tell which way to rotate it
and push it up or down. Once it felt about centered, I used a
.311 reamer to finish the hole, and then deburred and bolted it.
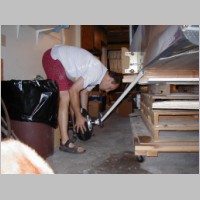
After that, I had a little more stuff to bolt on the leg, such as
the brake hardware. Incidently, I was shorted a bolt, and shorted
some AN960-616 washers, so I had to just install things temporarily for
now. Also: You'll need to purchase a 1-3/4" wrench for
working on the gear. The rest of the stuff went pretty well,
until I got to the nose gear and I was missing another bolt, so I
stopped for the night.
Aux. Batteries
One final quick topic...after a lot of thinking, I figured out how I will do my Aux. Battery. I'm going to use an Odyssey
PC925 for my main battery. Some people are using dual PC680's.
In my plan, I want a larger main battery and something like a 680
as my aux. But, putting both of these in the battery tray will
just be too much, and it'll be more aft. CG than I want. So, I
started looking for wasted space to put a battery closer to CG.
Suddenly I came across some great wasted space. In front of
the rear seats some space rear of the flap control tubes. I
decided to fill this space with my Aux. Batteries. (plural) I
knew about these batteries from large rackmount APC UPS's.
They're SLA AGM batteries, so they can be mounted in any
position, and aren't at risk of leaking fluid, and don't need a battery
box. These particular batteries are 6V, 12Ah batteries. I
plan to build a Series-Parallel arrangement of 4 of them to give me 12
Volts, and lots more Ah. (I'd say 24, but I don't think you'll
actually get that much more....effectively I'd guess it would maybe be
more like 15 to 18Ah) These batteries are a little under 6" long,
less than 2" wide, and less than 4" tall. The gap they're fitting
in is about 2-1/8" wide. So, if rivet in a bracket to secure them
with, I should have no problem filling the space, and keeping a small
working gap from the tube. More to come...