Catch-Up Photos
Canopy Attach - Throttle Quadrant - Panel Reinforcement
Attach front Deck - Re-Paint Interior - Door Windows - Door Latch
Added 8/17/2005 - 862.7 approx. total hours (774.7 By Me)With the rush before OSH to complete the panel, most of the other areas of the project got dropped...including some web page updating. Sorry for the delay. After I got back from OSH, I got set back by a cold, and then by work, so things went slower. Also, I fractured my building into many different branched paths, so there is not much "completion" going on...but when it all comes together it should come together quick.
Below you'll find some gems that I wish I had before I started this stuff. The fuselage and finishing kit plans aren't awful bad, but they don't explain things in much detail. I did, however, learn some things from great people like Anh Vu, and Randy DeBauw that helped a lot...althouth even that didn't quite save me from hassles, as I still had to learn for myself since I didn't have photos. I'll try to give some heads-up info here.
Also, you'll notice in some later photos, my headliner is torn out. After seeing the Colorado -10's at OSH, I was so impressed that I decided to do whatever it takes to go that route. My headliner was starting to suck after making a few gluing mistakes, and there was no way to get a good finished edge. I bought 1/4" foam, thinking that was right. Turns out Randy used 1/8" foam, which is easier to roll the edges on. Oh well. My next attempt will be by using some nice stiff fabric like those from Colorado. That looked beautiful.
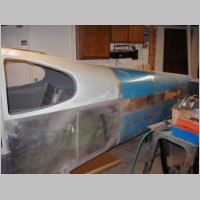
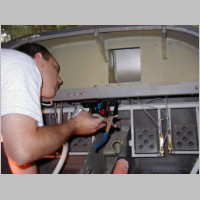
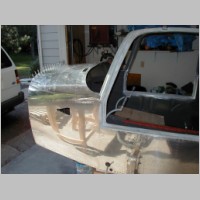
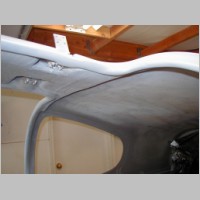
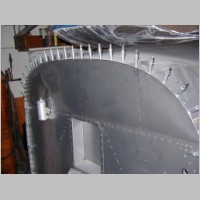
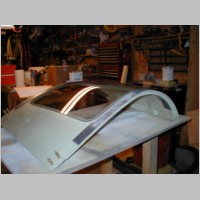
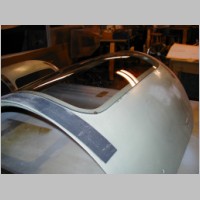
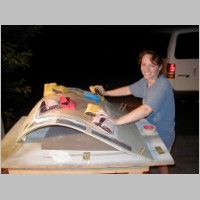
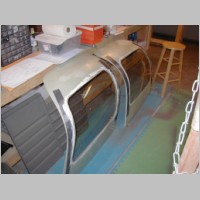
Canopy Attachment
The canopy attach was pretty straightforward. I did, however, start using AN426AD4-6 rivets below the rear windows, figuring that I could make it look nicer. In retrospect, it didn't make it look nicer, and wasn't worth it. The fiberglass may, probably, hold up to riveting just fine. Mine did. My concern was structural integrity after riveting....so I used CS4-4's from the windows rearward. I plan to cover the rivet shop head inside anyway with fabric, so I don't know why I bothered. As it turned out, the hammered rivets left the usual small dents in the outer skin, whereas the CS4-4's, when countersunk and dimpled, come out really nice and flush and no denting involved. I should have just used CS4-4's.
|
|
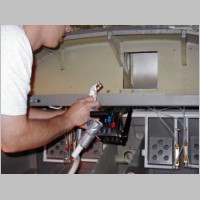
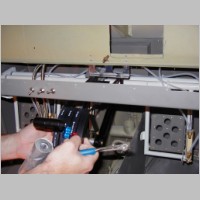
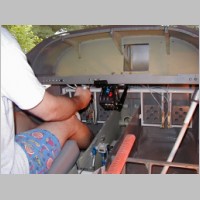
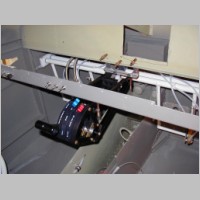
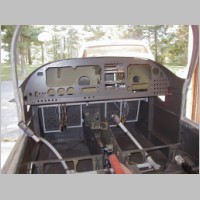
Mounting the 3-Lever Throttle Quadrant
After a frustrating phone call to Kenn Scott at Van's, I decided just to tackle my quadrant by winging it. When I'd asked Ken for how the quadrant mounts....and is it centered in the panel, he said "I don't know, we don't use quadrants around here." Then he told me to refer to the plans, (that I did not receive with the quadrant) only to find out that the plans were not yet available, after I pushed him to check. Great answer, Ken, Thanks for nothing. When I call from now on, I'll ask for anyone else, as I know you don't like talking to people. I don't know why I bothered. So, that particular day I just *guessed* and drilled my panel holes where I thought they'd work. Then when it came to install it, I just did what felt right.The quadrant apparently mounts by removing the old subpanel lower mounting bracket, and replacing it with a different one. You have to add nutplates to the new bracket, and it seems like you need to mount it flipped from the original, where the flange now faces FORWARD instead of rearward. If you keep it facing rearward, the quadrant holes won't line up on that lower switch bar for the panel.
After mounting the back plate, you can cleco the forward end of the quadrant on, and then mark holes in the center of that lower panel switch bar for the 2 holes there. Pull the quadrant, pull the bar, and add 2 more nutplates. There is room to leave the original nutplates (if you have a QB and it was already assembled).
A side note....I am finding that it's REALLY nice to have that lower switch bar permanently removable. For one thing, those ears bend forward, so you can't silkscreen on that bar due to interference. For another, it'll just be nice to take it out for complete access to the front if necessary.
See HERE for how I added 2 .125 "ears" to make this bar removable. It'll be secured with screws and nuts.
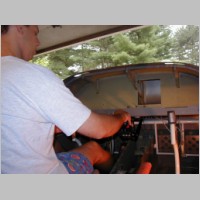
Another note about the quadrant. You can see that in some photos, I have both sticks move to full-travel to see how they interfere with the quadrant. At first, I was very nervous that maybe the interference would be a big issue....the stick can hit the quadrant. Then I sat in the plane and tried it again. As it turns out, when you're IN the plane, your legs won't allow the stick to travel that far anyway. My guess is also that once the ailerons and elevators are hooked up, you also won't get that kind of control travel....it's just a guess, but I doubt it. Anyway, I know that when I've flown in Randy's -10 and the factory -10, you don't make very large control inputs anyway....and with my legs there, I'll never hit that quadrant.
|
|
|
|
|
|
|
|
|
|
|

|
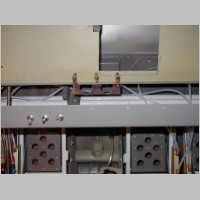
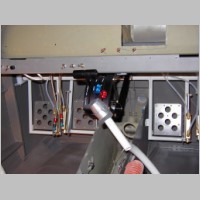
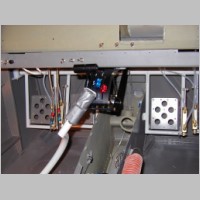
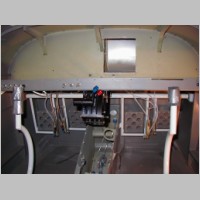
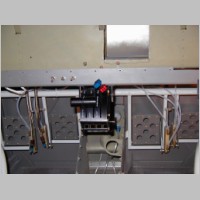
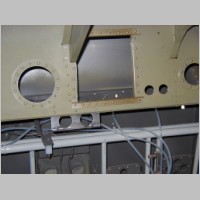
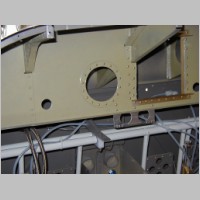
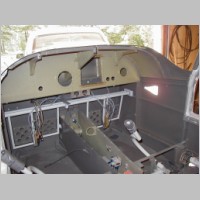
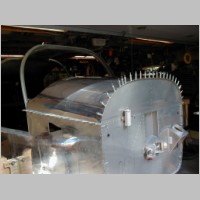
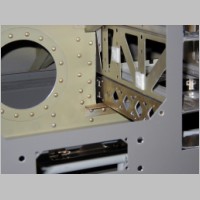
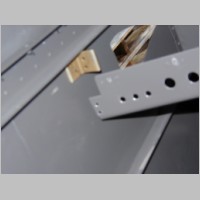
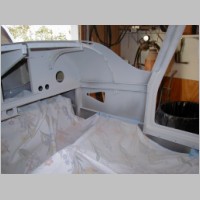
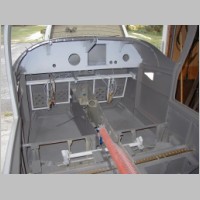
Panel Reinforcement and Attach Deck
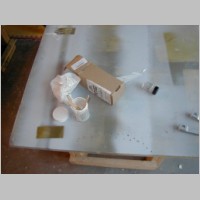
This part was pretty easy. Measured right, by luck, my radio stack now rests on a lower piece of angle in the rectangular cutout in the subpanel. I probably don't even need to tie the radios together with a strap. I used a fly-cutter to cut large circles in scrap, then I reduced the diameter, and cut a smaller circle on the same center. Then I used the same size to cut the subpanel. The result is nice circular hole reinforcements. I didn't know exactly where I needed them, so I positioned them conveniently. I'll protect the wires by making grommets out of 1/4" black rubber tubing, split down the middle, glued into the circles. You may notice that a couple rivets are shared with my quadrant bracket, and I did some funky reinforcement on the left side of the box....I used .040, or .050 sheet aluminum, about 1.5" wide on the face, and bent back a tab of about 3/4" facing rearward on that left edge. Now I have a reinforced strip that also goes around by the center rib to stiffen all of that too. Very happy with how this came out. I then riveted on the front deck. Some of those front nose rivets are a pain, but nothing is too bad. Test fit the panel again, and it looks real nice.
|
|
|
|
|
|
|

|
|
|
|
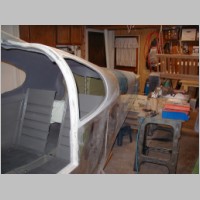
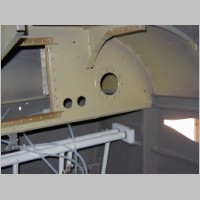
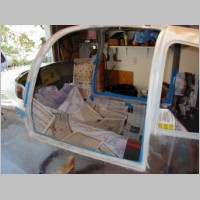
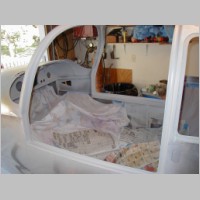
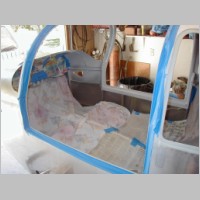
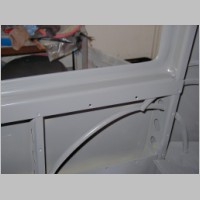
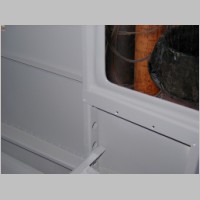
Re-Paint Interior
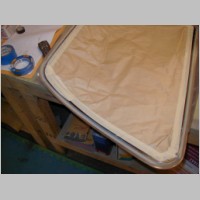
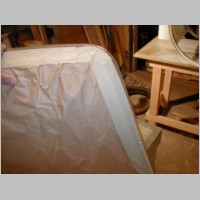
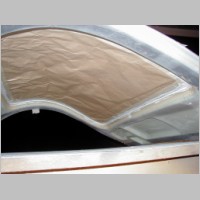
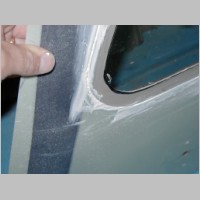
One area that I really wanted to have come out good was the fiberglass joint where it meets the aluminum around the doors. I spent a good amount of time filling and sanding and using smoothprime to do more than add a fillet of epoxy....but to make it smooth and nice. That caused me to have to repaint around the canopy though, so I did that extra step. In the end, it wasn't a big deal. I also reprimed the subpanel since I added that alodined angle and cut those holes. I masked the rudder pedals to protect them. As you can see from the pictures of the area below the doors, it looks very nice. To pat my own back, I think it looks better than any I've seen. Was it worth it?? To me, yes, but you need to answer than for yourself.|
|
|
|
|
|
|
|

|
|
|
|
|
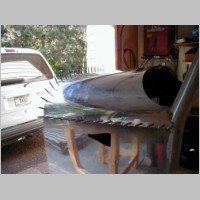
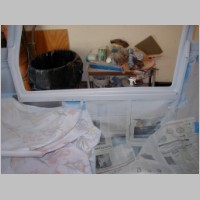
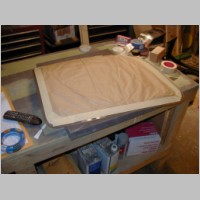
Door Windows
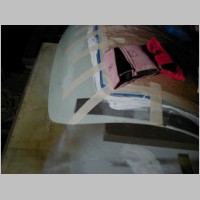
First Tip: Trim your windows back further than you probably did.... When I pre-trimmed my windows, I had them almost PERFECT. The plans call for zero to 1/16" gap around them. Mine were very near zero. After talking to Randy an Anh, they said I'd want them trimmed more, to allow the Weld-On to escape, and make it easier to fill with epoxy later...and it might help prevent some of that paint cracking that we all saw at OSH, caused by heat expanding the plexi. After having mine trimmed, I wasted a whole evening going back and re-trimming mine to give a good 1/16" gap all the way around the glass (a couple areas were maybe less than that). Then I had to re-smooth the edges of the plexi too.
Before you start, make sure you mask off everything that you don't want weld-on to get onto. That's all the plans say, but there's more.... This stuff will pour very easily...you'll have to do it to know how it pours. You should mask INSIDE the window, on the window, leaving maybe only 1/16" gap between the window and the door. Too much and you'll have a huge fillet. Too little and you'll never EVER get your tape off. (See my last couple of photos below...I masked with electrical tape, which is still stuck under some Weld-on...even though I had a tiny gap around the tape line. Then, you should mask around the door side, right up to that flange by the window. Maybe just a hair over the horizontal edge near the plexi, but not all the way to the plexi or you'll trap the tape there too. You don't have to mask too far, only an inch or two, because the glue doesn't run that bad. (maybe worse on the vertical surfaces....I'm not there yet) Then, on the outside, mask the DOOR side almost all the way to that lip around the outer window area. I didn't do this on one, and now I have a LOT of weld-on to sand off. On the window side, you should probably mask leaving at MOST 1/2" around the window, but after doing 2, I think I'll leave no more than 1/4" next time. I left about 1/2" the first time, so I could see and verify that the glue filled the gap well. If you use enough glue, it will fill the gap...from now on, I'd rather have less to clean up, so 1/4" is right more me. Then, mask the windows inside and out with paper too.
Now, prepare the door and the 3/4" exposed area inside the window glass by sanding with 220 grit or so.
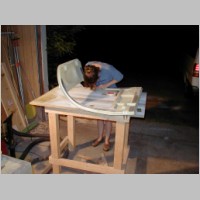
Note: Randy suggested to me that it might be better to mount the door on the fuselage, to allow the door to fit the perfect curve of the fuse, before putting the window in. That way it doesn't set up in a less than perfect form, and it will fit exactly as it needs to in-flight. (he did it this way, and it looks great). I went per-plans and just did it on the bench. The next day I fit my door to the airframe and it still looks good. I don't know what to say, but thought I'd point that out since it's maybe something you might want to explore.
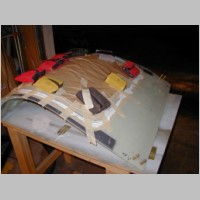
Once you mix the weld-on, you'll find that the stuff in the container stays runny, but anything you pour will skin over almost INSTANTLY. You'll want to pour a 3/8" to 1/2" bead....a good share of that 3/4" flange, all the way around the window. Pour enough so you KNOW it'll fill the gap. (The actual bead diameter would maybe be a 3/8" cross section to do a good job). If you do it right, you'll have a little glue left after going around the whole thing. Try to use enough so you don't have to go back and add more...if you touch the stuff even seconds after it's poured, you'll just smear it since it's tearing the skinned over stuff. Have a helper warn you of any shorted areas, and just add more glue next to what you already laid.
After you have all the glue poured down, which HOPEFULLY took you less than 1 to 1.5 minutes, you grab your window and put it in the door frame. Quickly center it where you want it, and have a helper hold it down all the way around. While they're holding it, QUICKLY put weights, sandbags, lead shot pouches (I had many from my SCUBA days), and stuff aroud the edges to help hold it in place. Then quickly wipe all the excess squished out Weld-on off that you can. You'll have tons of it ooozing out the top and bottom. It's important too, especially inside, to use your finger to create that fillet, and even more importantly, THIN THE WELD-ON DOWN that's on the taped area, near where the final seam will be. This is because if the weld-on is left on too thick, you'll NEVER get that tape to peel off...it'll tear, and be left there. I *kind of* understood what Ahn meant when he said this, but I *really* knew after having done it.
Once the bead is wiped up, and the fillet created, quickly tape the window down to the surrounding door. Then, let it sit for a while. Here's where I really wish I'd have done things differently..... DON'T LET IT SIT TOO LONG before you peel off the tape. I waited about 2 hours. By that time the weld-on was set so hard that I couldn't get all the tape to peel. I spent 2 more hours, after 11pm, using an exacto knife to carefully cut through the weld-on, and the tape, to remove it down to my intended fillet area. My advice, as soon as that stuff that you thinned out has skinned over (maybe 15 minutes), peel off all of your tape. It'll be soft enough that it'll probably allow you to break the weld-on along that tape line, and stiff enough that it probbaly won't mess up your fillet.....and, if it does create a jagged fillet, it'll be soft enough that you can push it back smooth. Fixing it like I did is a BIG pain....although if I try HARD, I'll be able to make it look nice again and you'll never notice...after using seam sealer to make a new fillet. Just do it right the first time, and tear that tape off soon.
As for quantity, you'll absolutely need one can per window, and that should be all you need.
|
|
|

|
|

|
|

|
|
|
|
|
|
|
|
|

|
|
Door Latch
I guess I haven't taken many photos of my work doing the door latching mechanism. It's not too tough. But, I found a GOTCHA...
Read REALLY carefully when drilling the door handles. the hole that you drill and later tap, from the front, ROUNDED side of the handle towards the tail of the handle....it isn't all drilled to the same size. You drill the initial part of the hole larger, but then when you drill the part inside, where you later tap, you won't drill that as big....it needs to be smaller for the tap. This is really hard to explain, so just read your plans slowly and look them over....I just wanted to point it out here to prevent you from having to buy another pair of handles like I did....thei're almost $12 each.

|