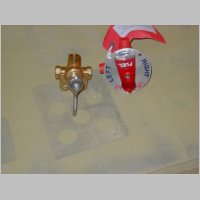
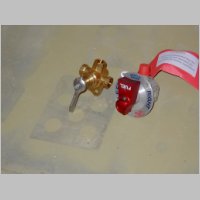
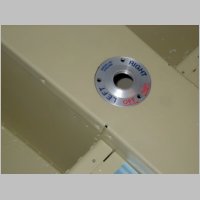
Andair Fuel Valve - Cutting back Left/Right Panel Ribs
Added 6/10/2005 - No Hour ReportAndair Valve
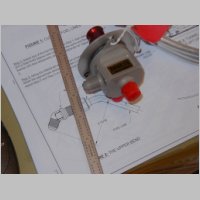
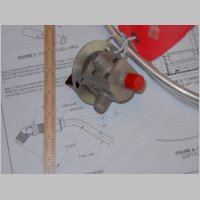
WARNING!!! If you are planning to put the awesome Andair fuel valve in the RV-10, DO NOT plan to buy the valve from Wicks unless you also want to buy the > $55.00 Banjo fitting elbow at the same time!! I had mine get backordered from Van's, so I dropped it off my order when I found 2 in stock at wicks. The problem is that Wicks only stocks the valve with 3/8" MALE flare fittings off all 3 legs. Probably no problem for the right tank, and the line to the fuel pump, but it is absolutely a problem on the left tank line. I tested a smooth 90 degree bend on some spare aluminum tubing and found that it requres about 2" of outward distance to fit a 90 degree bend. If you have the Wicks valve, you only have about 1" of space before it hits the walls of the tunnel. The only solution for me, if I was stuck with this valve, is to purchase the Banjo fitting (a swiveling 90 degree fitting) to replace the 3/8" male flare that came on it. That would be a great fix...at a high cost. I'm going to see if I can send the valve unused back to Wicks though. The Van's valves come with 1/4" NPT fittings on the Right and Left tank connections. You then need to buy 2 elbows of 90 degrees with 1/4" NPT to 3/8" flare. Actually, I messed up twice and purchased 3/8" NPT to 3/8" flare too....what a waste. So, learn from my mistakes.
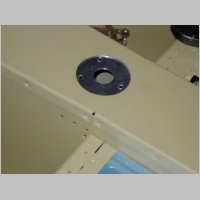
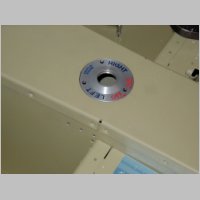
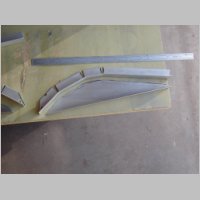
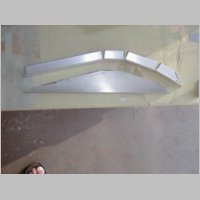
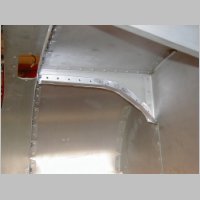
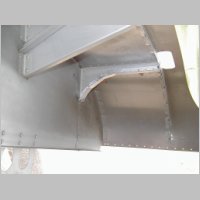
I did the valve mount modification similar to the Bob Condrey method. I mounted 2 pieces of .063 angle, without moving or replacing any of the nutplates that would interfere. I completely removed my old fuel valve mount. I cut the ears off, but in retrospect, I should have left the mount in until I had my mount fully crafted...this is because once it's seperated from the tunnel walls, it'll be hard to keep the tunnel walls in place to know exactly how wide to make your new mounting plate. Mine came out fine though anyway.
You just have to make sure you mount the .063 angles high enough to bring that plate up right under the tunnel lid...maybe about .1" or so if my memory is any good. I also rounded the apex (corner) of the angle so the tunnel would fit right over it. I just happened to order a piece of scrap .063 sheet that showed up this day, which is what I made the new plate out of. You probably want something that thick for this task, since the angle doesn't go all the way to the rear of the plate. Oh, and don't look too closely at my awful hole spacing on the top of that one angle....sh-tuff happens. The hole is exactly 2.75" diameter, and if you cut it dead center with the existing hole in the tunnel cap, it'll work out just great. See the photos for the fit. I didn't have a 2.75" hole saw, and the wife called me from the hardware store saying they were $11.XX, so I quickly tested my brand new Fly Cutter that I'd never had the opportunity to use yet. I was able to easily cut a great circle, so I just decided to use that on my drill press to cut the hole. DON'T EVEN TRY to use that fly cutter by hand for this job. You'll be really sad. After getting the plate mounted in the proper place, you can use the valve rim as a template to draw the center circle. It's a 1" hole. Cut that with anything you have handy.
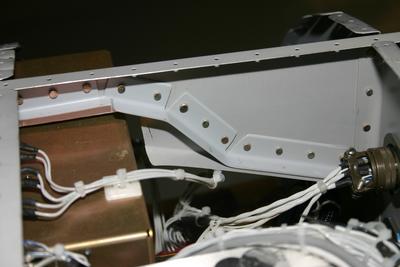
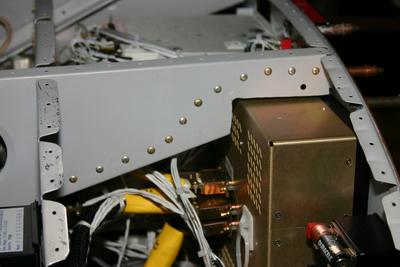
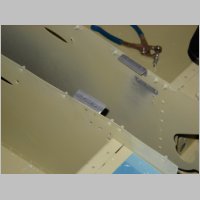
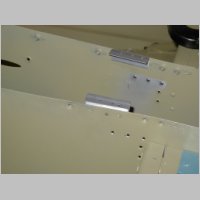
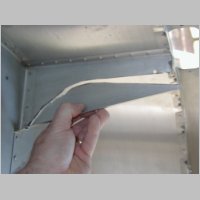
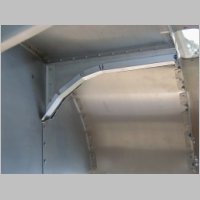
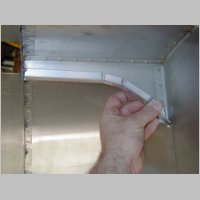
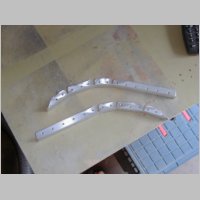
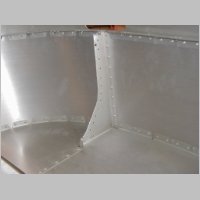
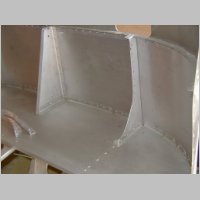
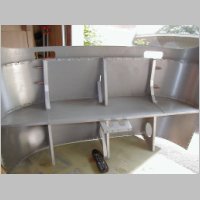
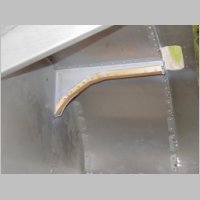
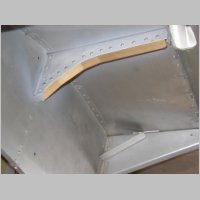
Panel Rib Modification
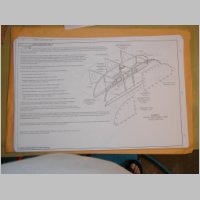
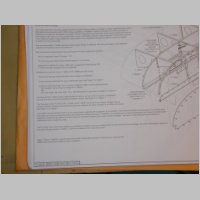
I knew the 2 outer Chelton panels would interfere with those Left and Right ribs, so I decided to use my time spent waiting for my andair valve, and the humidity to drop for painting by cutting those ribs down right away. Vic Syracuse had some great photos of his rib modification, so he gets the credit for how this came together so well. I put the photos at the end of this page. He has the Chelton too, and I could tell by his photos that the Chelton is not too deep, but I thought since I didn't actually have my Chelton in hand yet, I'd be best off to just cut that rib as thin as I could Height-wise, and cut it back an inch or two extra at that height...then taper it back to where the rib normally ends. This was a breeze. I started with a piece of angle at about 11" in length, cut a couple of slits in it, and bent it as appropriate. Then drew the line onto the rib, and used my awesome high speed body saw to cut the rib down. Oh, and I took a couple of photos of the plans for this page....where it specifically says that you are not allowed to cut these ribs. Allowed?? You know, looking at what Van's claims to "allow" you to do with the panel, I am no fully convinced that their entire goal with this idiocy of making this panel so short is intentional. I think they are trying to force-feed their philosophy of VFR-only on their customers, by intentionally engineering these panels to be small enough to make it hard to get as many things as they know many builders would put if space allowed. How many VFR only -10's do you think there will be? I'll bet my left nut that it would be a tiny percentage. If you reinforce these ribs properly there is really no reason that you can't do this mod. Too bad they just didn't make it that way from the get-go. For my Chelton panel, I laid it out so that the center rib should clear all of my radios and screens. I'll modify that one if necessary later.
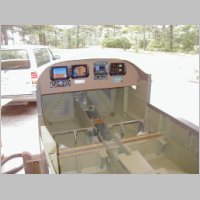
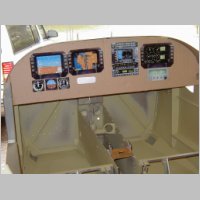
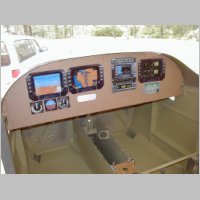
While I was bored, I stuck my panel cutout into the forward fuselage for a couple of photos. Can't wait to see that panel built.

|
|
|
|
|

|
|
|
|
|
|
|
|
|
|
|
|
|
|
|
|
|
|
|

|
|
|
|
|
|
Home | Previous | Next
Vic Syracuse's Panel Rib Photos