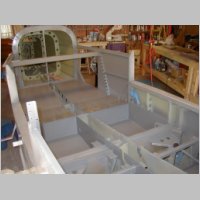
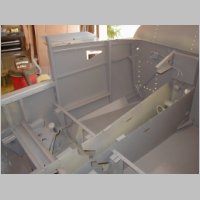
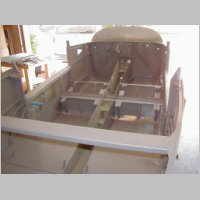
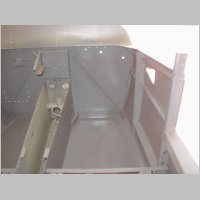
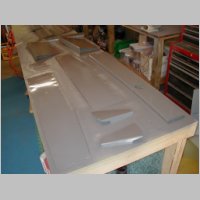
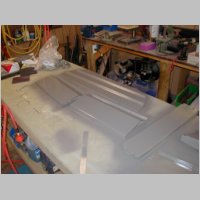
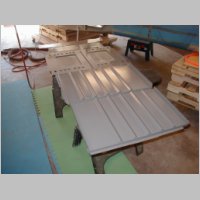
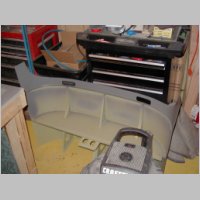
Painting Interior
Added 6/12/2005 - 665 total hoursHere's a great page to read BEFORE you try to paint your own interior....
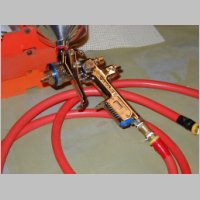
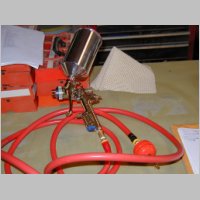
First, the gun. I purchased a brand new SATAjet RP 1.4 Digital II gun from http://www.spraygunindustry.com for $408. They had a blue anodized one that I could have got for $388. I also found one on Ebay for a very similar low price. If you read up on guns, you'll find that SATA has about the highest recommendation of any gun, so I just decided to go with the best. The SATAjet 2000 HVLP would be another awesome choice. The RP (reduced pressure) gun that I got is kind of an in-between HVLP and standard. It makes it easy to use your compressor at home (mine is 10+ cfm @ 90psi) whereas HVLP's require a bit more flow and may be harder to feed with a smaller pump. The digital II gun is nice in that you don't need an external regulator. The pressure is displayed on an LCD on the gun handle, and there's a control knob on the rear that you adjust the pressure with. This makes it more compact, which is ABSOLUTELY something you'll appreciate when trying to get in and around your fuselage.
For the Paint, I used PPG Concept (DCC) paint, DU5 Hardner, and DX 685 Flattening Agent. I'm pretty happy with the paint. The flattening agent allows you to turn down the gloss a bit. I didn't want a highly reflective interior....especially the panel. I added enough to go between a semi-gloss and eggshell...20oz. to be exact, to 1 qt of paint and 16 oz of hardner. I am very happy with the result. The surface shines a slight bit, but in general it will be very non-distracting.
Now for some warnings and tips...
#1. Color Matching: I didn't follow my own rule. Colors will usually look darker than the paint sample looks. I matched my faux leather portion of the seats to the paint chip. In reality, the paint turned out a shade or two darker and doesn't match as perfectly as it did out in the sun and in the store looking at the paint chip by the leather. You may as well just give up on an exact match...but keep in mind it will likely turn out darker than you intend.
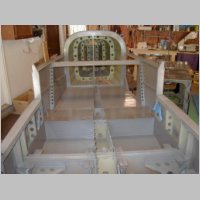
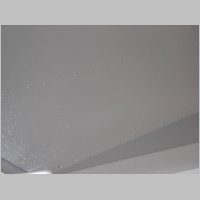
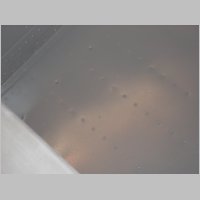
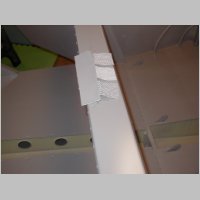
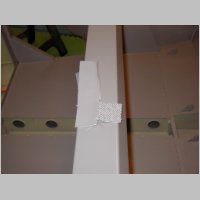
#2. Cleanliness!!! I really messed up here. I used some PPG wax/grease remover to wipe down the primer before I sprayed. Unfortunately I used a cotton sock to wipe it on. USE A LINT FREE RAG!! I ended up snagging millions of small cotton fibers on my floor panels and rear seat bottoms. I had some on other areas as well. I did buy a couple of tack cloths and I used them to wipe down the plane after I did the degreaser, but I went way too quick at it. Take your time and make sure you have the entire thing vacuumed well, and you wipe ALL the lint, dust, and particles you can find. They show up much worse with paint on them. In the end, my vertical walls came out fantastic. My floors had lots of lint in it, but I'm not concerned as I'm putting carpet in anyway. The rear seat on one side had quite a bit of lint though. Anywhere you have pop rivets is likely to be an issue.
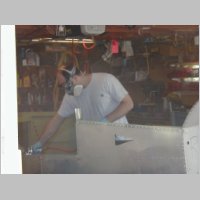
#3. Professional?? I'm all for do-it-yourself, which is why I will absolutely paint my plane. I think the exterior will be much easier to do than the interior. One common comment though concerns me. I hear people say that they'd like to do the prep work but have a pro spray it for them. I think this is backwards. The Prep work is what is hard about the paint job. It takes the most time, and it is what will cause your paint to look bad or good. see #2 above. If I had spent more time just cleaning, this would have been a fantastic paint job. It still will look pretty good to someone when it's finished, but that's because I'll be covering up the areas that suck anyway. I found that with my gun, my painting skills were plenty good to get a good finish. Almost nothing for runs, spots, sags, or anything, and there are lots of nooks and crannies in this fuselage. If you're gonna have a pro spray it, have them prep it too. If you're gonna prep it yourself, consider saving some cash and buy a good gun and paint and do it yourself.
#4. Quantity: I put down 2 coats on everything but the front of the rear seats. I used 32oz of paint, 16 oz hardner, and 20 oz flattening agent. (remember that DU5 hardner quanties is different than other hardners). I'm not saying to buy one quart, I'm saying that if you buy 2 quarts, you're probably going to have enough for the entire interior, when you consider the canopy top.
#5. Technique: I found that in the floor panels where I sprayed from a further distance, I had a rougher finish. Where I got up nice and close (6-8"), and let the paint flow on a bit, it came out beautifully smooth. Remember that this is an RP gun. If you used a full pressure gun it will maybe be different for you. HVLP will be too, but 6-8" should work for those as well...this RP gun is pretty close to an HVLP. Between coats, I let the paint sit for about 15-20 minutes and where I saw real bad lint I took either a super-fine sanding pad, or a piece of scotchbritel too, rubbing lightly. The scotchbrite wool you really need to be careful with, as it will leave fibers that you need to clean up. But, both are ways to knock down those bumps from lint and dust. Doing this allowed me to correct a side panel that was looking kind of ugly after the first coat. Allowing the paint to flow on a little thicker also helped make a couple areas look much better.
So in the end, I'm both upset at my paint job, and very happy with it. The color, although not a pefect tone match, is very nice. The quality of 97% (approx. <-; ) of the visible (post interior) surfaces is very good. But, I still hate the thought that I have embedded lint on my floor panels. Since I still have to respray my seat fronts, and do the upper canopy, I may just sand down the bad areas a bit and try to smoothen them up. There's only one bad spot that I will not show you at OSH 2006 unless I have it looking nicer, and that is under the rear seat cushions by the seat belt attachment. So no digging around the back seats of my plane!
|
|
|
|
|
|
|
|
|
|
|
|
|

|
|
|
|
|
|
|
|
|
|