More Finishing
/ FWF Tasks
Plus - Andair Valve Completed
Added 12/28/2005
- 1447.0 approx. Total hours (1241.7 By Me)
Today's
pages added (this one and a panel/wiring section) are once again
delayed in getting out. I've been keeping my head buried in the project
a little better (combined with the Christmas Holiday interruption), so
I haven't spent time posting much. It is exciting now, as some
of those things that I've been waiting to finish are finally
completed....like the Andair valve, and getting the panel into the
plane.
See below for more details on the recent accomplishments.
Also, go to today's Panel section page to see those items too.
Now, on to the sections...
Andair Valve complete
installation!
This is the something I've been waiting a long time for. The day
when my Andair parts finally arrived and I could finish installing my
andair valve in what I would consider to be a far superior arrangement
to the factory plans. It could still be improved on, if someone
DID NOT have the valve installed previously, as I did. Because I
had already cut and enlarged the hole for where the valve would go,
and, because I didn't order Andair's universal joint kit, I was a
little limited in exactly where I would mount the valve. In
addition, if you're building the fuselage, please note that you may not
want to mount your bracket that holds the fuel filter until you have
this valve figured out. It may be best to do that part along with
this. Also, I had my Transponder mounted in that same general
area. Had I known what I was going to be doing here, I would have
relocated that slightly also.
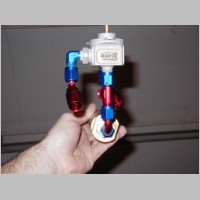
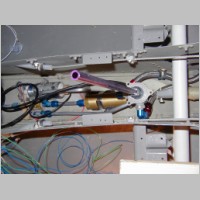
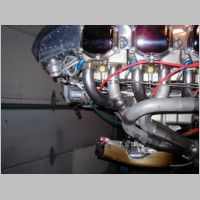
First of all, let me say that I learned about a whole new world.
I was looking for AN type fuel fittings, and none of the aircraft
houses had all that good of a selection. You'll notice from the
photos below that I have a unique 90 degree fitting on the fuel filter,
and a unique "Running Tee" on the bottom of the valve. These are
things you just can't find at Aircraft Spruce or other. I
happened across them in digging up info on fuel hoses. It was my
originial intention to use Parker 929B-6
hose....a Braided Stainless steel covered, conductive teflon hose.
It's light, durable, and won't wear out over the life of the
plane. There are issues though, and that is that you basically
have to have a hose dealer make up the hose, so you need to know the
exact length, and fittings required. Also, I was only able to
find certain fittings, and they were in steel. No big deal, but
all this meant that I'd have to order, and wait for my hose, and hope I
gave them the proper length when it came time to hook up the
wings...since I'm going with one continues, jointless hose from the
valve to the tank....less worries about leaks.
Anyway, I found that the best source for AN fittings isn't aviation at
all...it's RACING! I had no idea, but racers long ago adopted
aircraft fittings for their cars, and not only that, but in their
market, they have a LOT larger selection, with multiple brands like
Aeroquip, Russel, XRP, and many more. A good source is Summit Racing.
There are many places to buy this stuff, and I actually ordered
mine locally, just to make a relationship. I ordered XRP
fittings. I looked and Aeroquip is top notch...the best.
Russel was good too, but you could tell that very slightly, the
finish wasn't quite as good. XRP looks and seems to be almost
exactly like aeroquip, but at less cost. You may actually want to
get ALL of your AN fittings from these places. Too late for me
now, I'm sure I have $50-100 in EXTRA AN fittings that I won't need.
After I'm done with the build, I'm going to sell off some excess
stock of parts I bought. By the way, the fittings you can
self-install on the hose with no special tools (a vice helps), and,
they're considered reusable.
One other thing I found was that when it came to hose, the rubber
braided didn't weigh all that much more, but instead of the 3.5-4"
minimum bend radius that the parker hose had, the Aeroquip braided hose
I bought had a 2.5" bending radius. Nice. You can also buy
the hose in set lengths. I ordered 10', which gives you nearly 3'
of extra hose. I think you need about 82" to do 2 fuel hoses.
The hose is meant for all types of fuels, so it will be plenty
durable....remember that Aeroquip IS Aviation, started in aviation, and
is the source for Aviation hoses. In fact, Van's hoses that have
the red ends, are Aeroquip hoses and ends. So, it's good stuff.
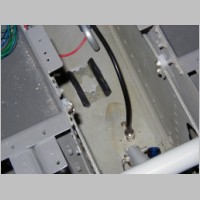
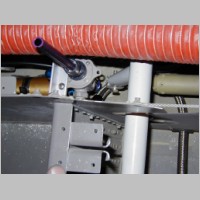
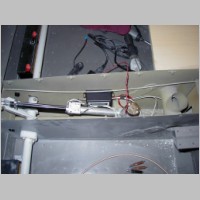
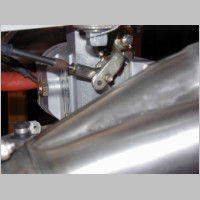
Mounting:
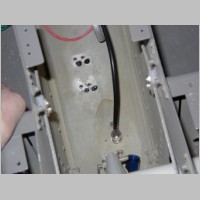
First, remember I had that limitation as to where I could mount the
valve, since I had the big hole in the tunnel cover drilled already.
That meant that the stem had to be centered in the hole. I
also still had issues with that left side fitting hitting the tunnel
wall, so now was the time to address that. I drilled out the
rivets on my fuel filter bracket, and relocated it slightly aft and
right of where it was. Used flush pop rivets to put it back in.
The Transponder antenna is close, but it fits just fine.
The cheap black cable attached was just some spare cable I used
to ensure I wouldn't pinch it.
You MAY, or may not, have better luck with that new 90 degree valve
that Andair makes, with 90 degrees between left and right, and 90
degree AN flare fittings coming off the valve to the bottom. I
can't say for sure. For SURE, you'd be best getting the 90 degree
fittings coming off the valve as a stock setup. I just don't know
that the 90 degree between left and right would help.
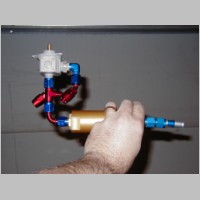
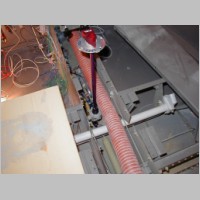
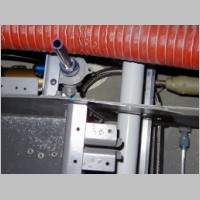
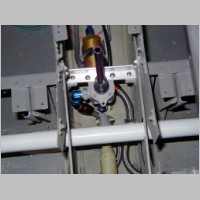
Since I had the fitting arrangement above, I just had to drop the valve
and filter in place, measure and cut a new hose on the front of the
filter, and then the valve was in postition, with the stem coming where
I wanted it. I was concerned at first that the aileron bellcrank
would interfere, but it actually has plenty of clearance! With
the filter mounted to the right, I have plenty of clearance from the
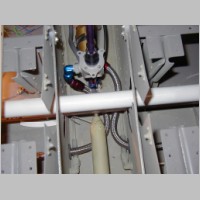
tunnel sides too. And, with the valve mounted lower, I have
plenty of room for a 2" SCAT tube to pass for the rear heat!!!
(Oh, and the SCAT doesn't
even RUB THE RUDDER CABLE!)
I did add a bracket to the valve body, just to hold it in place so if
someone stepped on the valve it woudn't flex the fuel fittings.
As for improvements... If you hadn't cut the hole in the tunnel
cover, and/or hadn't mounted your fuel filter bracket, my 2 cent
suggestion would be to mount the filter and valve more forward than it
is. The tunnel gets wider forward, plus if you add the universal
joint to the extension, you could mount the valve body wherever it's
handy, and put the handle lever where you feel it fits best. I
didn't have these luxuries, so I went with what I had...but, I'm
extrememly satisfied and much happier with how this all went in.
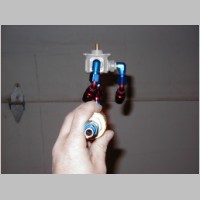
Just for parts-list sake, I used the 90 female AN elbow, one Running Tee, I put a 90 and a 45 on my hose ends on the fuel valve,
and I think I'll use 45's on the tank end. The reason I put a 90
on one side was just because I crossthreaded one of my 45's and had
originally planned on putting 90's on the valve. It just turns
out that on one side at least, a 45 fits better, and they'd probably be
great on both sides.
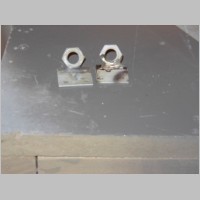
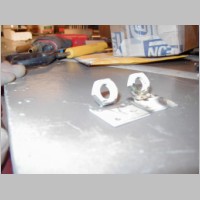
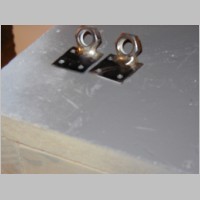
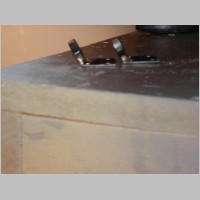
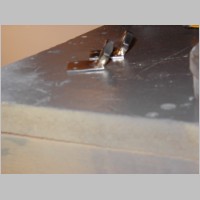
Trim Nuts -
Improved
After our discussions on the Matronics list about these cheaply
welded trim cable nuts, I thought I'd post my fix. I know someone
else stainless welded them very good. That's perfect. I
think Van's also MIGHT be doing a better job on them now too...but mine
were only welded on one edge, and it wasn't very tough looking.
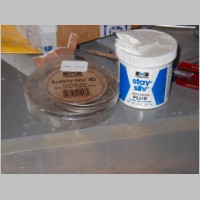
I fixed mine using silver solder, since I had it around. You can
see that they're now much beefier, and should never break. Silver
solder works great with stainless steel. I used to use it to
build super-heavy duty SCUBA tank attach rigs. We'd wear 4
cylinders on our backs, and I had to make brackets to attach the outer
2 to the inner 2. Yes, we had lots of fun. Helium/Air
mixtures and deep 325' dives, looking for shipwrecks in Lake Superior.
Sometimes carrying 6 tanks per person. The best part....My
little wife joined in the fun! I have absolutely the best wife in
the world....she has to be, or I wouldn't be building this plane!
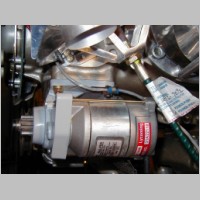
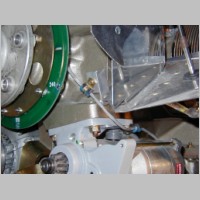
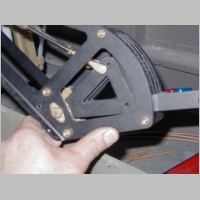
Throttle
Cable - Fixed
After getting a new throttle cable from Van's, it now had
about 2.25" cable travel. It now had the travel enough to
actually open and close the throttle for it's full range, but it
didn't have enough throw to make the throttle lever on the quadrant go
nearly full travel. So, I bit the bullet and drilled my fuel
servo arm. Now I had more travel, but I then drilled the quadrant
end too so that the actual lever travel would be JUST more than the
servo travel. It gives a little springback when you go
full-throttle, and goes all the way to idle with full-lever-back.
Perfect!
|
|
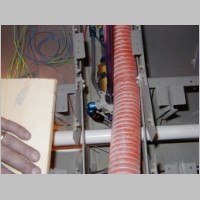
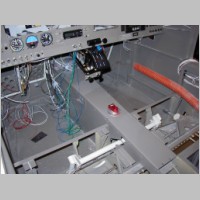
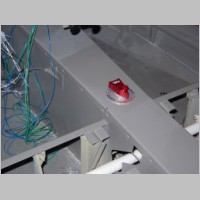
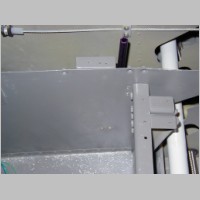
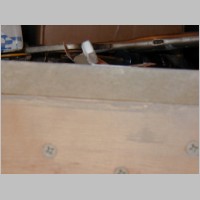
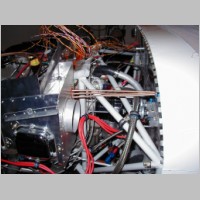
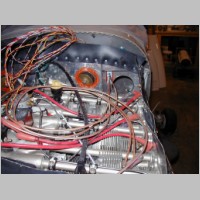
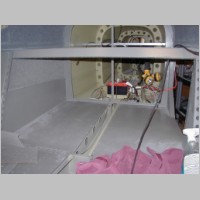
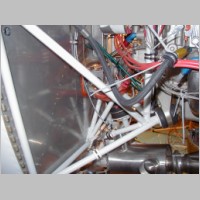
Finishing Tasks - Misc
Here's the rest of the stuff. You can see how I
routed my Lightspeed sensor wire, where the flap position sensor is,
and more.
Notables are the GRT EGT/CHT wires (and others too) will come out a
flange that I mounted on the firewall. It's 1.25", so there's room for
me to stuff most anything through. Also, I have 3 eyeballs for
the big cables coming through the firewall, but was able to use just
one for the 3 lightspeed coil cables. I also bought a 3 wire
passthrough from ACS for routing them through the baffle.
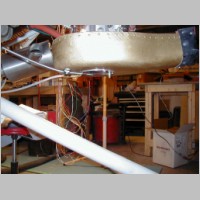
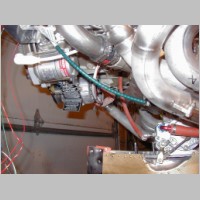
You'll see below that I added a 1" flange for my alternator blast tube.
I also have some good shots of how my alternator and starter
wires are routed....those took some time. You'll want to make or
buy from Van's some stainless standoffs that mount Adel clamps to the
sump bolts. It's in the wiring kit that you find these things.
Ask me if you have questions on this.
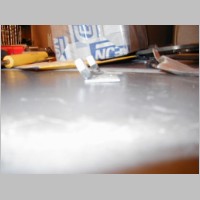
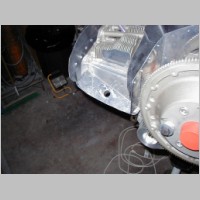
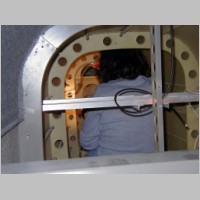
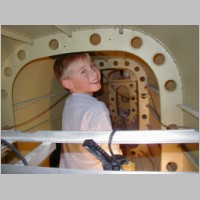
I also finally had some good help come and mount my static tubing.
It's 1/4" ID 3/8" OD Tygon, going onto a pair of Cleaveland
static ports. There is a clamp holding the hose at the upper part
of a bulkhead, where the 2 sides Tee, and then the hose runs down to
snap bushings. The first night I only had a small 3/16" Tee, so
the next night my kid went in to replace it with the proper size.
The wife did the initial install. Then the next day the
nephew pushed the larger Tee in all the way. We also drilled and
ran some snap bushings for the rearward wire runs.
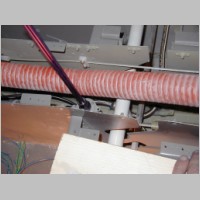
One last project was running the heat box cables, and FAB bypass cable.
The FAB cable was easy, but the heater box cables are VERY hard
to do after engine hose installs are done. Do them early! I
didn't, but that's because I didn't know where on the panel the cables
would mount. Figure that out early and you'll have a much easier
time.