More Pre-Paint Body Finishing
Added 9/24/2005
- 1008.3 approx. Total hours (910.2 By Me)
This part of
building is pretty much the least gratifying part that I've come to.
It's a lot of work and re-work, with minimal "accomplishment
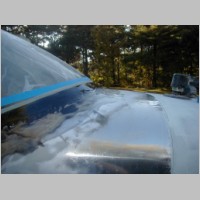
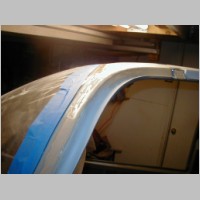
feeling" type moments. You can see my reworked windshield
fairing, which is/was looking much better. As I may have written
before, don't lay the fiberglass cloth all the way to the double-tape
line. The cloth will chip off when you sand it. But, I
found a trick that worked great! I sanded away about 3/4" of the
cloth, and re-applied pure epoxy film and let it run down off the
double-tape line. As it thickened, it ran less far. When it
ran, I'd just squeegie it up and let it drip down the tape again.
Once it had some thickness to it and it didn't run much, I yanked
ONE strip of tape. That left a very nice epoxy edge. I
still had air bubbles, so I filled over it all with fairing filler, but
at least that final line should look nice now once I sand thru the
fairing filler.
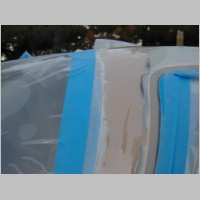
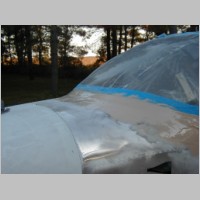
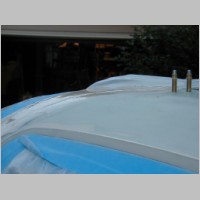
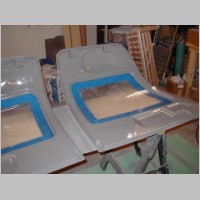
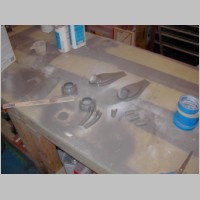
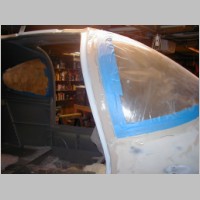
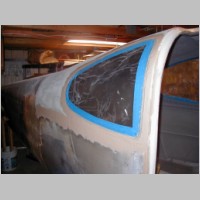
You can now also see how I'm taking care of the gap around the
doors. The fit wasn't perfect, so I first put waxed paper over
the canopy side, and gooped the door with a layer of epoxy with fairing
filler. (If I had more colloidal silica I would have added that too)
Then after it dried, I was able to sand it all smooth and re-sand
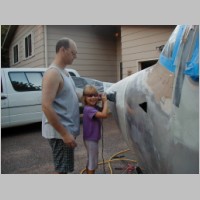
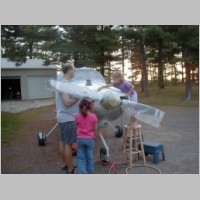
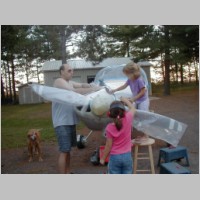
the outline of the door for best-fit.You can see that for a while I had some sanding helpers. The little one claimed she'd be there to help from now on, whenever I worked on the plane, she'd work on the plane. Hmmmm, we'll see how that works. ;)
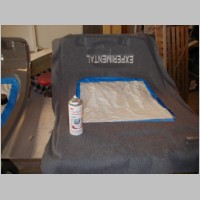
I then did a very rough prep of the inside of the doors, so that I could paint them. It would take a very long time of sanding and filling to get plain fiberglass doors to look really perfect, and I didn't like that look anyway, so I chose to cover mine with the same fabric I used on my headliner. I painted the door so that if there was any visible around the outer edge of the fabric, it will be the proper color. Also, if the fabric weave ever opens up, or I get a tear, I won't have an ugly green fiberglass piece visible. At the same time I painted my NACA vents. These vents are another point that I'm hoping Van's takes and makes changes to for all you future builders. They originally installed small vents in the first RV-10. The vents were inadequate, so they send out larger ones with the kit. Problem is, the larger vents are about 1/4" too high to fit under their instrument panel, wth the NACA cutout in the side of the cowl as-is. They need to either move the location on their computer punching system, or better yet, leave the vent out and let the builder place it where it fits THEIR plane the best.
The door fabric went on pretty well. You can see I had the word "Experimental" embroidered into the fabric, and the word is upside-down. I had this idea and then noticed that Vic Syracuse did the same thing. It makes it so that when you open your doors, the word is visible while boarding. Meets the legal requirements, and looks great! Note about headliner glue: I used 3M super 77 on the inside of the canopy, but in a couple spots it is letting go. You should probably at least in some inaccessible locations use the 3M General Trim Adhesive. It will hold better, but is much harder to work with. Around the windows I'd at least start with the super 77.
There's a couple photos of my Bob Archer Wingtip NAV (Left side version) My main NAV is going to be an under-tail cat whiskers style, but by NAV 2 is this Bob Archer Nav. My first impression is, if you have the plans, and the parts, build the kit. It would take you less than an hour EASY to throw this together if you had good plans or photos next to you. If you're like me though, and never have enough time, just buy the kit. Stein sells them very reasonably. http://www.steinair.com
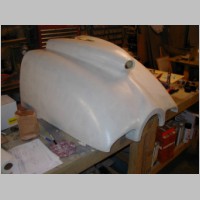
The it was back to filling around the door edges and around the windows. This is the worst and most tedious process. Next time out, I get to sand it all and make a huge mess. The door seams should look pretty good when I'm done though. You can see another photo of the PolyFiber SmoothPrime on my lower cowling. This stuff fills those pinholes pretty well. It's very hard stuff once it dries, so it takes a bit of sanding to get the excess off, but the cowl should be ready for primer and paint after this step.
|
|
|
|
|
|
|
|
|
|
|
|

|

|
|
|
|
|