RV-10 Rudder Gust Lock
IMPORTANT:
Updated 10/2015: Read Update at Bottom!
As for the ailerons and elevators, you can use gust locks for them too, but they are far less affected by wind than the rudder, and the ailerons don't flop around too much. I'm using the seatbelt hooked over the stick to pull it aft and that actually does a great job of locking the elevator and ailerons, other than the fact that the elevators are pulled in a nose-up position. To prevent issues with this, I attach a strap to this rudder gust lock that will also attach to the stick, and allow you to set a neutral position, then your seatbelts will pull aft against the stick, locking it in place. It is important to have the elevators neutral with any gust lock, to reduce the amount of wind drag on the airframe in strong winds, AND to keep both the tail and the nose from lifting in extreme gusts. I've had my airplane out in very strong winds, and you need to be ready for even 60+ kt gusts.
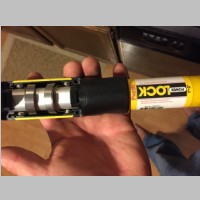
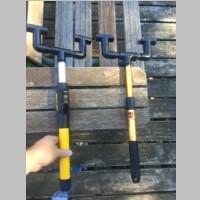
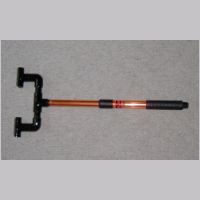
The gust lock was easily and cheaply made using some 1/2" PVC, and an extendable painting handle from the paint department. If you look at my original design, pre-2015, I used a regular "Twist to lock" paint roller extension. What I found in 2015 at OSH, in the 60 kt gust storm that we had, was that this particular extension was not strong enough. If you put it on the floor and pushed on it hard, you could compress it with maybe 80lbs of force (a guess). That slippage caused my gust lock to partially collapse, which released one pedal from the gust lock. In my 2015 revision, I purchased a Purdy brand, 1-2' extension, with a pushbutton lock. It has a fiberglass pole on the bottom, maybe 1.25" dia, and an aluminum tube extension. It is VERY strong, and will easily withhold my over 200lbs of weight!! I also disected the mechanism to see how it worked, and it is very very robust. It should not collapse on you. I also, while building my 2015 gust lock, put all of my over 200lbs of weight on the PVC fork, and it held my weight as well. So as long as you secure the bottom of the stick (see my 9/2013 update!) you should be good to go with this gust lock. Yes, the Purdy brand extension was heavier than my old design, but it is worth it for the solid trouble-free gust locking, and I have not yet found a better paint stick extension. Should I find a better one some day, the PVC portion of the gust lock can be rebuild for well under $5. In fact, I paid less than $5 for 1 bag of 10 elbows, and 1 bag of 10 T's, and had scrap 1/2" PVC around home. The purdy brand extension cost me $17.xx on sale.
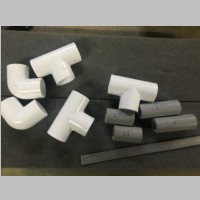
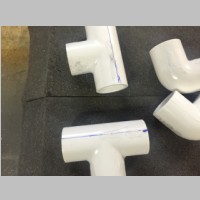
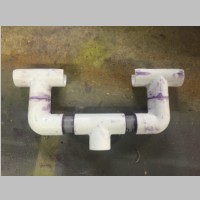
To make it minimum weight, I cut the handle and removed the mechanism for locking, then shortened the handle to the optimum length.....just long enough to be able to put good pressure on the pedals at near full extension, with the pedals mounted in the forward position....and that allows it to be pretty compact when compressed. When reworking this for the Purdy extension, I also removed some of the accessories, like a thumb button for locking the roller on, the lock mechanism on the roller threaded end, and the bottom stop. The PVC pipe required is very minimal. A 10' piece is cheap, and then you require a couple elbows and 3 T's. Once they're all cut and glued together using PVC cement, I stuck some wadded paper in the leg openings of the center PVC Tee to prevent epoxy from filling the side tubes. Then I stuck the handle's threaded end in the Tee and filled it with a flox-filled Epoxy mix. If you coat the threads with vaseline, you may even be able to remove the end from the handle later, my original one screwed off as needed. Then, to make it prettier, they sell PVC paint at the store, and I painted the PVC parts.
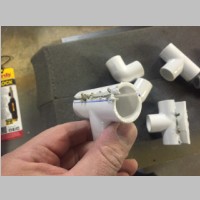
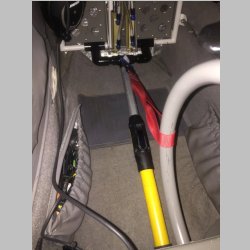
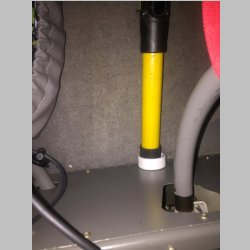
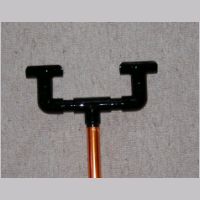
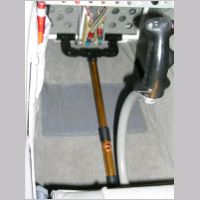
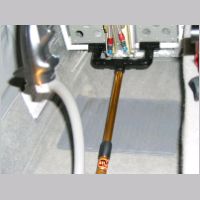
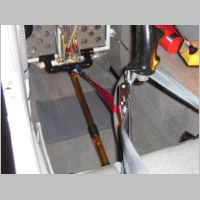
Operation is simple: When you exit the plane, just stick the bar into the pedals. The front T's are cut in half to go around the lower pedal tubes where they won't interfere with anything. Then extend the lock by twisting to unlock, and pushing the pedals as forward as you can, while placing the handle butt in the joint between the floor and front face of the seat, just below the stick. The nice thing about the lock is that if you put it on the pilots seat, it's in the way enough that you wouldn't overlook it before flight. Look at some of the last photos on this page for how the stick strap attaches. One of the nice things about this unit is that it is fairly light, and fairly compact, but there are other options.
I should note that while you can put gust locks on the external of the plane, to keep the rudder, elevators, and ailerons from moving, one of the big benefit of this sort of gust lock is that you can install it before you exit the plane. Otherwise you may have controls flapping around on a windy day before you even get to them to get the locks on.
Aviation Tech Products
I had also purchased something somewhat similar, available as a completed product, that you may be interested in. I have one and tried it out at and after OSH and it works great for the rudder. It isn't as solid for the ailerons and elevators as what I've devised though. It would be a fantastic rudder gust lock for keeping in your plane though, as it is very small and light weight. I would discourage you from using this as your only gust lock, however. I have seen one builder who had his bend and break in the same 60kt wind mine was in, at OSH 2015. There are small design issues with it, and it just isn't tough enough.
There is info available HERE, on the rvtraining website.
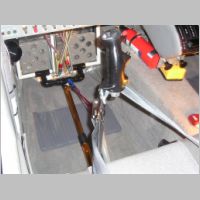
In the last 3 photos you can see how with my lock, I use a strap that holds the stick with the elevator completely neutral, then pull back with the seatbelts against it, which holds the ailerons and elevator tight. This works very well. The Aviation Tech Products gust lock is right next to it. This one also has a stick tie, but while it's super compact and light for travel, it doesn't hold the stick very tight for ailerons and elevators, so you may want to add your own strapping similar to what I did...then it would be very nice indeed.
Update 9/2013
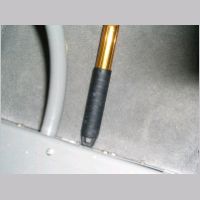
Until now, I've used this gust lock in my travels to 49 states and 4 countries, and it's worked perfectly....until my last trip. I have an important addendum for this now. First, when you put a heavy side load on the rudder, you may notice the joint from the top of the stick, to the horizontal part of the yoke will flex. So you can see that there is a side load. The side load is the issue. The place where this design failed me is at the bottom of the handle, where it contacted the airframe. Look at the center picture in the 2nd row. Notice the handle has a tapered ring to tie a lanyard on it....well, if you don't have a ton of pressure pushing on the rudder pedals, and you side load the rudder heavily, that handle can slide sideways. Effectively you'll be pushing down on one side of the fork of the T, and that will force the handle to slide left or right. It will kick that handle out and then at that point the pedals will start to move and the gust lock can fall off and the rudder will start banging around. That's what happened to me during a large gusty wind in Rapid City, SD.
The damage is considerable. First, if you used rivets (3 per side) to secure the rudder stops, as per plans, those rivets will shear. Once one shears the whole thing shears and fails. If you use screws, you may be ok on the stops but the flapping rudder can still damage itself. If you used rivets, the rudder will flap back and forth and the trim tabs will put holes in the side skins of the rudder. You'll also get a little damage to the forward edge of the rudder by he bottom hinge bracket, and maybe even some bending and paint damage up the rudder, or a kink in the trailing edge. All the new parts to build the rudder are about $450 not including paint, so it quickly adds up if you do lots of damage.
The Fix:
So, I did develop a fix for the situation. I went to the hardware store, and bought a 1" schedule 80 grey PVC cap for grey PVC. I cut it down to a shallow cup, rather than a deep cup (just for space/weight purposes). I secured that cup to the forward face of the seat pedestal under the stick, by drilling a small hole in the center inside the cup, and reinforcing with a tinnerman washer and countersunk screw. The idea is to have a socket to capture the handle tip, so it can't swing out. With the new 2015 Purdy stick, that cap can be a smaller cap, and you can put it INSIDE the stick if you prefer. It doesn't take much resistance to prevent the stick from kicking out, but you do need a way to secure that stick from moving.
My October 2015 Gust
Lock
|
|||
 |
 |
 |
 |
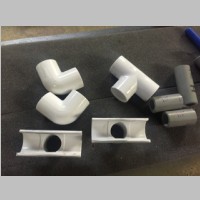
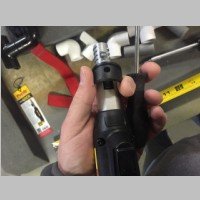
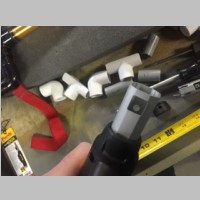
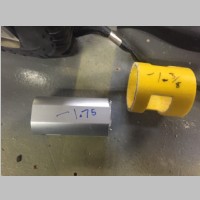
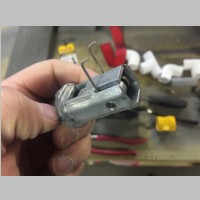
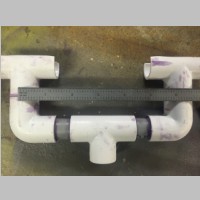
| Above you can see some of the locking mechanism. Do not take that cap off. If you do, you will have to study it long enough like I did, to figure out how to get it together. It's pretty cool, but a pain if you disassemble. :) Above are the parts. I show approximate measurements on them. I actually used about 2" to 2.1" length on the longer grey pieces. That length gives about the right minimum width for the RV-10 and RV-14. If you cut back and removed the inside ears of the T's, you could probably make all 4 pieces as 1.5" and have an even more solid device, now that I think about it. For 2 of the T's, you cut off the top so that you have slots to fit over the rudder bars. | |||
 |
 |
 |
 |
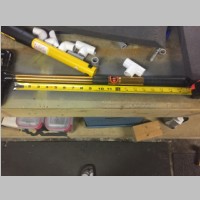
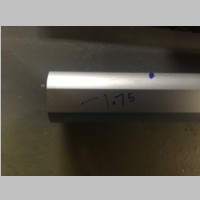
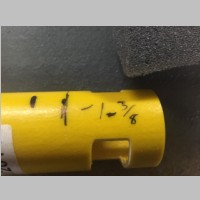
| Above are measurements
of my pre-2015 stick, used to help me size my new
one. Also above is the bottom stop on the purdy
stick. You don't necessarily need that bottom
stop, or the slots to hold it. I cut mine
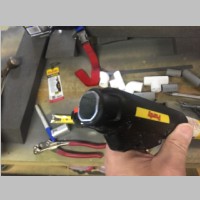
off. In the photos below, you see the black
roller-release button that I left off. The next
photo shows the square hole where the release popped
out...That section off pipe gets cut off. There
are my cut marks also, in the next 2 pictures. |
|||
 |
 |
 |
 |
 |
 |
 |
 |
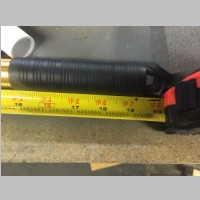
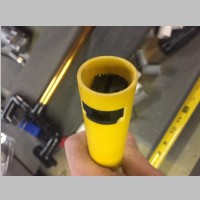
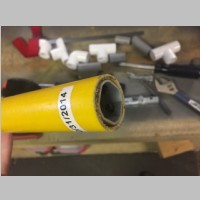
| Above are the pieces I
cut off. I drilled a screw hole for the threaded
end, but decided not to screw it on. I should have
left no hole. I didn't want the screw because
without it, I can compress the stick further. I
also removed those springs and pin for the pushbutton
release. Above are 2 photos showing the aluminum
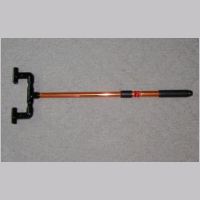
tube inside both ends. Below are pictures of the assembled PVC. When gluing, hold them tight for 15 seconds before releasing so they don't move. Another photo of the stick standing up after epoxying the stick in to the PVC And finally, above, is a photo of my new stick next to the old. The new one actually compresses shorter than the old. |
|||
 |
 |
 |
 |
Final as-installed
|
|
My Pre-October 2015 Gust Lock
 |
 |
 |
 |
 |
 |
 |
 |
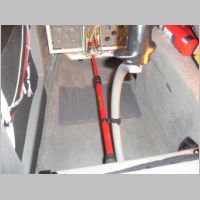 |
| Gust Lock With Aileron and Rudders Locked | ATP lock with stick tie | |