Tire and Brake Line Replacement
Added 5/4/2008This weekend provided me the perfect timing and the perfect opportunity to get some maintenance done that I've wanted to do for quite some time. At 175 hours I had flipped the tires on the rims, due to uneven tire wear...so click that link to get a good picture of the tires at that point. I had also replaced the brake linings at that time too....which is one data point for how long brakes last. At that point, I had run the brake linings to the rivets on one side.
So coming up on 300 hours I anticipated the first tire REPLACEMENT, and stocked up on a pair of new main tires and some new brake linings. As it turns out, my current brake linings have probably 3/4 of their original life left in them, so that's great news for me. I tried to discipline myself into not riding the brakes so much, since the last lining replacement, and I guess it's working. For tires though, it looks like I can expect to flip or replace tires at slightly over 150 hours of operation....flipping them after the first 150, and replacing them after the 2nd 150 hours.
The tires I purchased for replacement are Desser Tire 15-6.00-6 High-Performance retreads. I originally picked these after reading in Aviation Consumer about how the Monster Retreads were the best value in tires....good hardness and wear characteristics to the rubber, and retreads are actually not a bad way to go in aviation tires, from what they said. I'm not sure I'd do that again, however, after seeing the tires themselves. On one hand, the tires in general look good....they're probably a bit more durable than the ones that came with the kit. But, when I mounted them up and spun them, the installed tread isn't as straight and true as what I'd expect...so it's a bit of a dissapointment. Read on for info on the results though. My retreads were done on what had been GoodYear Flight Custom II tires, so at least they were nice retreads. I think my next tire purchase, however, will be actual brand new Goodyears, so I can get the best I can get.
Tire Shimmy..... Yes, it's something a lot of RV-10 owners have experienced. I started having a shimmy about the time I put wheel fairings on...despite the fact that I molded lead shot into the nose of my nosewheel to balance the fairings. I didn't balance the main gear fairings, however, and I think that I probably should have. I have had someone notice that one of my main gear legs had a shimmy in it during taxi one time, but I was pretty sure that from the cock pit that the shimmy felt like it was from the nose. So, I made sure I did all the right things on the nosewheel, and got it in good shape. Still had the shimmy. Time to try something new...
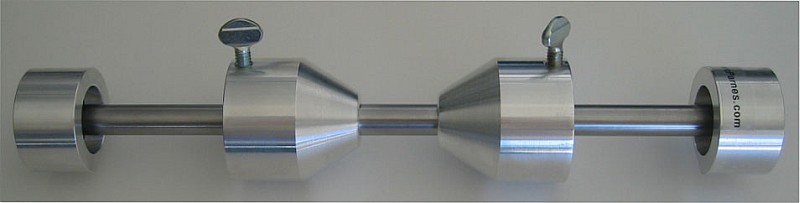
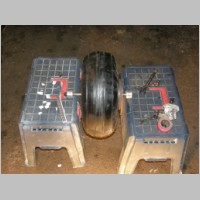
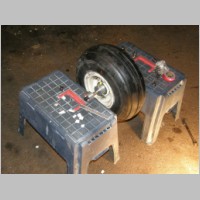
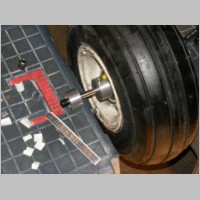
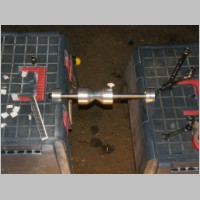
Enter the Tire Balancer. Below is a picture of a tire balancer I purchased from Marc Parnes Products, that was originally built for Ducati Motorcycle tires. I purchased his DU42 model on his recommendation, because the cones fit well into the standard Cleaveland wheels. He was right...the balancer worked well. Vic also found a balancer on eBay that he used, that works too. As long as you have a good quality set of bearings in your balancer, you should be able to balance your tires with many varieties of balancer styles. I bought mine with a pile of stick-on weights that use a self-stick foam tape under them to secure them to a degreased rim. The weights are 1/4oz each. Below you'll see photos of my tire balancer in action. All you do is secure the tire between the cones, and set the balancer on 2 equal height stands of any sort. The tire will naturally rotate to the heavy spot low, so you just turn it 90 degrees and see if it settles low again. If it's consistent, you add weights to the opposite side of the rim, until when you have the tire 90 degrees off, it doesn't rotate much or very quickly. You may never get it perfect, but you can get it plenty good for any of our purposes. I found that I needed 2oz on my left main, which was the gear that I had originally been told was shimmying. I added 1/2oz on the other side. The results were astounding... I have now almost completely eliminated my shimmy! That's after 4 landings, that I report that, so I'll update it here if I find this doesn't stay consistent...but I'm amazed, nonetheless.
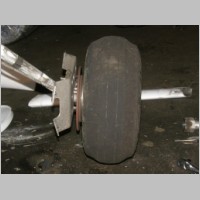
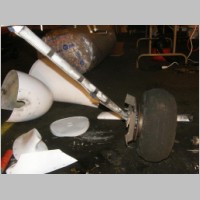
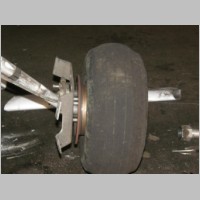
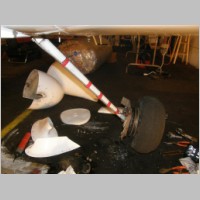
Another item I did while I had all this stuff apart was to finally replace my brake lines from fuselage to wheel. For those who have followed my build and discussions on the forums, you'll know that I originally had heard about enough quantity of reports of people's brake lines cracking to know that there was no way in heck that I was going to build them per-plans. When you take the aluminum tubing and flex it and spiral it around the axle, and then work harden it by landing a few hundred times, eventually you'll crack the lines. It's a common thing. So I put flex teflon lines for the lower 1/3 of the gear leg. No worries now about cracking down by the wheel. Unfortunately, I have since been told of another RV-10 builder who's lines flexed up at the fuselage junction....which of course is easy to see how it could happen too. He recommended flex lines there as well. So, off to Bonaco, Inc for some custom hoses. As for length, I had originally measured and told someone else that 44" was right. Then I forgot that measurement and so I asked one of my pals that I made the recommendation to, to measure his, and he said 46". As it turns out, I think any length between 44 and 46 would probably work fine. Mine at 46" required one extra adel clap to be added to the fairing mounting plate, but I see that as a good thing. Also, there is a change to one of the photos below. You'll see that my new adel clamp was added to the forward 90 degree portion of that fairing plate. That location had possibilites of the bolt head hitting the brake disc, so I mounted it up at the forward and upward 45 degree point instead, to put clearance away from the brake discs radius. It worked perfectly for me. So I now have full teflon flex lines all the way from fuselage to caliper. The important thing when odering is to tell them EXACTLY what you want.... 46" -3 size hose with -4 size straight fittings, WITH the chafe guard protective rubber coating. That will get you exactly what you want. The -3 size hose has a smaller I.D. so it requires less fluid to fill it. The lines cost less than $25 each when I purchased them. Ask for Brett at Bonaco, Inc. 1-909-985-3429
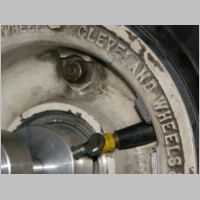
With a brake bleeding to re-do, it was the perfect opportunity for another maintenance/upgrade at the same time. My pal Ed had told me that a common upgrade with people around him is Viton o-rings for the Cleaveland wheel Caliper pistons. The Viton o-rings are M83248/1-224 V-75, that he got from Ace Seal Co. in Santa Clara, CA. 408-727-3995 I swapped out my old rubber o-rings for these viton mispec. ones. They have a higher temp range than the standard rubber ones.
 |
 |
 |
 |
 |
 |
 |
 |
 |
 |
 |