Spring Projects - Ground Power - Heater Insulation
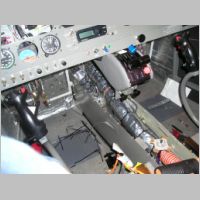
Added 4/1/2007 - approx. 205 Flying HoursTo finish my interior lighting to the rear seats, I had to re-open the interior side panels, and to add a ground charging circuit to both the main and aux batteries, I had to open the flap tube areas, so I used this time to open up all of the cabin panels again since I had wanted to insulate my SCAT tubing for the heater feeds too. Now the SCAT tube shouldn't radiate heat until aft of the fuel valve area, which was just one of those things I intended to do to help ensure the fuel lines stayed cool. Spring projects...
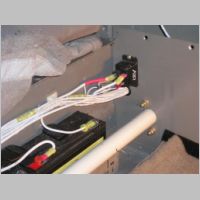
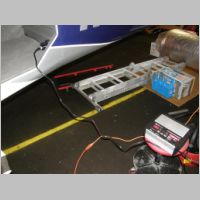
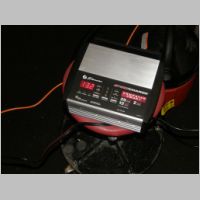
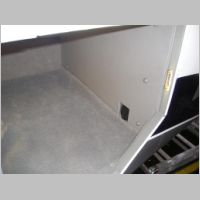
This gives a good look at the aux batteries and contactor. There are 4 batteries, in 2 parallel pairs of 2 serial batteries. They're 7Ah batteries, at 6v each. It provides power during startup for the e-bus avionics, and it is completely separate from the main battery other than a charging feed that can either come through a diode or direct, depending on the e-bus switch position. My goal of this project was to come up with a good way to charge both of my batteries while the plane sits for any extended periods, to use that time to maintain the battery to the best of my ability. I purchased a Schumacher SC-2500A charger (actually I bought the WM-2500A...Wal-Mart's model number for that charger (owners manual)), that at least at one time was one of a couple smart chargers recommended by Odyssey (owners Manual) for use with their battery. It charges the battery up to a certain voltage for a certain time and then drops to a maintenance charge of something like 13.6V. I haven't verified that it's exactly the same as the OMAX-25A-1B that they currently recommend, but I believe it probably is, and it's at a lot lower cost, especially from Wal-Mart. It's a pretty cool charger that is capable of charging at multiple rates, multiple types of batteries, and it does have some diagnostic features to it also. I liked it so much I bought a 2nd one for home use.
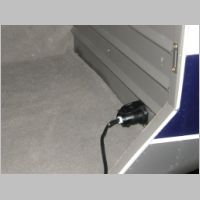
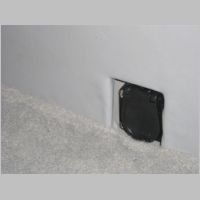
My requirements for the ground charge connection was not the same as everyones. Some people want a plug for jump starting the plane if the battery dies. I didn't care about that for myself, as I wouldn't be flying home with a battery that had died that far without first charging it anyway. But I did want a lighter weight connector than some huge metal one, and I wanted one with some sort of protection for the wires and terminals coming off the back to protect from abrasion and shorting out. I also needed a form of connector that had at least 3 pins...one ground, and one hot for each battery. I searched high and low for what I wanted. Sure, there were a couple of plugs that are more standard for ground power, that might be nice, but the piper style couldn't handle 2 batteries, and it needs to be modified to adapt for use. The other style is much more expensive and I still don't know if I could charge 2 batteries and still keep the connector "standard". After a lot of digging around, I finally ran into what I wanted to use.
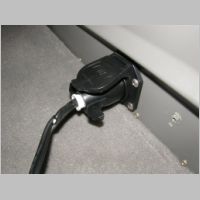
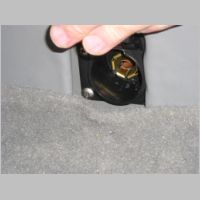
The 7-wire RV trailer connector turned out to be a pretty great match. It's not tiny, but it's nice. I really tried to look at the 4 and 6 wire round versions too, since I didn't need that many conductors, but here's the problem: Both of them didn't have great ways to connect the wires internally. They used a cylinder to stick the wire into, and then you crushed it with the threaded end of a screw to hold the wire. I didn't want to do that for at least the 2 hot wires on the plug. Also, the connectors didn't seem to be as "safe" from the way the wires routed out the back of the plug...if one started coming out, it would be easy to short on the metal plug or socket body that they came with...and it didn't have a good wire support. In contrast, the 7-wire model had a lot of plusses. First, it uses screw terminals that you can use with ring terminals on the 6 terminals around the edges...this is HUGE. Next, it has much larger connector blades, that can easily handle the current. In addition, you can use MUCH bigger wire with these plugs, as they're made to handle charging RV batteries off the tow vehicle alternator, and run electric brakes, and things like that. The wire spec can handle better than 10ga on the center terminal...probably 8 or so, and it easily handled my 10ga wire on the ring terminals. Not only that, but the plug and socket were plastic, so they didn't add a lot of weight, and the size wasn't all that bad. In short, it seemed a very safe way to go.
So I hooked up a pin to each battery hot terminal, and the center I hooked to the black battery neg. terminal. On the plug end, I cut the clamps off the charger wires, and hooked up the ground and hot terminals to feed my main battery, then added a 10ga jumper from the main battery terminal to the aux battery terminal. So I have achieved the goal of charging multiple batteries from one charger. Yes, by the way, it's ok to charge batteries in parallel like that....it's just as it is while you're flying. The nice thing is though, you get a well conditioned and maintained charge, that should help the battery last a long time, and keep it at full capacity.
|

|
|
|

|
|
|
|
|
|
|
|