Misc. Fuselage related work
Added 6/22/2005 - 687.8 total hours (641.7 by Me)Sorry that this one kind of came out all at once. I haven't updated in 10 days, and with delays waiting for various things, I'm kind of forced to jump around a bit.
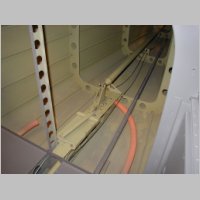
Pedals and Rudder Cables
The rudder pedals are nothing tough to assemble. First though, there are a couple of important tips: #1, the "cupped" side of the pedal does NOT go towards the pilot. Look at the photos. When putting the pedals together, it's easy to picture how someone could do these backwards. They just "feel" right the other way. I had to drill out my rivets and start over with the doubler plates (after re-painting too) because I had the rives with the round side on what I *thought* was the top. One other builder (was that Jim Combs?) also had a great idea...countersink your rivets on the pedal surface so you don't have any round heads. #2, you probably want to paint that area of the fuselage before you add the pedals. I suppose you could do it the other way around, but then you might want to leave your brake cylinders and lines off for the time being.
As for the rudder cables, they're a breeze to install, but here are tips for those as well.
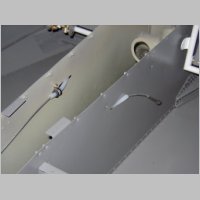
#1: Before you paint the fuselage, you may want to consider buying rudder cable fairings for the front cockpit area where the cable exits, AND for the tail area where they exit there. They are available from Aircraft Spruce, Avery, and many other places. I used Avery fairings, but bought them from Aircraft Spruce. At Avery I think they're P/N 10728, and you get 2 for $10. I paid the same from ACS P/N 12-00635 on an order for screws and nuts I got from them. These fairings will make the cable exit look nicer, and won't take a long time to install. Doing them before painting would be preferred.
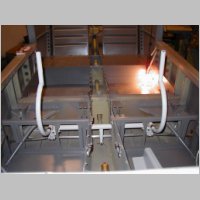
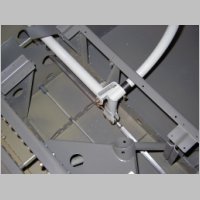
#2: Here's a good tip for you. You can rivet these, like Scott Schmidt did (see Here), or you can glue them, as I think I've seen suggested by Dan Checkoway. On the Aeroelectric list I've seen many references to an adhesive you can get many places (Wal-Mart, Menards, many more) ...E6000...which is a cheaper brand name for "shoe goo". It was only about $2.50/tube. This stuff is VERY strong. I had my interior painted already, so I decided to paint my fairings and glue them on, rather than rivet them. This worked out VERY well. A big tip is how to stick them on. I got to thinking about ways to hold them on through the aluminum. Finally decided on MAGNETS! At work we destroy old hard drives for confidentiality reasons, so I ripped apart 4 of them, and pulled those SUPER strong permanent magnets out of them. Made sure they were smooth on the magnet side, and then put a magnet on the top and bottom of the fairing, inside and out. (See photos below) Sorry, I forgot to take pictures after I had them on and removed the tape. **Update, for rudder cable fairing post-install pictures, go to the next page, or click HERE.
|
|
|
|
|

|
|
|
|
|
|
|
|
|
Controls
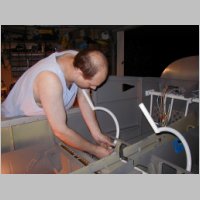
These were a lot of fun. I had already pre-made my spacers and rods while wasting time before, so the actual install of all of this didn't take too long. Just follow the directions and it'll go fine. It does leave me wondering though....I thought I'd heard that you could make these sticks removable, so you could yank out the co-pilot stick when necessary. I'd love to do this on trips with the
kids. The problem is, with the curved stick, I don't know that this will ever be easy to do. I'll have to study it more later. None of the bolts are tightened at this time because I'm still waiting for resolution on my andair valve. (see Fuel Lines section below)
|
|
|
|

|
|
|
|
|
|
|
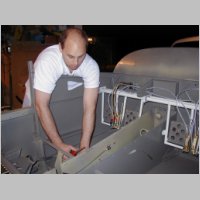
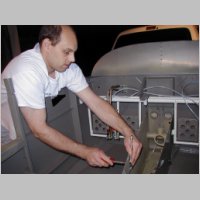
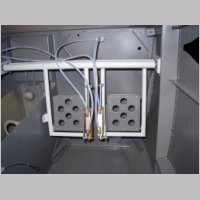
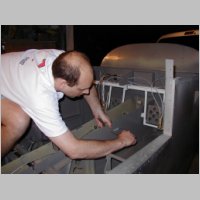
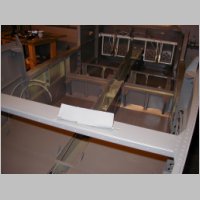
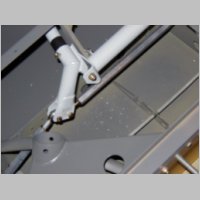
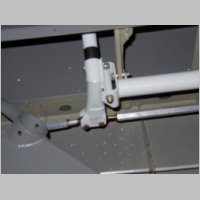
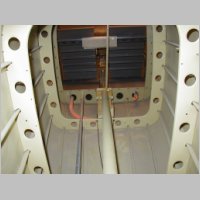
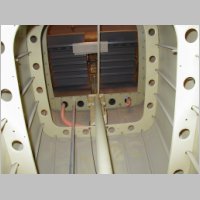
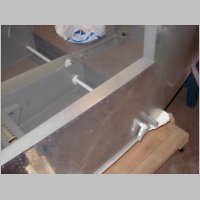
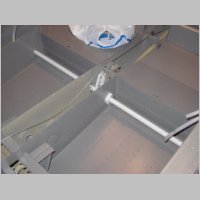
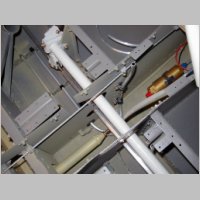
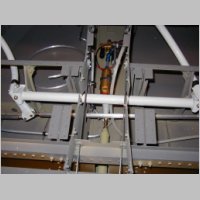
Flap Mechanism
This one was easy, and tough... It's easy to build the tube, but installing the bolts on the outer control ends in that little area on the side of the fuse is very tough. One thing about missing parts... I had the following parts issues in this section:
(1) AN4-20 Not listed in RV10 QB Hardware bags. Used on Pg. 40-7 Flap motor. Need 1.
(4) AN3-12A Bag 1423 should contain these bolts, per the top line of the bags inventory, but they are not listed on the quanties of items in the bags. No -12A's were received. 4 are needed on Pg. 40-5. AN3-12's were received in the same bag but used on other areas.
(4) AN515-6R8 None were included. Short 4 on Pg. 38-10 rudder cable holders. These were also short back on the fuel/brake line holders....not called out in hardware list. Needed a minimum of 12 for the QB Fuse to the point I am at now. Also would be missing the associated AN365 nuts, and the washers on the fuel line brackets.
(2) 5702-95-30 Bag 1419. Received 4, bag should have 6
(2) 5702-75-60 Bag 1419. Received 10, bag should have 12
Tips for this section: Even though it's not noted to final drill the holes in the sidewalls of the interior where those UHMW blocks attach, DO IT. Also, final-drill the UHMW blocks themselves. Additionally, my center actuator piece was wide enough that it was a tight fit where it exits the tunnel. You should either deburr this hole so that it's oversize a bit so the pipe goes through smoothly, or maybe shorten the center piece about 1/16". I chose the latter, but wish I'd chose the former. On the outer ends of the left and right pipe, it's the same story where it exits the fuselage. Here again, I wish I'd enlarged the holes, but I shortened my pipes 1/16" or so for clearance. No structural issue, anyway.
When installing the pipes, they have you do them both from the footwell area. There's no reason for this. Just remove all attaching stuff and stick them in from outside the fuselage...it'll work much easier.
|
|
|
|
|
|
|
|
|
|
|
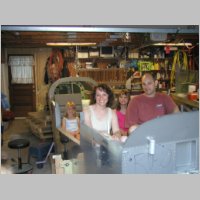
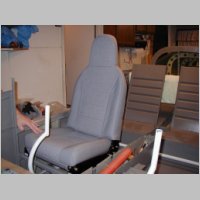
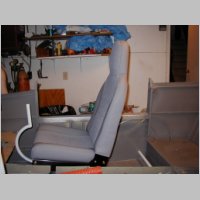
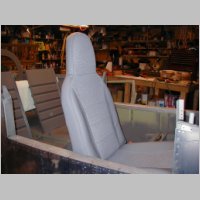
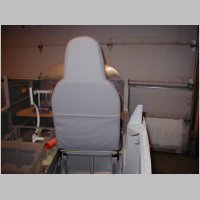
Seats and Misc
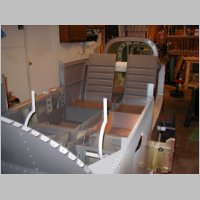
I took a flight down to the RV Fly-In on June 18th in Boone, IA (Home of Cleaveland Aircraft Tools), and picked up my front seats from DJ at DJ's custom interiors. They were fantastic. Veyr nice work she did on them. The match to the paint of my interior isn't so bad either. Here we also screwed around a minute and sat the family in the plane for a Father's Day photo opportunity.
|

|
|
|
|
|
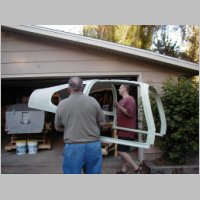
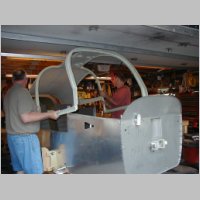
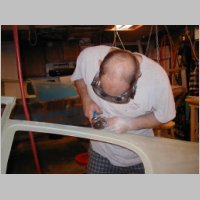
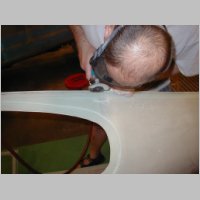
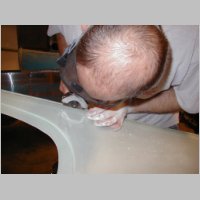
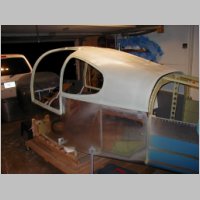
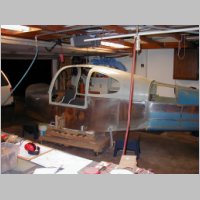
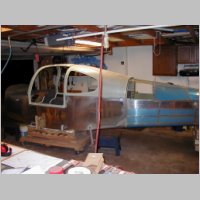
Canopy Top
A bit of advice, DO NOT attempt to install this top without going through the trimming stage. I got convinced to move too fast and test fit it on the spur of the moment, and there's NO chance you'll get it to fit as delivered. You end up VERY tight on the front and rear of the door area, trying to fit it in the door cutout of the fuselage. One suggestion I wish I'd heard before I started (just made it up after my test fitting) is to take a tape measure and measure the width of the hole in the fuselage, then measure the outer edges of that mating surface on the canopy. Now you can see how much material you're going to be removing. I did only a little bit at a time, and removed a ton before I got close. I'm not done yet, but should be within the next building session.
As for trimming, I used an air powered cutoff tool. It worked pretty well. I'm sure there's other good ways also. As for the scribe marks they put on the fuselage. On many area's they're wanting a 3/4" border, but the scribe marks aren't very perfect to that number, so take the time to measure and draw. I think you'll find that along the rear of the fuselage above the longerons, you'll be right down to that 3/4" and maybe a hair more before it fits.
|
|
|
|
|
|

|
|
|
|
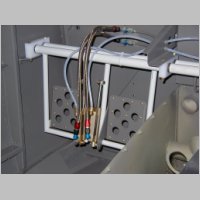
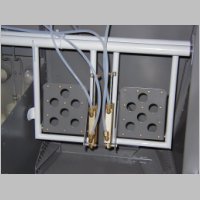
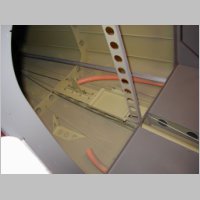
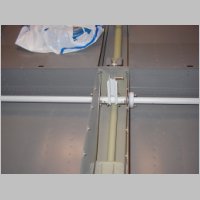
Fuel Lines
Parts Tips:
Be sure that before you get to the fuel line section you have purchased your fuel flow transducer (Ususally included with your EIS), your ES Airflow fuel pump, and ES Airflow fuel filter. You need all of these items to complete the fuel lines. The fuel flow transducer and EIS may very likely have many weeks of lead time, so probably try to choose your instruments and EIS in particular at the very beginning of the fuselage section.
Parts Shortage??
I'm not sure yet if I'm short these parts, but, the fuselage kit only contains 6 of the MS21919WDG6 Adel clamps. 4 are required for fuel lines on pg. 37-3, 2 on 38-10 Rudder cable front exit area, and 2 on 38-8 Rudder cable rear rudder cable exit area. I still had 2 from my empennage kit, so perhaps these were for the rear rudder cable areas. I'm not sure if I'm short yet or not. If I were you, I'd order a couple spares.
Andair valve vs. El-Cheapo Van's valve
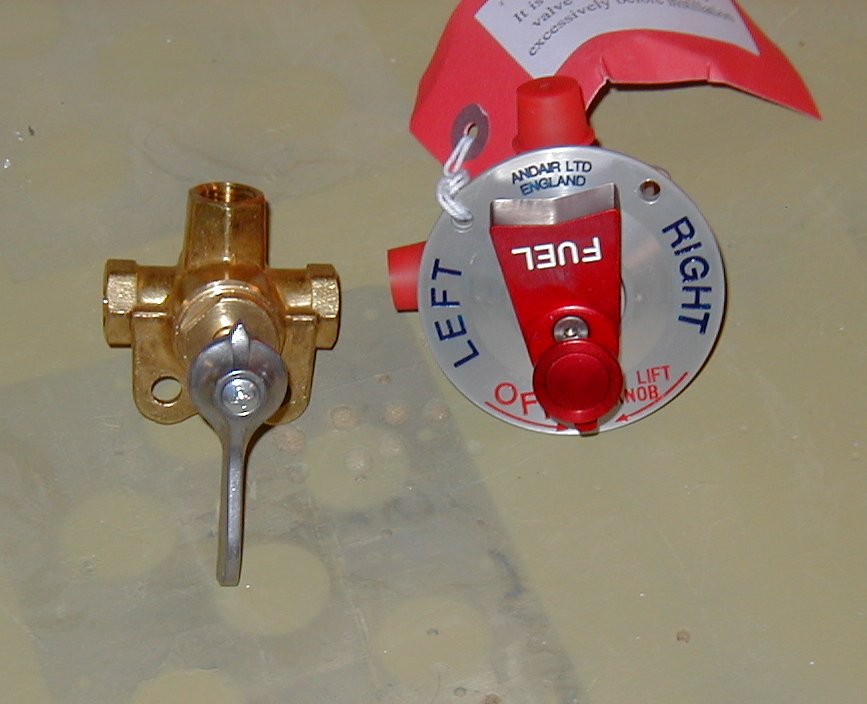
Ok, so I'll complain for a minute, but don't get me wrong, I think the Andair valve is great....just DON'T ORDER ONE FROM WICKS!!
I originally ordered one from Van's, but it was backordered for a few *weeks*. Then I found Wicks had one, so I dropped my Backorder and got one from Wicks. Turns out this isn't the same valve. What you WANT is the FS20x3-F, with 1/4" Female NPT pipe fittings on the left and right tank fittings. Wicks sells the FS20x3-M, with male flare 3/8" tubing fittings. The RV-10 doesn't have enough room in the tunnel to mount the male fitting valve in it's original (and easiest/nicest) location. I got the valve from Wicks. When I realized that I was in a bind, I first tried the expensive ($55+) step of ordering a Banjo (moveable elbow) fitting (Andair specific) from Wicks...the F20B. Unfortunately they were out of stock. So, finding a Banjo fitting at Aircraft Spruce, I had them verify that it had 3/8" tubing on the elbow outer end (as I needed) and ordered it. While in transit, I removed the old fitting from the Andair valve.....doing this is no problem...just a #9 Torx driver is needed. But, I scratched the valve a bit...no big deal, but now it's probably non-returnable. When the ACS banjo fitting arrived, it had a MALE NPT fitting on the inside of it!!! This isn't right...it needs the 4 screwed flange that it MADE for the andair valve. Besides that, the web page listed it as Female. Very strange. So, I had to return that useless piece of junk. Now I'm stuck trying to get a replacement side fitting for the andair valve, with no luck. I've REPEATEDLY emailed Andair about these fittings, with absolutely no reply. I even CALLED England and left a message and still no reply.
Today I gave up and I bought a 2nd Andair valve from Van's, I'll use it for fitting my fuel lines, and then get new side fittings at OSH. If you're interested in buying my 2nd Andair valve (the brand new one) after I'm done fitting my fuel lines, let me know and after OSH I'll sell it to you at a little break off from it's cost.
Reasons for
going Andair?
1) The
standard valve is very ugly.
2) The andair valve has that engraved plate with left/right labeling
whereas you have to stick or paint on labels with the other.
3) The andair valve has a more positive detent feel for when you get
to the left or right position.
4) The andair valve has an OFF position that you can't get to by
just twisting the valve...you couldn't do it by accident.
I'll be flying with kids on 95% of my flights, and they
like to climb around and trade seats.
5) It's not really a retrofit difficulty...you have to build the
whole fuel line system anyway. The convolution is in the
STANDARD valve...you have to cross the fuel lines so the
Left line feeds the RIGH side of the valve, and vice versa.
This is an incredibly screwed up situation, which has already
led to one other builder mounting hsi standard valve backwards
just to make the convoluted routing simpler. The Andair valve
is a much more straightforward and logical plumbing job.
6) The plane is going to be > $150K....point #1 is just too much
to bear when the andair looks so nice. I'm not building a
flying lawn tractor.
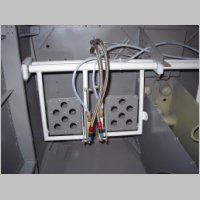
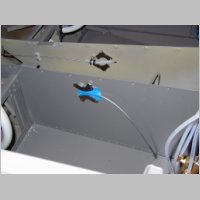
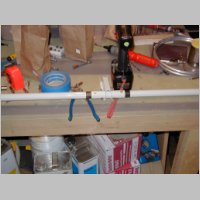
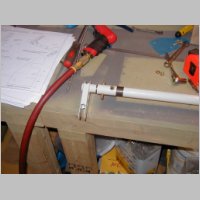
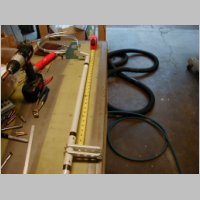
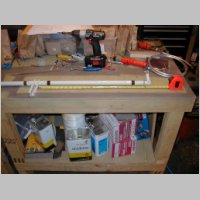
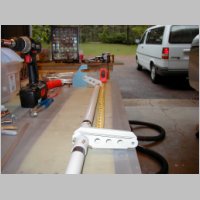
Below are the initial pics of fitting my fuel lines. The Left line is just started. The thing on the right is a piece of plastic tubing I'm using just to get the general shape pictured so that I can pre-bend the aluminum tube and have it fairly close. You can also see my mounted fuel pump and filter....still awaiting my flow transducer.
|
|