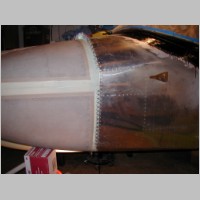
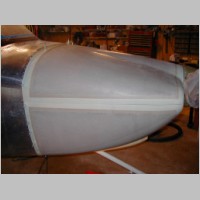
More Cowling Work
Added 9/11/2005
- 961.8 approx. Total hours (864.0 By Me)
The cowl has
been taking a bit of time. It's actually a very simple operation,
but it's definitely one of those things where you'll scratch your head
a few times as you ponder the process. My cowl is turning out
pretty good, but if I were to do another one, I know I could do it even
better, and in much less time. So far, the only real "defect" is
a slightly off-center prop. You probably wouldn't notice unless
you looked real close. It was lined up perfectly before riveting
in the top and bottom cowl hinges, but then once riveted it was off a
little. Oh well, life goes on. I'm very happy with my
cowl-to-fuselage gap. In most cases, it's a good rival to the
-10's I've seen.
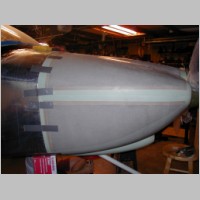
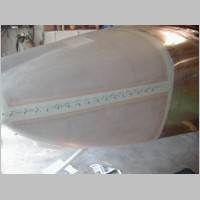
Now, on to the process. After epoxying in the air inlet "ramps", they get some fairing filler on the inside where it meets the cowling hole, to keep the airflow smooth. It then gets a big notch cut out on the left side for the prop governor. You also need to notch both sides to clear the ring gear. ** A note about the prop governor, c/o Anh....the actuator lever will need to be rotated from the current 2 o'clock position to about the 10 o'clock position because it's actuated vertically in the -10. I have not done this yet. Once notched, it fits well...see photos below.
Engine Mount Clearance possible issue
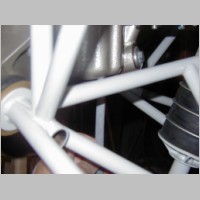
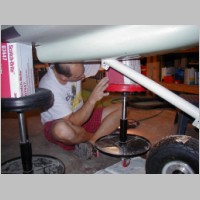
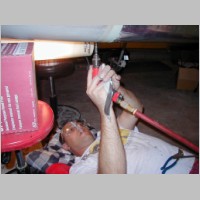
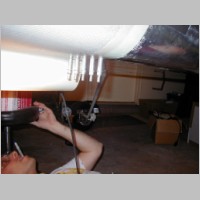
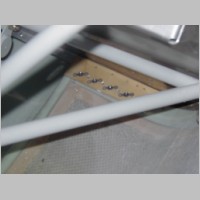
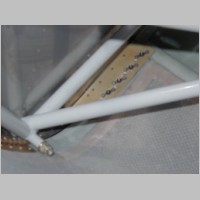
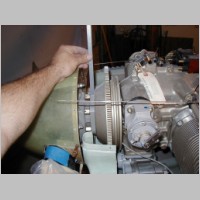
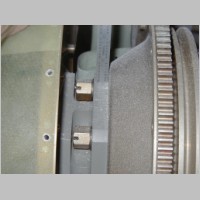
Perhaps other builders can keep in touch with this issue so we can determine if it's truly an issue, and if so, what's the proper fix. There have been at least 2 builders that have mentioned having the lower oil-sump area at the rear of the engine having very little clearance to the crossing support bar below it. One person said that it was hard to even fit a piece of paper in the gap of his, and one said his was very small, like 1/8". I think the expectation was that there would be about 1/2" or maybe slightly less, to provide for the engine shaking and rocking around during start and shutdown. Both builders tried to resolve the issue with Van's, but did not get any real good response. Both builders hired private welders to cut the bar off, and move it lower and give it clearance. On builder paid about $200, and the other $250.If you remember my previous section on hanging the engine, you might note that I originally didn't think the mount would fit. Then I tried doing the bottom bolts first, and it still didn't feel like it would ever fit, but at least the bar wasn't hitting the sump. Then after popping the top bolts in, it all seemed OK, and I was left with a gap of what I *thought* was about 1/8".
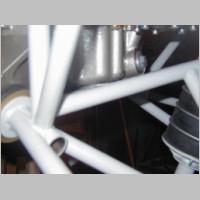
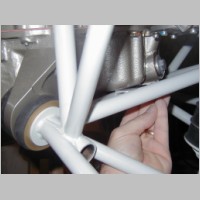
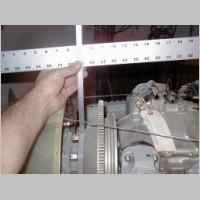
I had thought that 1/8" was maybe what was "good", but then I talked to one of the builders mentioned above. While talking to them, they mentioned that they had only 1/16-1/8" gap, so I went and measured mine. Sure enough, 1/16" material fits thru fine, but 1/8" material does not at all fit thru the gap. (I tried to take photos below) At this point, I'm going to *hope* that this is sufficient, and that it won't cause an issue and damage anything during cranking or shutdown. I'll monitor the gap regularly, and put some sort of marking material on the surfaces so that if it makes contact I will be able to tell. I'm really hoping this won't be an issue, but I have nothing to go on for experience there. If you know the answer, please tell me. As far as engine sag goes, if the upper mounts sag more than the bottom, the engine should tip down in front, and maybe slightly increase the gap. If all 4 mounts sag, then the gap will eventually disappear to nothing and there will be problems.
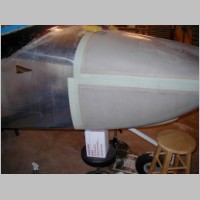
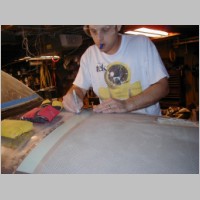
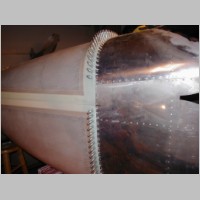
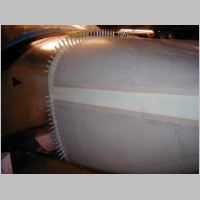
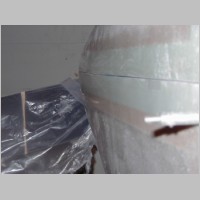
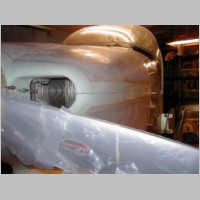
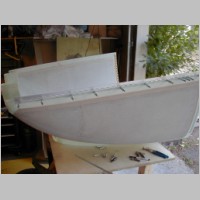
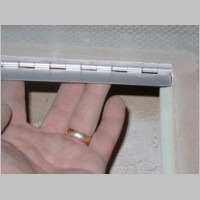
Trimming the cowl
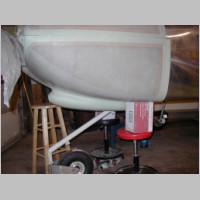
To trim the bottom cowl, you use the same 3" line marking as the previous page shows. I did a great job with that trim line where it meets the fuselage and was really happy. Make sure you double check your prop centering through the whole process. I used 2 hydraulic lift chairs to hold the cowl in place initially (see below) I also did NOT install hinges on the bottom of the cowl, since those eventually will wear out from what other builders have said. So I installed a metal plate to hold nutplates and screws. In some of the final photos, you can see how that came out. The only catch was I riveted the backing plate on the skin, so I ended up having to add some holes in the nutplate plate, to accept the shop head of the rivet....forgot about that little detail.
Once the cowling is fit on the rear, you mark a line down the sides of the cowl and trim the bottom cowling back to that line. Then you trim the back the top cowling to the nicely cut bottom cowl line. You then also take a little excess material off, and have a side cowl gap of something like 1/32" to 1/64" (if I remember right). This turned out to be kind of meaningless, because until you start actually riveting in the lower hinge, as the cowling flexes together you may find you have to trim some more to get the proper gap. The only reason for gap that I can think of is to allow for paint to fit between the cowls.
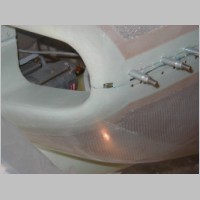
Then you drill and rivet in the bottom cowl hinge. I found a catch there. First, make sure the cowl lays nice and straight, so there's no bending tension on it. The pins go in and out real well then. In the plans, it says to put the bottom notch of the hinges I think 1/32" to 1/64" above the bottom cowl. I tried to do this, but didn't do a great job. I think the reason for it is, with a small gap between cowls, this extra aluminum behind the gap will prevent air from leaking out the hinge gaps. Well, I may have a bit of that. If I'd have thought of this sooner, I would have offset my hinge a bit more and totally eliminated the gap. No big deal though.
Quick note about beveling the hinges. I think the only function of this is to make the cowl come on and off easier. From what I can see, it's a worth-while step to do. The cowl can get kind of "sticky" sometimes.
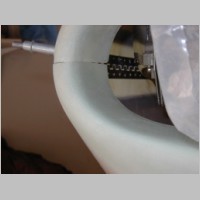
Cutting the hinge pine notch for the knuckle isn't hard at all, but I have a question on the knuckle (the part that screws in to hold the horizontal hinge pin in) I *think* this knuckle gets the back side of the eyelet cut off. If not, it's going to be a big pain to get on the hinge pin unless you have an oversized cowling notch.
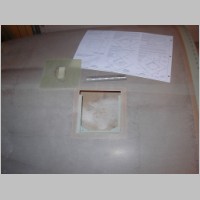
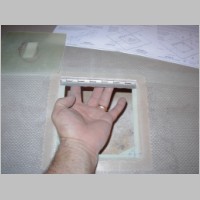
Oil Access Door
I'm just starting on the oil access door right now. I'm running into a small question.... is the hinge suppose to fit waaaay down inside the hole? I did have one other builder say their inset area was "too deep", and I'm not far enough to see if that's true yet. But, I am far enough to see that it looks like the cowling thickness in that upper edge (nearing 1/4" or more) is so thick that I don't know how the hinge will look in that spot. I wish I could see a good photo of a completed one. If you have tips on this, please let me know.
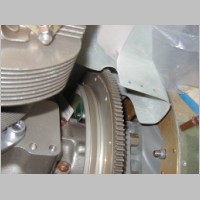
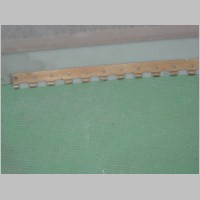
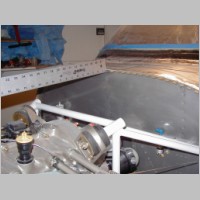
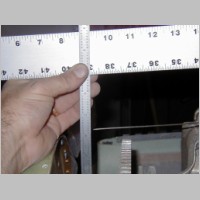
Cowling Measurement
This is just for one other builder who's using an alternative engine and needed some cowling measurements. The pictures tell the story. The measurement is from the main flat surface of the flywheel where the prop mounts, to the very top skin on the fuselage.

|
|
|
|
|
|
|

|
|
|
|
|
|
|
|
|

|
|
|
|
|
|
|
|
|
|
|
|
|
|
|
|
|
|
|
|
|