Aircraft Tire Bead Breaker
The first couple of times I changed or flipped my tires on my RV-10,
everything went perfectly in getting the tire off the old rim.
The last couple times though, it's been really tough for me. I
don't know if it's just gummed up from residue over time, or what it
is, by the tires just did not want to come off the bead. I'd
stand on it, jump on it, have 2 people stand on it, and use 2x4's in
creative ways, and I still had trouble getting the bead to break
free. It was then that I resolved myself to getting a bead
breaker.
I found a couple online that you could buy:
Bogert
Aviation 13M-TBB Aircraft Tire Bead Breaker $129.99
Meyers
Hydraulics Tire Bead Breaker AB-1 a hefty $193.00!!
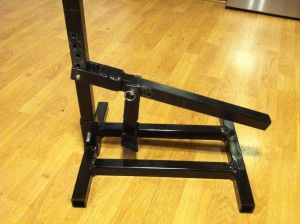
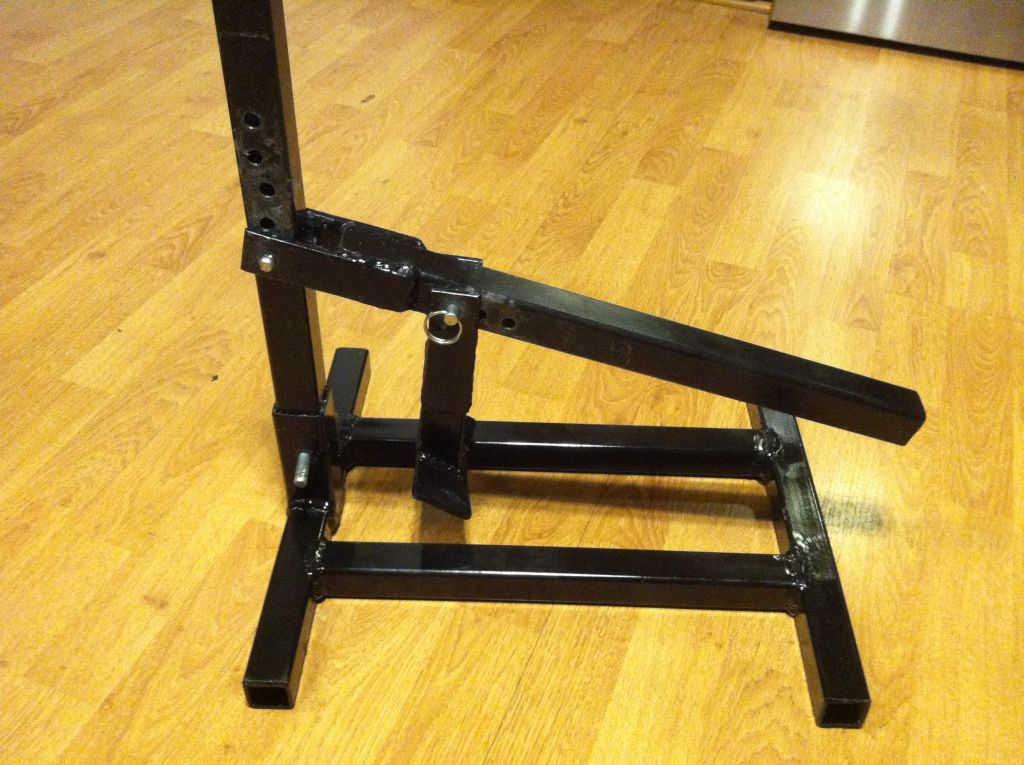
Well, those of you who know me know that I actually like doing it
myself if I can. So here is what I came up with. It's very
similar to the Bogert's bead breaker...I looked at their photo to think
about it. The entire thing cost me $20 or less to build....about
$10-12 in steel, and about $7 for 3 of the 3/8" hitch pins.
The 4 bars on the floor are all 1.25" x 14" square tubing of I think
3/32" thickness. I think the vertical was cut to 18", but it's
way taller than what is needed. My guess is that 14" would be fine for
that too. The handle was 16-17". So in total, allowing for
a couple inches of spare, you would need 90" (7.5') of 1.25" square
tubing. On mine, I chose to use a little 1.5" box tube on top of
the frame to make a "socket" to plug the vertical piece into. I
don't remember the specific thickness, but the steel supplier cut me a
6" piece of that and gave me the thickness that would allow them to
nest with no slop. The only other steel I needed was 4 pieces of
1.25" x 4" x 3/16" steel plates to make the forks on the ends of the 2
box tubes, and a piece of scrap of 3" x 4" x 3/16" that I used for the
piece that pushes on the tire. For that piece, there are many
options. Looking at other bead breakers you can make them push
hard vertically, or do it many different ways. I just did what
was easiest for me, rather than bending a piece into a curve, I let it
hit the tire at a slight angle and I ground the edge to roughly follow
the curve of the rim.
It took maybe 1.5 hours to cut and weld up, and maybe 1/2 hour to
drill. I put in extra holes to make it adjustable, but that was
because I didn't have a tire on hand at home to test fit it all
with. Turns out my first guess on the holes was right, so I could
have saved a lot of drilling if I would have brought a tire home to
test it with.
So, as you go forward with your RV-10's maintenance, here's a cheap
tool to keep around the garage that may save you some time.