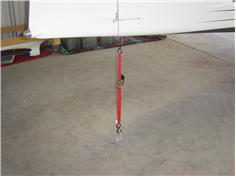
| The axel replacement and tensioners from Matco arrived last night so today I picked up concrete anchor bolts and fashioined a |
|
| crude 'jack' to raise the nose wheel to so the replacement. Drilling the concrete took a bit of time, I found a piece of Alum angle |
|
| that I drilled 2 holes in, 1 to anchor to the floor and 2, to hook the ratchet strap to. It really doesn't take much force on the aft end |
|
| of the plane to raise the nose (a good reminder to not load 2 rear passengers at the same time.). The replacement parts go in |
|
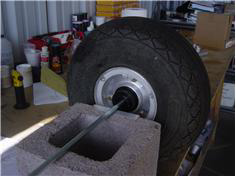
| fairly quickly. They come with good instructions. The first thing you do after removing the wheel is to drill a .250" hole for the bolt |
|
| which keeps the axel/spacer from rotating. Then remove the old axel parts, install lthe new, and screw on the cap/ bearing |
|
| tensioner until it puts enough pressure on the rubber bearings so that they don't move independently from the axel. Then install |
|
| the hex lock nut that holds the tensioner in position. Iordered some wheel balance weights and statically balanced the nose |
|
| wheel. It didn't take moch weight (2 slugs) and its probably not as accurate as a dynamic balance, but it's baound to be better |
|
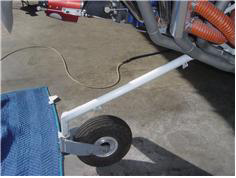
| than it was. I cleaned off some really crusty duct tape that I had applied to the nose gear to prevent scraping of th epowder coat. |
|
| U fortunately I had to use sandpaper to get it off after 4 AZ summers. I sprayed it with some epoxy paint. tomorrow I'll apply |
|
| some 3M antichaffe tape. I need to adjust the castle nut for 26 lbs breakout force tomorrow. |
|