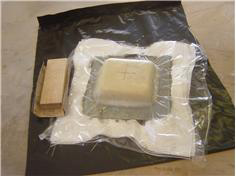
| Today's accomplishmen was the fabrication of the oil filler seal for the plenum, I laminated a 1" and 1/4" piece of foam together, |
|
| and then carved/sanded ti to fit the contoure of the inside of the plenum. Warpped the foam piece w/ Saran wrap, and then |
|
| placed ot on the lay-up that I had previously made of the inside contoure of the plenum, Floxed the foam in place (temporarily) by |
|
| running a radius of flox around the base. Applied 3 ply layup of (6 oz). I was going to use 4 plys but the epoxy kicked off too fast. |
|
| 3 will work. with the heat, I broke for lunch and came back and it was 'cured' ridgid. Removed it from the foam plug and from the |
|
| contour base. trimmed/sanded the edges to final width. Cut out the hole for the oil filler tube previously layed up. and then press |
|
| fit it into the 'cup'. I temporarily press fit the cup and tube over the oil filler tube, and then mounted the plenum and used some |
|
| pressure on the top of the plenum to 'set' the cup to the right height and angle. Removed the plenun, marked the intersection of |
|
| the cup and the tube w/marker. then gently removed cup/tube and permanentlly glassed them together, first ran a flox fillet |
|
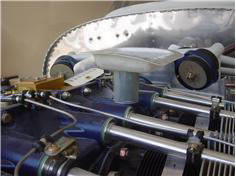
| around the base, and then wrapped the joint with 2 plys of glass 2" wide cut on the bias. I figured out how to get everything in |
|
| place on the #6 baffel. located the position for the purge valve control cable fitting, then positioned the Oil cooler scat tube ring, |
|
| and then positioned the sparkplug 3 wire grommet. marked everything, then removed and drilled/cut/filled/sanded to final shape. |
|