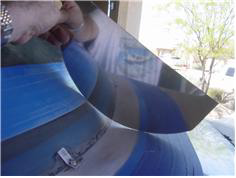
| Began by repositioning the fine line tape so that it would be close to the final paint line. Used the 7" radius template to deternime |
|
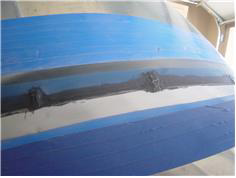
| where the tape should fall. Thoroughly sanded the Blakc flox, the upper fwd fuse skin, and the plexi to ensure adhesion. Mixed |
|
| up some black micro to fill some voids & depressions left from the flox, and also trowled some around the pop-rivited 'fingers' to |
|
| make a fillet around their edges for bettwe fiberglass bonding. then began the process of doing the lay-ups. I used 3 plys of 6 oz |
|
| as I couldn't find 9 oz cloth. I wetted out 3 plys on plastic sheet, using s plastic squeege to get good penetration and consistent |
|
| epoxy, then put another layer of plastic sheet above the lay-up, again used the squeege to remove excess epoxy to the edges, |
|
| and then cut strips of the appropriate width using a roller blade cutter. when applying the lay-up's I did them in 2 pieces, one |
|
| 32-34 " long and the other 35-38". I butted both pieces together and alternated the butt joint to 2" off the center for every other |
|
| layer. It's a pretty messy affair, because you need to use your hands to ensure there are no air bubbles between lay-up's and |
|
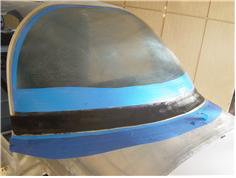
| inevitably you end up snagging a glass strand, which tends to pull out of the bundle and creats a few wild 'threads'. The 'fingers' |
|
| created some bumps that carried through until the last couple of layers. Will have to cunt on Super-Fil to fair everything even. I |
|
| probablly ended up with too much glass on each end by the doors, which will have to be sanded when cured. |
|