| Before beginning th eoverhead I needed to dismount the doors, I also took the hinges off and deburred/dressed them with the |
|
| scotchbrite wheel, primed each before reattaching to the cabin cover. Parker came out and took out most of the clecos that |
|
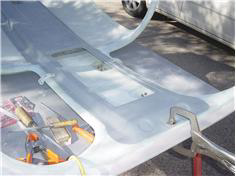
| were holding the cover on, and he, Judy and I removed it.. Got the console out and began to figure out where it needed to be |
|
| trimmed. The 1st area to trim is the gas strut braces, but before trimming you have to figure out the fore/aft placement, with that |
|
| done I trimmed out areas for the strut brace to clear, and then looked for where it was touching. Th edirections say that they took |
|
| th emold from a cabin top that already had a fair amount of filling/body work done to it. This seemed to help me, and there really |
|
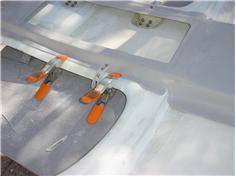
| weren't too many places to trim to get it to sit flush. I trimmed off the forward flange so that there is nothing that wraps around |
|
| the windshield frame ridge, the other places that required some trim were the aft cabin where there is a 'step' behing the rear |
|
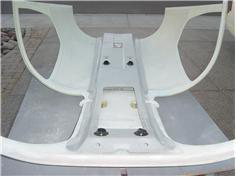
| door braces, Tried some clamps to see if it would sit flush. No Problem!. Drilled the holes for the Lights and the Air vents and |
|
| test mounted the air vents. I've ordered some switches from Mouser which should be here Mon. So If I can get the vent attach |
|
| rings floxed in place tomorrow. I should be able to epoxy/flox in the overhead on Monday , leaving the rest of the week to finish |
|
| the interior and reattach to the fuse. Anothe rtask for Monday is to make the fiberglass window trim rings. while the cabin top is |
|
|
|