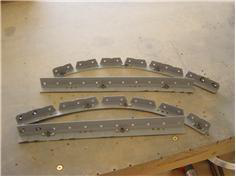
| Made FAR less progress today than I thought. Gained a renewed appreciation for the Pre-Punched parts. 2 Instrument panel |
|
| attach plates. F-1003D&E, For some unknown reason Van didn't make these parts, but rather provides some sheel alum bent |
|
| into an angle. The 2 outer attach plate come predrilled. After you get these 'made' the instructions say to attach them to the |
|
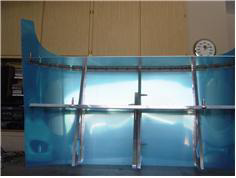
| instrument panel and to the F1071 top skin. The problem is that the entire assembly is clecoed to the fuse at this point and there |
|
| is no way short of being a controtionist to comply with the instructions, It would be easier if the entire assembly could be removed |
|
| and worked on on the bench, but when you asssemble it on the fuse, there are some clecos that prevent it's being easily |
|
| removed. I ended up taking enough of the top skin undone to allow getting at the attach clecos and removing it from the Fuse. |
|
| then I inverted it on the bench and marked the instrument panel screw holes on the attach flanges w a sharpie, match drilling |
|
| one of them #30, putting a cleco in and then match drilling the other screw holes #19 while keeping pressure against the upper |
|
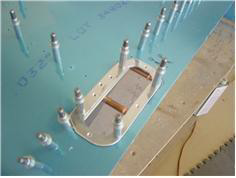
| fwd top skin. once the #19 holes are in I attached nutplates and screwed the attach plates to the instrument panel. finally was |
|
| able to match drill the #40 holes from the top skin. ONLY----- when you go to dimple the Attach brackets, you find that 5-6 of the |
|
| nutplates are directly under the skin holes. No way to dimple them much less rivet them! The only solution was to drill off the |
|
| offending nutplates, then dimple the holes. it will be easier to reattach the nutplates after the top skin is riveted. |
|