A Great Backup Instrument - Finally!
Added 8/2018| If there is one thing that I've
always wanted to improve on my panel (yes, plural, this is
on both the RV-10 and RV-14) it is the backup
instrumentation that I have. I actually was better
off on the RV-14 than the RV-10 in some respects, because
I have installed permanently an iLevil 3AW with full
pitot, static, and Engine monitoring integration that
allows any iphone or ipad to become a backup instrument
when necessary. This is a really nice little setup,
and one that I will some day add to the RV10 as
well. Either with another iLevil or my Stratux
(Seattle Avionics Merlin, to be exact). I prefer the
iLevil because of both the engine monitor integration, and
because of the pitot and static integration, plus with the
stratux requiring a cooling fan it makes me wonder how
well it would hold up under a hot panel. There is
one more thing as well. The iLevil has an automatically
charged 4 hour backup battery, whereas the Stratux uses an
external USB charger that can't be left plugged in and on
all of the time. At any rate, that kind of backup
instrument is great, but what you REALLY want and need for
safety is a real good panel mounted set of backup
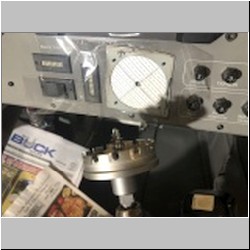
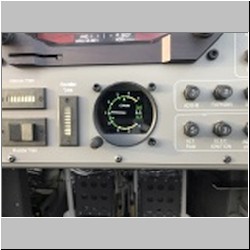
instruments. In my RV-10 I have 3 round 2.25" instruments. Airspeed, Altimeter, and in the center I have had both the TruTrak Turn-n-bank, which was pretty nice, and the ADI, which was also OK, but still not ideal. Neither one of them qualify as "excellent", in my opinion. On my RV-14, I didn't cut any hole because I wasn't sure I'd ever add a panel mounted backup gauge, based solely on my long-term inability to find one I really liked. Prior to 2018, I have spent 3 years going to OSH asking about the RC Allen 2600-2. It's really the only suitable 2.25" gauge I've been able to find. It's got some cons, however. For some background, this instrument is actually made by iLevil, and sold to RC Allen (Now Kelly) where it is sold as a TSO'd instrument. So the hardware comes from the experimental/lower end market, actually. It's an OK instrument, but very limited in what it displays...mostly just attitude information. There is an external skid ball you can buy as an option. I believe there is no pitot and static information that goes to the system, and it's unclear how iLevil can have a well performing attitude indication without either GPS or pitot/static information to aid the AHRS within. I have heard that while it performs ok, it isn't all that great. One other caveat is that you have to order it in one of 2 ways for variations of panel tilt, because the unit is really designed to be mounted perfectly vertically, and if you don't, you can have issues. I have also heard that iLevil actually has other software that they've run on it before with many more features, but that is not available for sale. Year after year I hounded iLevil to start selling the unit for experimentals, with more features. They will not, because it would jeopardize their relationship with RC Allen. And, of course, RC Allen doesn't care much about the experimental market...and why would they when they can rake in over $2500 for a unit that has very limited functionality. I pursued this for years, with no luck, but was unwilling to spend that kind of cash for a backup instrument when our experimental world has so much more, for so much less. The issue was only form factor...I NEED 2.25". So along comes my RV-14 build, and of course, there wasn't a suitable instrument, so I didn't drill a hole. Had I *known* what I was going to do today, I would have left a little more room by my light switches on the Left side of the panel, but I never thought I'd actually find something I'd want to buy. I did, however, leave space intentionally on the panel where I *could* mount a 2.25" instrument, just in case. Jump forward to 2018, pre-OSH. I'm now growing entirely impatient for a solution, and decided that this year at OSH I will just find the best deal (probably through SteinAir because he's always the best source), and buy the 2600-2, because I'm tired of not having a good electronic LCD Gryro on the panels of my plane. I planned to drop over $5K and buy 1 for each plane. BUT, before I did that, I wanted to take the time to use Google and see what I could find on the market now. Last year I had found a couple that were promising, but not perfect. This year, however, I was BLOWN AWAY by what I was able to hit within a few minutes of searching! Enter the Kanardia
HORIS EFIS
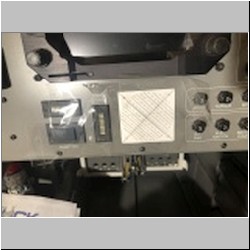
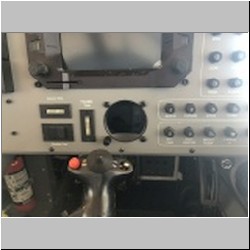
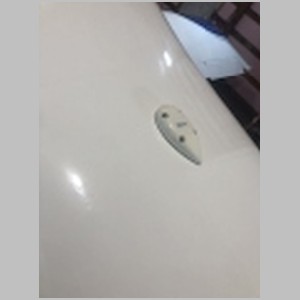
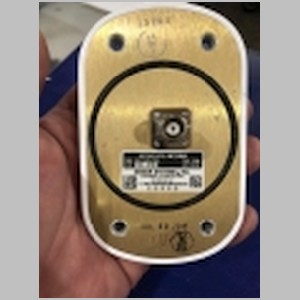
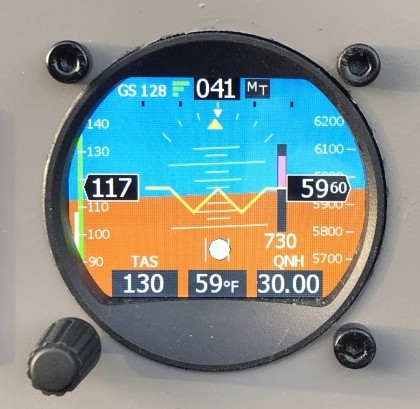 When I clicked the link on their website, I knew it was going to be perfect, if it only performed well. You could tell from the display that it had all the features and MORE than I wanted in a backup instrument. In fact, this thing had enough features that I didn't NEED 3 round gauges any longer...a single hole will do everything. That meant I could have a complete backup instrument (less a moving map) in my RV-14 the same as in my RV-10! You need SOMETHING that can help you keep the plane right side up in the clouds when flying IFR, and this would absolutely do everything you need to do that. Then all you need is your iphone/ipad to pull up some charts and lay out a course and you're home free! I first tried calling their US distributor, but found that they only sell the Indu Round Indicators (which actually look pretty awesome if you need round gauges). He told me that Kanardia will indeed sell direct to me, if I call them, and that they speak english too. You see, Kanardia is in Slovenia. I almost hate to admit this in public, but I had no idea there even WAS a "Slovenia" before this. There are so many small countries that people just don't hear about, and for me, Slovenia was one of them. But I decided to send them an email to inquire. What I learned was that they are actually a fairly well known company in Europe, just not in the U.S.A., and they started out in the Glider/Soaring market originally but sell to experimental airplane owners in their market. I talked to Stein at SteinAir and he told me that he actually ran into them and saw the product at a show in Germany. The more I learned and saw about the unit and company, the more comfortable I was with it all. I downloaded their install manual and read through that. It really DID have everything I needed! This thing has Pitot input, Static Input, Skid Ball, OAT probe (which allows it to display TAS), settable Altimeter, a VSI display, Ground Speed, Magnetometer (optional), Built-in GPS, and MORE...in fact, it can act as a dedicated G-Meter, and a heading indicator! The heading indicator can either function on GPS Track, or if you have the magnetometer option (I do not), actual magnetic heading. The Direction indicator has a heading bug, as well, which for me doesn't serve a function, but since this system includes a CAN bus it can interface with other Kanardia devices and utilize that indicator. Not only did it have all the features, but it had one other BIG thing over the RC Allen...this thing could be leveled after install, so as long as it was facing forward it could correct for any panel tilt necessary. Now, for most of us, we buy things like Dynon EFIS's, Garmin EFIS's, or the Garmin G5 as a backup instrument...things like that. But there is a definite market for 2.25" instrumentation, especially to retrofit "old" planes like my RV-10 that were completed in 2006, with current instruments. The G5 is simply too big for any of the places I would have available to put it. But this thing...this this is perfect for me! After a few emails back and forth, I asked them about pricing to purchase 2 of them, shipped to me in the U.S. Surprisingly, it was LESS THAN $1000 EACH for me to buy 2 of them and have them shipped here. Shipping was done via FedEx and took LESS than a week! They arrived in nicely packaged boxes, and they sent me 5M of OAT probe length so that I could run the probes out under the wing like I did with my other probes. They come with a nice little manual, although you will probably want to use the .pdf version. The only accessories I had to order was some 3/16" Tygon tubing (5mm) because I did not own any, and some adapters and T's to connect it all. My RV10 has mostly 1/4" tubing in it, so I needed reducing T's there, and my RV-14 has convenient 1/8" tubing right near my engine monitor to tap into, so I needed inline adapters to upsize it to 3/16". Retrofitting into my RV10 took only about 1.5 hours, plus another 2 hours to run the OAT probe wire through the fuselage. Installation into my RV14 was slightly longer because the OAT probe took more time to run, and I had to cut the hole in the panel for the unit. This does not take into account making the install templates that I used to drill my holes without wrecking the panel paint. Here I'll go thru some of the install and hole cutting, and then talk more about how it works. First of all if you watch the video above, you can see the hole saw I used. I went round and round about using a knockout punch, or hole saw, and settled on this hole saw by Morse. It is the Morse CTS36 - 166300 holes aw for 21-1/4" or 57mm diameter holes. I picked up mine on Amazon because I was impatient. It's a carbide tipped saw and it did a great job not wrecking my panel. The first step I did was download off the internet a nice template (the paper thing you see below) for these 2.25" holes. I printed it to true size, and then measured that to ensure it was accurate. I found an old PC and chopped out (very crudely I may add) a couple pieces of heavy steel sheet metal from the side cover. My goal was to make a drill guide so that this hole saw could not chatter. I actually made 2 of them, for 2 purposes. First, I used a center punch and made one guide that only had the 4 drilled screw holes plus a hole in the center for centering the hole saw. Then after I verified that template, I used that template to cut the 5 holes into a second scrap of steel and test drill the actual center 2.25" hole. Then I verified that this new template fit on a 2.25" instrument where all the screw holes would line up. It did. Time to do it for real now. With another paper template, I carefully taped the paper template onto my panel and covered it with clear packaging tape. I made sure it was aligned horizontally and vertically and level with the panel. Then I drilled one corner hole and cleco'd it in place, and drilled the other 4 holes making sure to align them with the paper template marks. After that was done, I drilled the center hole. I now had 5 #40 holes in the panel. I removed the first template and installed the template with the hole cut out of the center. I wanted to use this steel template just to ensure my saw could no jump out and tear up the panel outside of the hole area. There is a pilot tip to the drill of the hole saw, and I used a uni-bit to enlarge the center hole to the pilot size. |
|||
 |
 |
 |
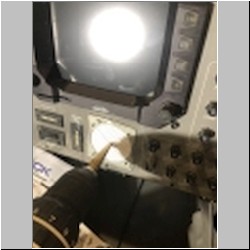 |
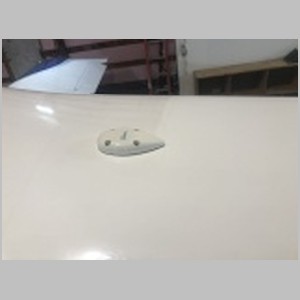
Now it was finally time for the hole saw to do it's work. Take a look at that first pic below. That's one badass looking hole saw! It took barely any time for those carbide teeth to eat through my aluminum panel, and it did a real nice clean sharp job of it. At that point I took a q-tip with black paint on it and painted the inside edge of the hole, just to give it some protection and prevent it from being shiny silver...even if it wouldn't ever show. All that was left was to enlarge the screw holes to the proper size. Be aware that the screws included are metric. They were nice button head screws, but my panel is done in socket head cap screws, so I bought some metric cap screws in stead. DO NOT get screws that are too long, because if you screw a screw that is too long into the unit, it will hit the LCD inside and crack it, FOR SURE. If you buy screws the same length as the ones they provide, you are fine. |
|||
 |
 |
 |
 |
 |
 |
 |
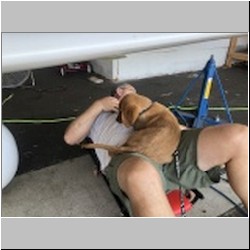 |
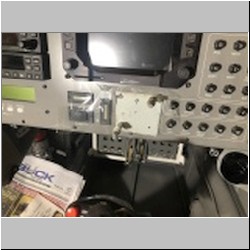
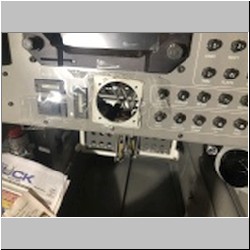
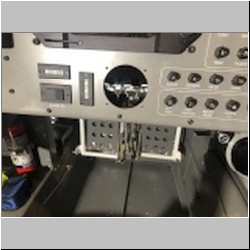
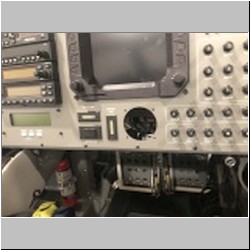
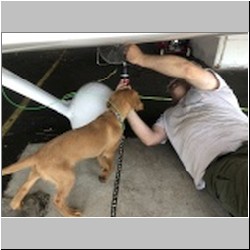
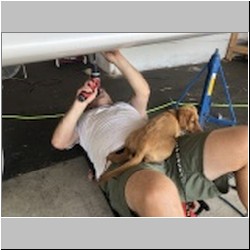
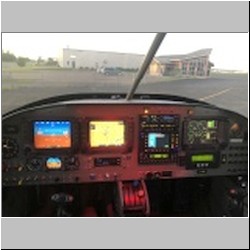
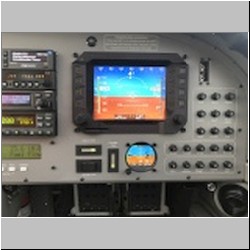
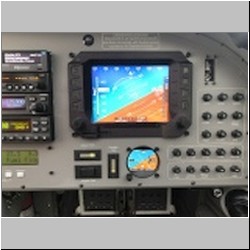
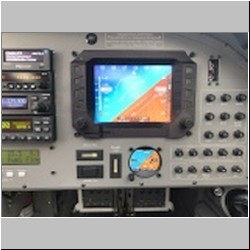
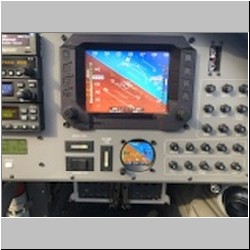
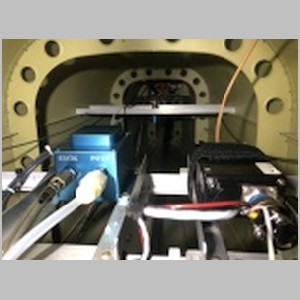
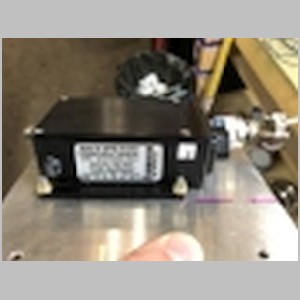
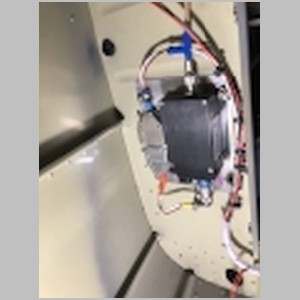
With the hole drilled, it was time to throw in the EFIS and start wiring it up. The worst part about the job was running the OAT probe wire. It's a fairly thick wire, and has a long way to go. You can see that I had my new helper dog, Bernoulli, giving me a real hand. He was born 4/10/18 and we are hoping en ends up loving aviation as much as his name would suggest. Below you can see some photos taken at various times, of the instrument in my RV14 and my RV10. |
|||
 |
 |
 |
 |
 |
 |
 |
 |
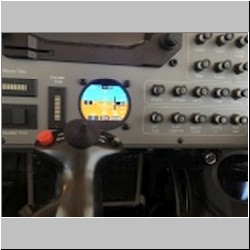
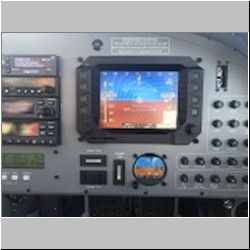
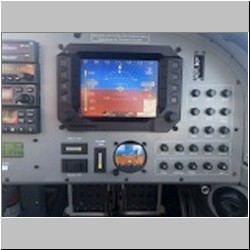
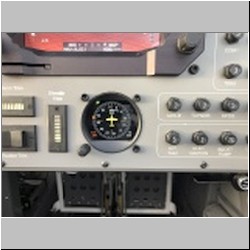
And here below you can see the G-Meter function and the Direction indicator function. The G-Meter is fully configurable. I didn't add a "red" zone to mine, because I don't ever intend to see the G-Limits on either airplane. |
|||
 |
 |
 |
|
Here's a quick video of the RV-10
install, on it's first test flight.
Ok, so now I've explained how I ordered the unit, and how I cut the hole in the panel, and how I got it installed, how did it perform? With 2 of these units ordered, I would be out a couple grand if I didn't like these boxes. After powering them on though, it really looked like things would work out. Once I set the altimeter, it matched my other systems very well, and as I would find in flight, my airspeed was also very close to my other instruments. It may actually even be more accurate, as calibrated. I really wanted to know though, could I trust this thing in IMC. So for that, I wanted to subject it to something a little more harsh, and I had JUST the airplane to do it in. I pulled N14YT out of the hangar and fired it up and headed out to the open fields for some aerobatics. Once at altitude, I started some turns, steep turns, changing direction after each one, then added rolls, loops, half cuban eights, and wingovers among other things. While the attitude indication slightly lagged that of my Chelton EFIS, it was having no problem keeping accuracy to the level it would take to fly out of any unusual attitude in IMC. The setup menu actually has quite a few options in it, and inside you can adjust many things from leveling the AHRS, to setting the sensitivity. There are actually 5 setting levels for how responsive you want the AHRS to be, and the default is right in the middle. I decided to just leave it there, because I didn't NEED it to track the Chelton perfect. I would rather have the most stability and reliable operation, not the highest roll rate. As I got done with my flight test, I was thoroughly impressed...enough so that I decided I just HAD to do this write-up and take these videos to post for other builders. It's a really decent instrument, and I know Kanardia would love to be selling in the U.S. market, and I would love to help that happen. Not because there's anything in it for me (there isn't...this is all 100% un-reimbursed), but because when I find a good company selling a good product, I like to make sure my fellow builders know about it. If you become interested in this Kanardia HORIS EFIS, my suggestion is this: First, call Stein directly at SteinAir and ask him if he's a distributor for them yet. If so, that would make it more convenient for you to purchase from a payment perspective. Heck, maybe some day he'll even have one in stock. But if he is not selling them, just email them directly and tell them what you're looking for. You won't be disappointed. |
|||
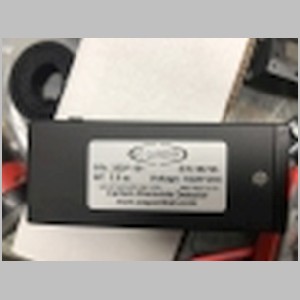
CO Guardian Upgrade / Refresh
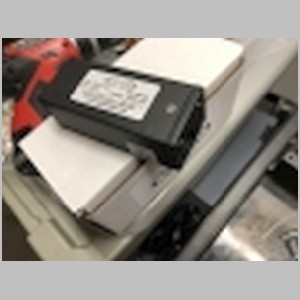
It has been 12 years since I started flying RV10 N104CD, and that is way too long for a CO detector to go un-serviced. One thing that I had found when buying the same CO Guardian for my RV-14 is that it now came with audio panel integration, which came in handy for me when I had an exhaust crack. I had an alert in my headset as soon as there was CO in the cockpit. I wanted to upgrade my existing RV-10 unit to the same technology. It was a similar part number, as mine was a 353P series in the RV10 that had pressure monitoring (It warns you when you're over 10,000' to make sure you use O2), but now the unit comes with audio too. So I paid a small upgrade fee in addition to the normal fee they have for swapping systems for sensor replacement. You can either send yours in and have the sensor replaced and the unit calibrated, or you can get an advance replacement. I chose the latter.
Installation was simple, because the plug was basically the same, but I had to add one more wire and then take it up to one of the unswitched inputs on my audio panel. I found that all of my unswitched were used, so I removed my transponder from the unswitched input, and put the CO monitor there instead, and moved my Transponder to the DME input, which I can just always leave on.
 |
 |
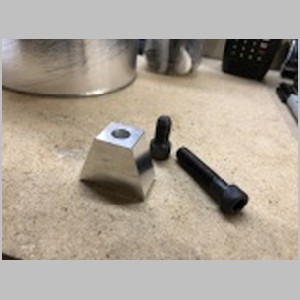
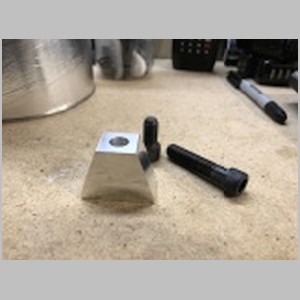
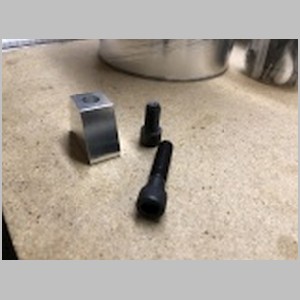
U-1024 Nose Wheel Spacers
Here's a sad one for you. One day, while pulling my nose fairing on the RV-10, I obviously didn't tighten the capscrew on the U-1024 tight enough, and lost my nose wheel spacer. Now it's a pretty basic part, with not much in the way of close tolerances if you need to make your own. Heck, you could probably makeshift one by using a stack of washers if you were stuck somewhere. But I wanted a nice nose spacer and I didn't have time to make one. I'd have to go out and buy some AL, then cut it all up, file it down, and drill it out. I decided to just yell "uncle" and give up this time, and I called my friend Steve at Aircraft Specialty. They
have these cut and in stock, ready to go, so all it took was an order, and time for USPS to show up. Check out how nice they are!
 |
 |
 |
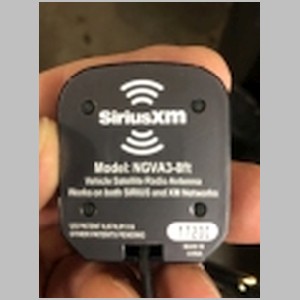
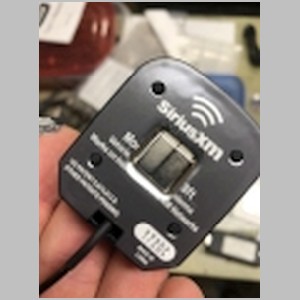
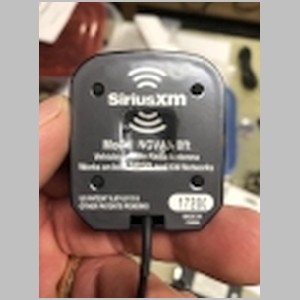
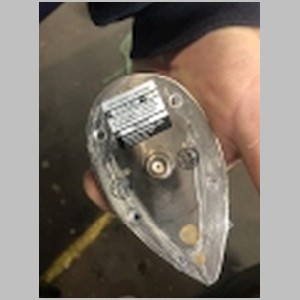
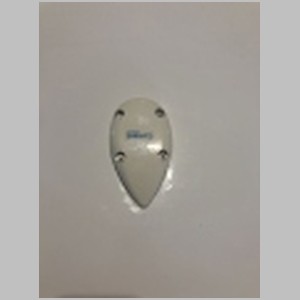
Sirius XM Antenna Magnets
I can't remember if I even did a write-up of when I installed my SXAR1 Sirius XM Satellite receiver in the RV14 and RV10, but if I did one, this should go with that. The receiver works pretty great, and I put external GPS and XM antennas on the glareshield of both planes. But, what bothers me about these antennas is that when you buy them, they come with magnets in them. Magnets and airplanes don't go together, because good magnetometers are very sensitive and the last thing you need is a magnet in your plane throwing off your magnetometer or compass. Plus it just adds weight. So, I took some pics but I was easily able to extract the magnets from both the garmin GPS antenna and the Sirius XM antenna.
 |
 |
 |
Chelton Beta 3 GPS
Why is the ugly bald dude smiling you ask? Because as he was going to install his 2 WAAS Beta 3 GPS's into his planes, he found that he misplaced the antenna that he bought 2 years ago, and after multiple thorough searches of house and hangar, he found it just an hour before he was going to give up and buy another one for $500-700! I didn't find any gasket with it, so I made my own. The antennas required for these GPS's aren't your normal antennas. Beta 3 requires TSO C-190 antennas. I take my navigational accuracy to heart and bought 2 of them, one for each airplane. These are basically similar to a Freeflight 1201 GPS, only smaller, and faster, and certified to be more accurate than those. Again, it was something I had been wanting to do for years, but once I got the second unit so I could do both airplanes at once, I jumped on it.
 |
 |
 |
 |
 |
 |
 |
 |
 |
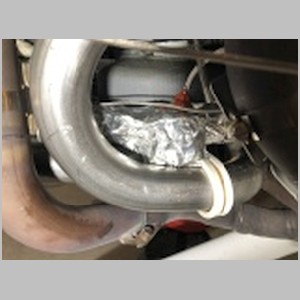
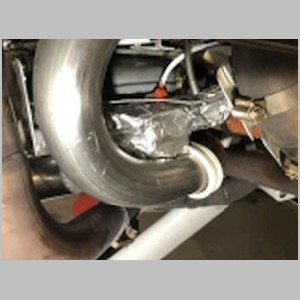
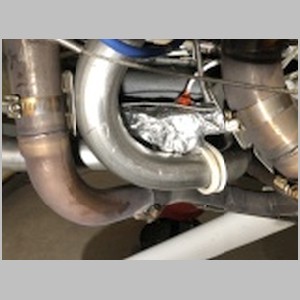
Fuel Transducer Heat Protection
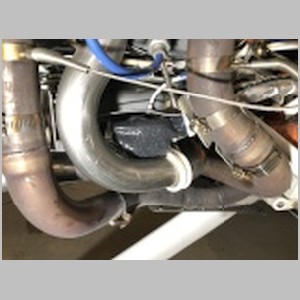
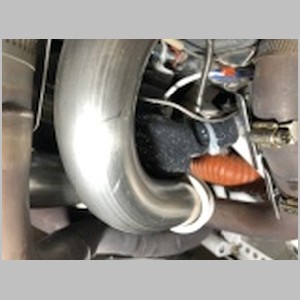
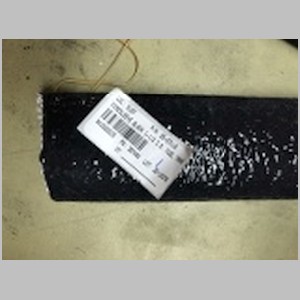
This quickie was one I did on the RV-14 only. My RV-10 has the transducer in the tunnel where it isn't extremely close to exhaust. The RV-14 uses a Red cube transducer, and during my initial install, I covered it with silver stainless steel tape, to reflect away heat. I had recently heard of someone who had charred their wiring on their unit, due to close exhaust proximity, and although I never had that issue, I decided I could do better than just foil keeping it away. You probably already saw that I did small heat shields on my exhaust pipes right next to the transducer, but this would provide more protection. I purchased some firesleeve sold by Aircraft Spruce under p/n 05-07119 Firesleeve Black 1-1/2 I.D. After removing all my silver foil, I slit this in a couple places and wrapped it around my transducer, then covered it back up with silver foil. This should give it even better protection.
 |
 |
 |
 |
 |
 |
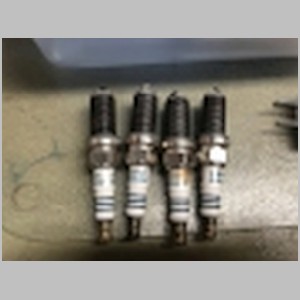
Spark Plug Time for N14YT
With 200 hours on these iridium plugs, it was time for new ones. Just took some pics to show how they looked.
 |
 |
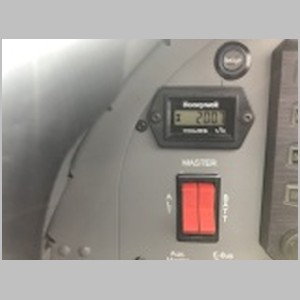 |
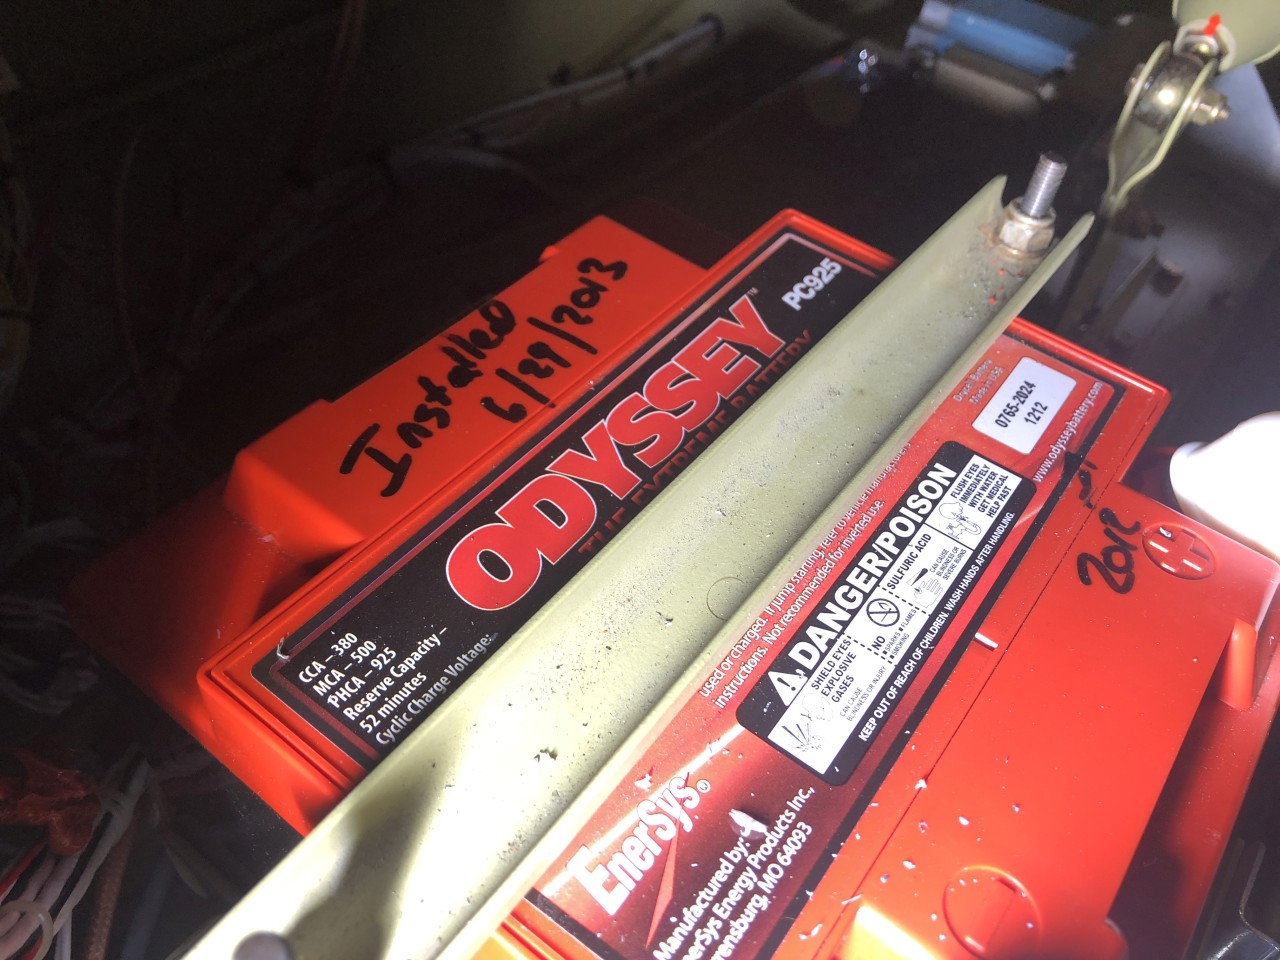
Battery Time for N104CD
Having been 5 years now on my Odyssey PC925, and with a Bahamas trip coming up, I decided it was time to replace the battery just for the heck of it. I'm not yet ready to go Lithium, but that just means that battery replacements don't cost me an arm and a leg. Besides, I'm nearing time when we'll have fewer full family flights, so we won't need the weight capacity. I did the Aux batteries at the same time.
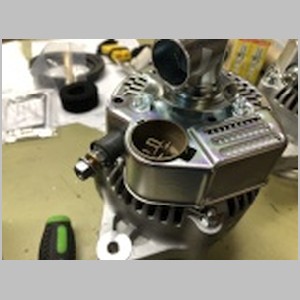
N104CD Gets a New Alternator
In addition to all new batteries in N104CD, with a Bahamas trip coming up, and probably 900-1000 hours on my alternator, I decided to splurge and replace it right now. I don't want to wait for things to fail, and replacing it now means I will have a shelf spare for when I do have an unexpected failure. I took some photos to compare. The original had the overvoltage module externally attached. The new ones aren't built the same way, despite all the similarities. P/N difference is due to the new one being an "alternator only" version, rather than a kit with boss mount.
 |
 |
 |
 |
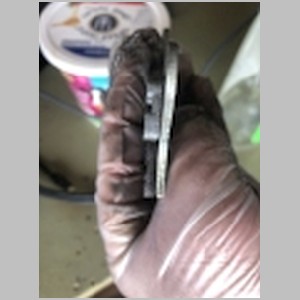
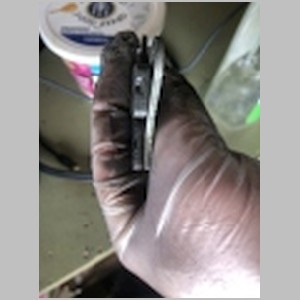
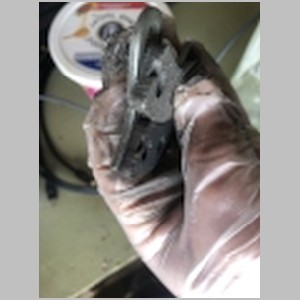
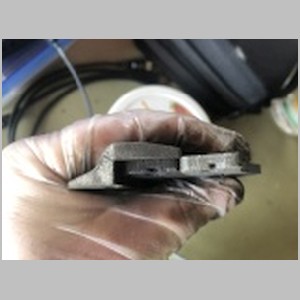
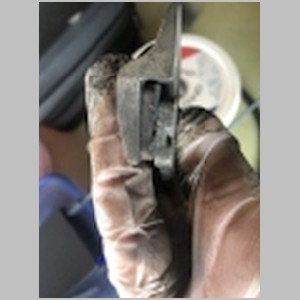
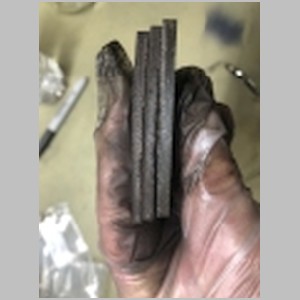
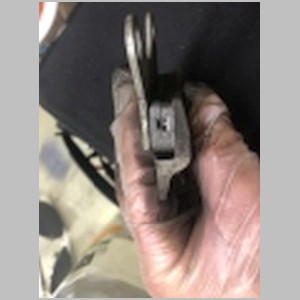
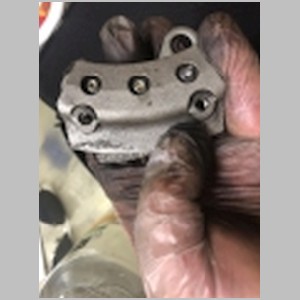
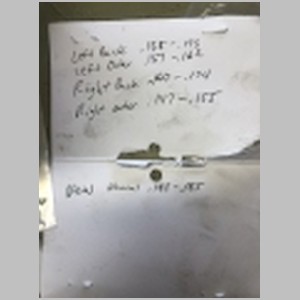
N14YT (and N104CD) get new Brakes
Again, with a Bahamas trip in front of us in June, it was time to go through the airplanes and look for anything that could go wrong, and deal with it now. These brake linings were just fine on the RV14, but if I left them for the entire summer, I'd probably be wearing too thin. So rather than delay, I replaced them. Did the same on N104CD, but those were worn further. I love it when I catch things before they are a problem...hate it when it goes the other way.
 |
 |
 |
 |
 |
 |
 |
 |
 |
 |
 |
 |
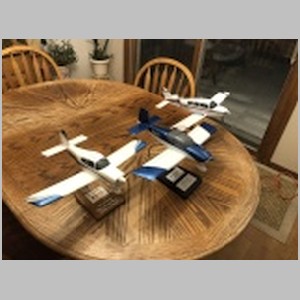
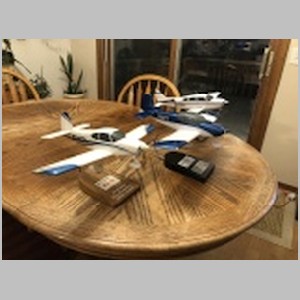
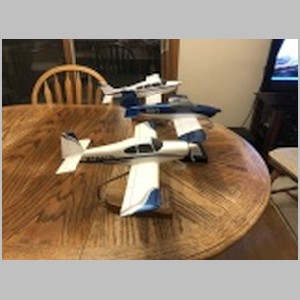
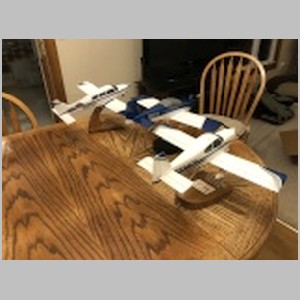
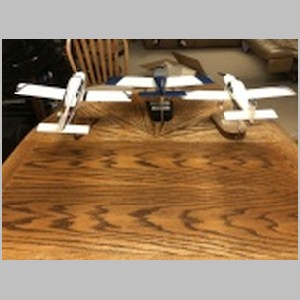
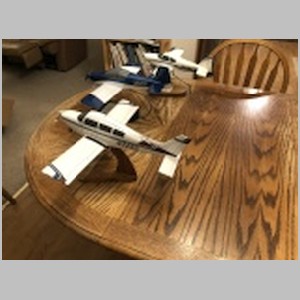
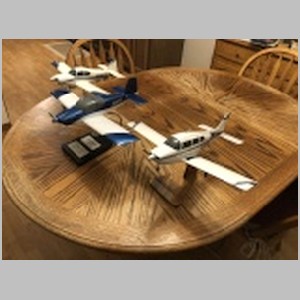
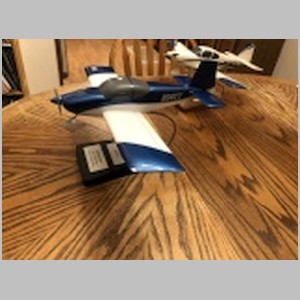
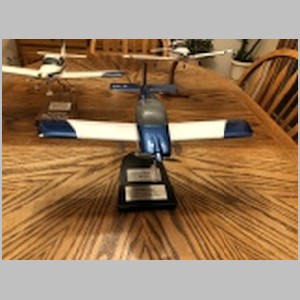
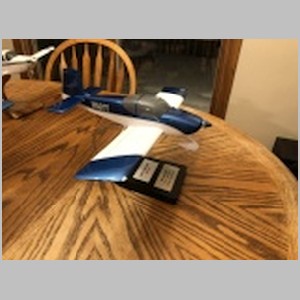
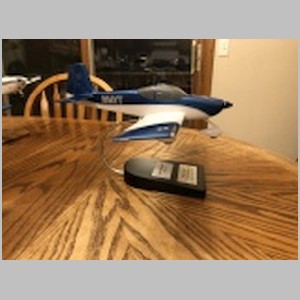
Late Christmas Finally Arrives!
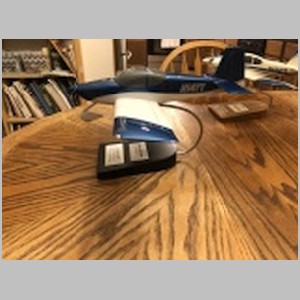
As you can tell by looking out the back window, there was at least still snow on the ground when my Christmas present arrived! One of my favorite things I got, when I finished the RV-10, was a wooden carved and painted model of N104CD. I also had one of my first airplane, a Beech Sundowner. For Christmas this year, I received one of N14YT as well. No, none of these are painted perfectly...not sure why they can't keep things straight, like the baggage door on the wrong side of the RV-10, or the non-curved wing paint on the RV-14, but they're close enough, and the colors are nearly dead on. Anyway, I hope to get one of these for every airplane I own. Hopefully after my lottery ticket cashes in, that will mean I'll be adding the following: A Breezy, a Beaver on Floats, A Falcon Jet, a Bush Plane, and maybe a Beech Baron. :)
|
|
|
|
|
|
|
|
|
|
|
|
Well this has been a pretty long update, since I let too many things go for too long. But, I hope you enjoyed it.
Site Home | N104CD Home | MyRV14.com Home