Rudder Pedal Blocks
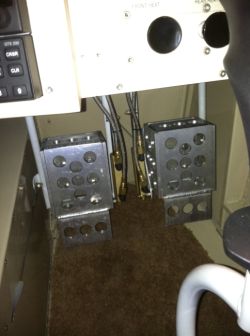
Added 5/3/2009 - Updated 3/7/2011 - Major Update 6/25/2017In the RV-10, the builder has the choice on where to mount the rudder pedals. Being over 6'1", I decided I wanted mine in the forward position. I have found this to be great for me in the airplane. You can see the sort 2" or so link in the rudder pedal cable on the Left side of the photo below. If you mount the pedals aft, you just don't use that link. I like the pedals forward because:
- A) it keeps the CG more forward in the plane, and if you've read my site elsewhere, you know that I think the RV-10 is NOT noseheavy in a way that would make you want to intentionally move the CG aft in most installs.
- B) It keeps me a little closer to the panel with my seat adjusted where I reach the pedals. The panel reach is comfortable, but I don't want to be further back than necessary.
- C) It also gives my rear seat passengers just that little bit more legroom because my seat is a couple inches further forward than it otherwise would be.
I thought about it hard for a while, and went through many iterations of aluminum machined things in my head. Yes, there are ways to make it prettier. But no, for right now, I am not going to put that much time and effort into this. In the end, I found a plenty workable solution that will allow us to go forward for a while.
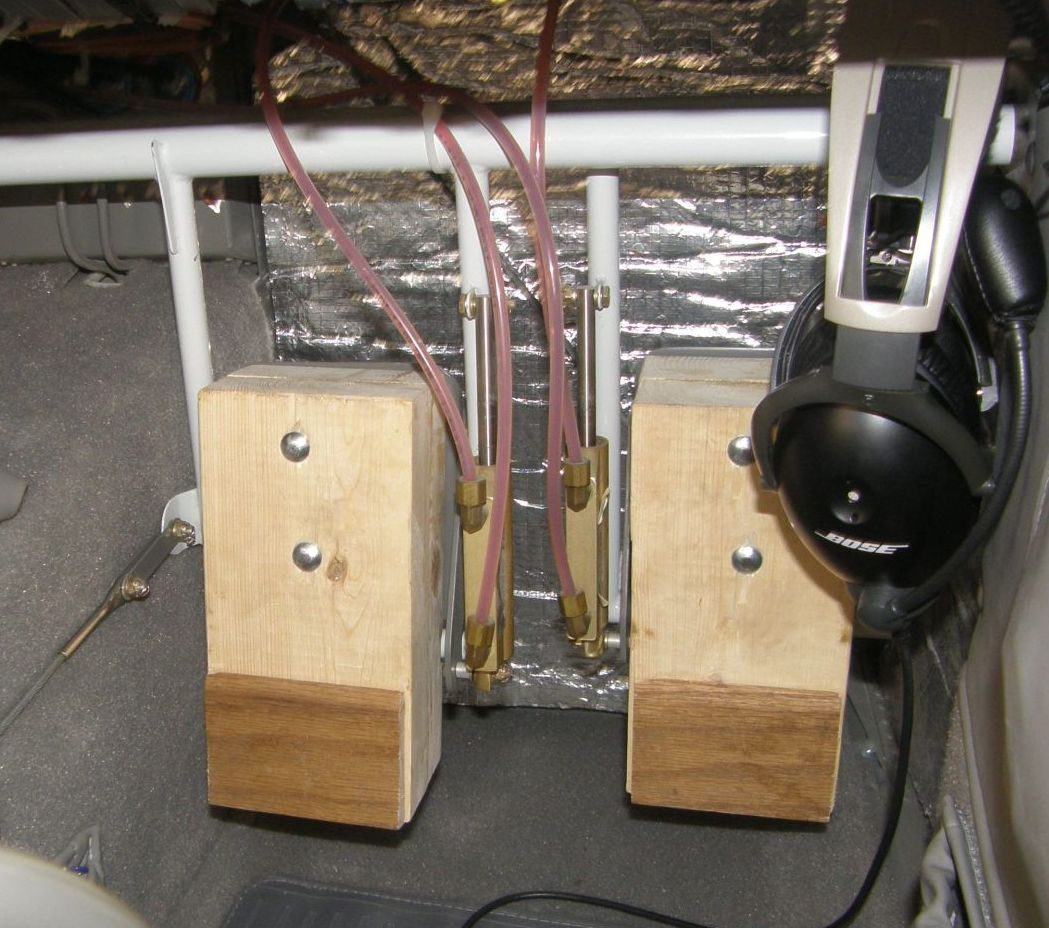
A basic description is this: The blocks are 2 pieces of 2x6, glued together solid, and then cut down to 4.25" wide by about 8.5" long. A couple inches from the bottom side on the back, I have routed a slight 1/4" deep concave line across them. This concave fits over the bottom bar on the pedals, otherwise the block wouldn't sit flat on the pedal and would pinch at that pivot point. This keeps the blocks completely attached to the pedals, and NOT the bars surrounding the pedals. At the bottom of the face of the blocks is a piece of trim moulding, to raise out the pedal on those bottom couple of inches. If you push on that area, the pedal would be assisted to retract the brakes, so you get rudder action only. It also helped lower the pedals to the floor for her stubby little feet. You probably remember that the standard pedals have a series of lightning holes in them. That is how the bolts secure. On 2 of the holes I have long carriage bolts going through the blocks, and out the back side of the pedals. On the back side of the pedal are 2 large flat washers, with a felt anti-skid chair leg pad stuck on them, to keep from scratching the pedal. This holds them securely against the pedals themseles. To prevent the blocks from twisting and moving around, potentially jamming up something, I have drilled holes in the back side of the blocks with a 3/4" bit, and glued in stubs of 3/4" dowels that stick out and through the other lightning holes on the aluminum pedal. This means it can't slide up/down/left/right and jam into anything else. The dowels are an important part...you do NOT want to worry about jammed pedals or brakes. With these it's just plain not gonna happen.
Updated 3/7/2011
In the end, they functions fine and have been in use for coming up on a year now with no issues. I had intended to make them prettier, and remake them out of Aluminum or maybe remake them real nice out of wood some day, but these things are functioning fine and so there really wasn't any need to improve them for us. I just pulled them this weekend and drilled the lightening holes in the back of them (top half only), so that I could reduce the weight a little. They now weigh something near 2.5lbs for the pair....not significant. I did not drill out the bottom part that hangs below the bar on the rudder pedals, for this reason: The weight hanging down low in that position will tend to DE-activate the brakes. It isn't anything really necessary, but I figured I should do anything I could to make sure that the blocks didn't cause a tendency to apply the brakes (they didn't before), but that by leaving the bottom heavier, it would assist in brake deactivation. No, these aren't the prettiest things out there, but they are plenty functional!
So if you are in a bind for the rare but there "vertically challenged" pilot friend, this may be a solution you could try.
6/25/2017 Update: If you've gotten this far, just jump ahead now to THIS PAGE on My RV-14 site for some better rudder pedal info. The rest of this page is now irrelevant.
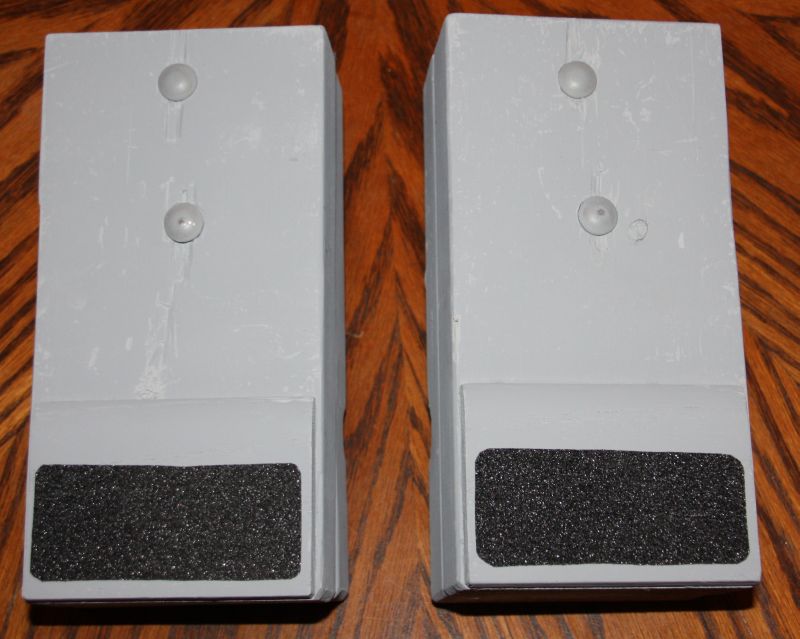
Pedal blocks - Front View - with Anti-Skid tape
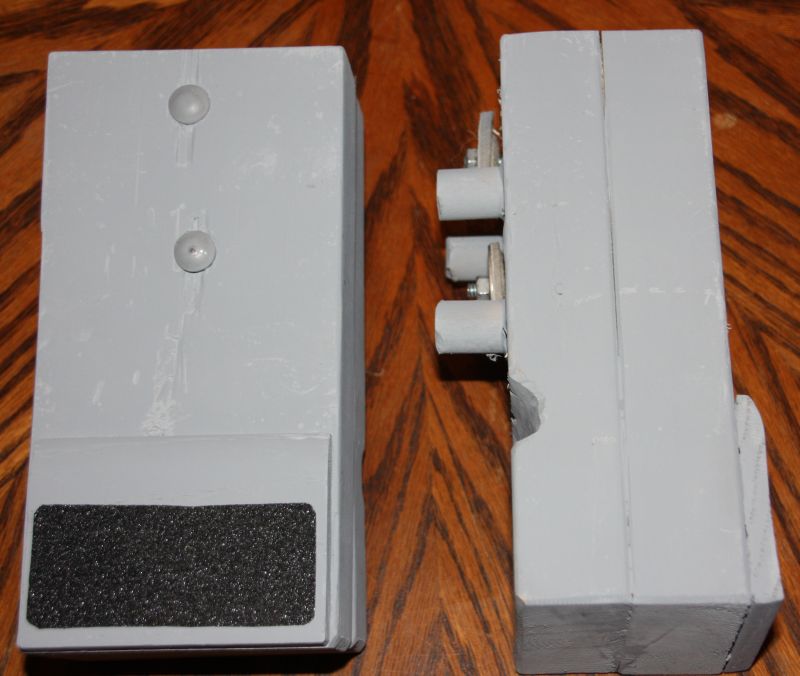
Pedal blocks - Side View - You can see the wood dowels and washers
Pedal blocks - Back View View - Note the wooden dowels, and the holes to lighten the blocks
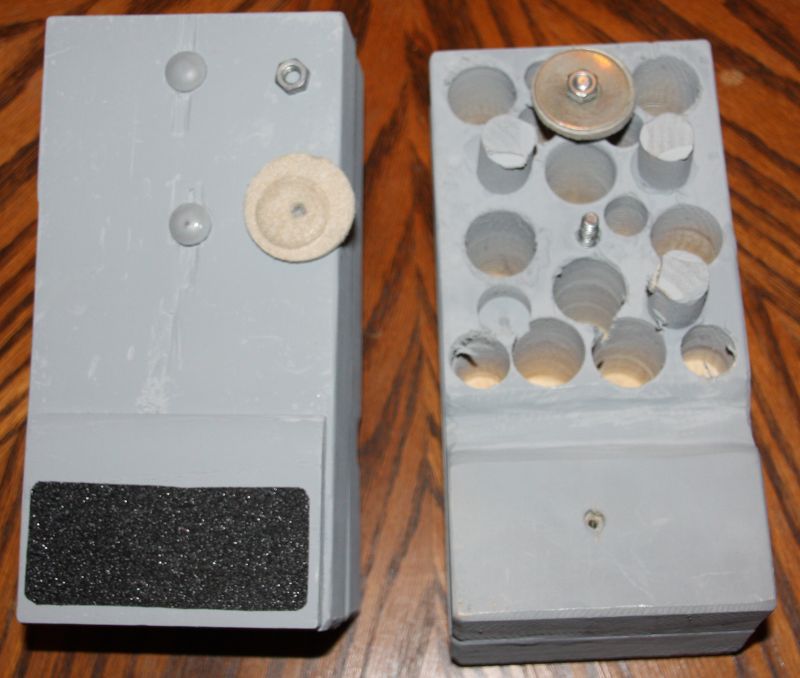
This is a pre-paint view
Here is a pair by Alan, another RV-10 guy...his are made out of 1/4" aluminum