RV-10 Axle Extension Replacement
Added 1/18/2007 - 192 Flying HoursPage updated 2/9/2007 after Completed
Updated 3/15/2007
Recently on the 2 main forums, we've seen threads about a couple people who have had their axle extensions break at the AN4-6A bolt. The extension holds the outer side of the wheel fairings on to the axle, while the inner side is well supported by a backing plate on the wheel area. I haven't had any problem with mine, with 190 hours of flying, but I've been mainly landing on pretty good condition landing strips. Only landing a dozen or so times in grass. The ones that broke were often used on grass or rougher asphalt strips. Still, considering that there should be no real downside to this modification other than cost, time, and effort, it's probably a worthwhile thing for most builders. The time lost to repairing the damage done to or from a broken wheel fairing can be miserable.
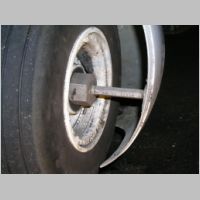
The problem, in more detail: The stem lays against the large flat washer, that protects the axle nut from rubbing by the stem. With such a narrow base, and flats on that base, the shaft can rock back and flex slightly, putting a large bending load on the threaded area of the AN4-6A bolt.
The solution, in more detail: To fix this, you can use a heavier bolt, but you can also eliminate the bending by using a stem with a much wider base area, which is the common theme to the fixes listed below. I'll comment more on the fix below.
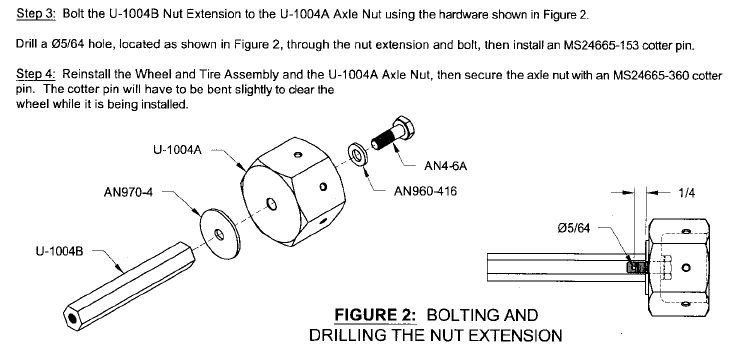
This is the original plans area for the construction of that stem
page 46-5 figure 2
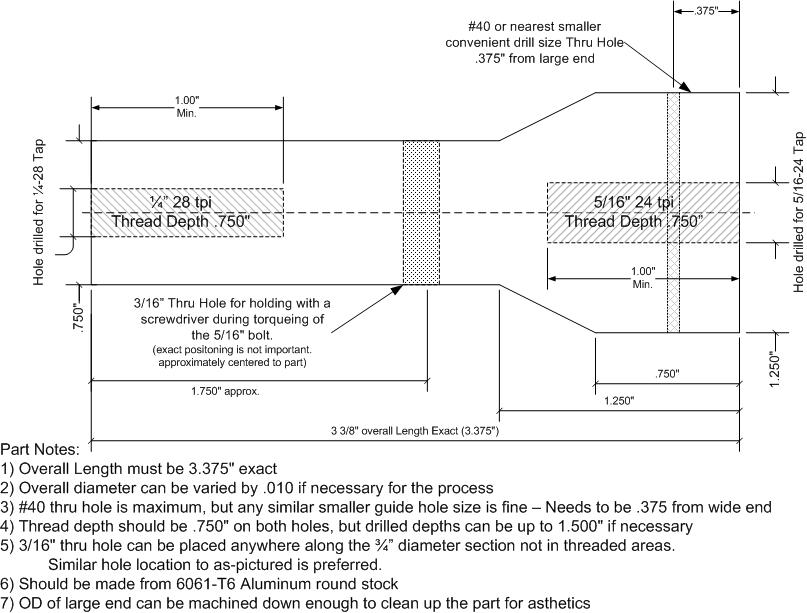
Here is a drawing of the replacement stem that I had made up for my plane.
Drawing Revised 1/20/2007 to remove previous .25" counterbore hole, and lengthen overall length by 1/16" to eliminate need for large flat washer under the fat end of the assembly, and added notation changes for thread depth. Revised 1/28/2007 to reduce thru hole to 3/16" on suggestion from the friend who made them. Also changed minimum thread depth to 3/4" for both ends. I've been told that this alternative design, slightly less smooth looking than my Rev. 1 Drawing of the taper area would save some work for the smaller machinists by allowing the use of a bit on the lathe that could cut a 45 degree taper easily. It adds a little more thick area too, but that strength isn't necessary...but it does allow the threaded hole inside more room from the outer edge of the shaft to keep some wall thickness there. Revised 1/31/2007: Labeling and moved #40 screw hole further from fat end.
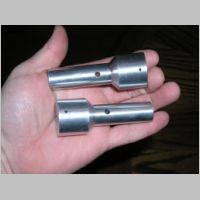
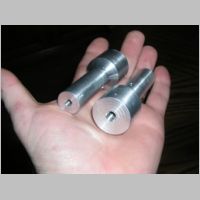
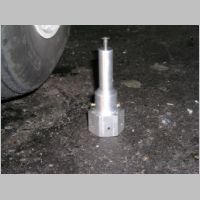
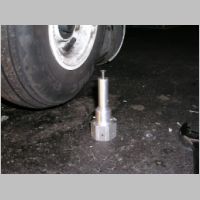
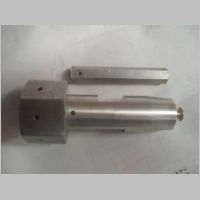
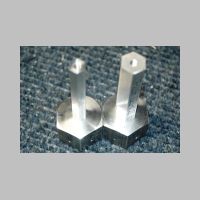
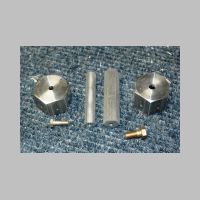
Here are my completed parts. This was a one-off made for me to the drawing above, by a friend. They look great to me.
|
|
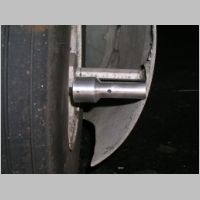
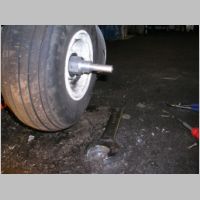
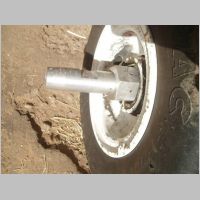
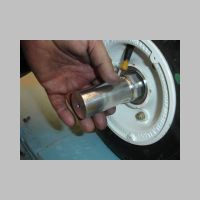
Installation of new extensions
Today, 1/28/07, I got the extensions installed.
|
|
|
|
| It's easy to see when you
compare them the smaller thickness of the original part, that can lead
to flexing and stressing the AN4 bolt that holds it together. The new part uses a thicker AN5-6A bolt and AN960-516 washer, and has the same overall length as the original shaft plus the large flat washer between it and the axle nut. I also installed MS24693C298 1" philips stainless machine screws instead of the 3/4" originals, and used blue loctite, as I've had them rotate out and almost come off before. You still need the washer that gets epoxied to the fairing. |
|||
|
|
|
|
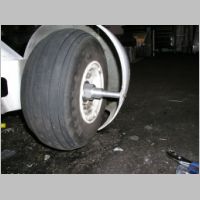
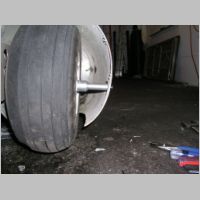
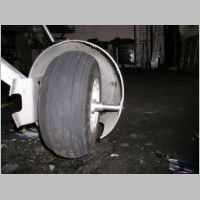
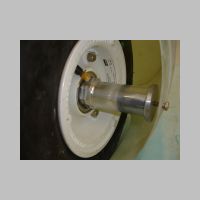
| Looking at the photos you
can see the length was an exact fit. It turned out perfectly.
I also installed brand new MS24665-292 (thin) and MS24665-362 (thick) cotter pins for both the axle nut and to pin the extension to the drilled #40 hole in the AN5 bolt. Installation was perfect, and required about 1.5 hours of time including the removal of the wheel fairings which is the longest part of the job. |
|||
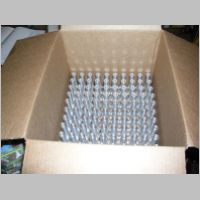
Packing up the parts for the cost-sharing group purchase
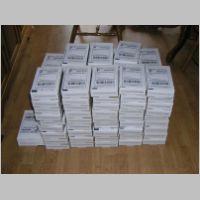
Well after only about a week from the cutoff of the signup for the axle extension list...the one that I originally figured maybe 10 or 20 people would get on, to have a cost-sharing small production run of extensions made, I picked up my first load of 198 extensions. They're still working on the rest of them which will be only a couple more business days away. They're making a total of 336 parts, which will be the exact number required to satisfy the current and final list.
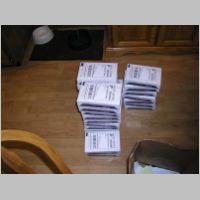
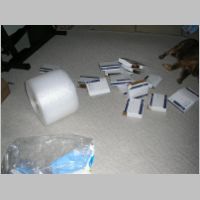
Before I even got home, I had my slave labor working on getting the boxes made. You can tell that the kids were working diligently, but that ol' dog was looking pretty lazy. Shown here are some photos of the finished product, which looked fantastic, and my first night's packing and shipping job. There are 194 parts going out today (2/9/07).

|

|

|

|
|
|
|
|
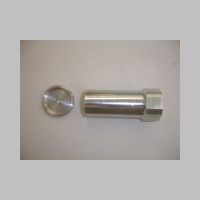
This is the part made for Russ Daves. It is available for sale for those interested in a turnkey product.
Here's is one of Russ's posts from the forum:
"Dr. Linnard Griffin has agreed to build additional Wheel Pant Spacer Extension, like the ones he build for my RV-10 (See previous post and pictures), for the price of $125.00 per set including shipping in the US.
It you decide to place an order send me an e-mail at dav1111 at cox.net, and advise me as to the status of your build so that I can have Dr. Griffin ship such spacers out to the builders who are closest to being ready to fly. There are currently 13 other builders interested in the spacers."
|
|
Here is another design posted by Zack #40512 on the RV-10 Matronics List
contact info updated 2/2/07
(My Note: This option may be perfect for a builder who has not yet done the fairings, as it would be light, and strong. For people who have fairings done though, and have glassed in their outer washer already, it may be tougher to retrofit without a little added work.)
Here is Zack's post:
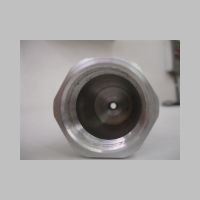
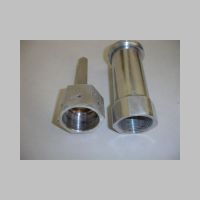
" Here is another solution to the Axle Extenders for the wheelpants on the RV10. Since the Vans supplied extenders are having problems in the field, my brother Jim (who is an engineer) came up with a solution. The pics below show his design. The axle extender rod is hollow in the center. This setup is lighter, thats right, lighter in weight than Van's nut and bolt on extender. It doesn't look like it in the pics, but it is! And it's stronger too! The one piece billet axle rod screws onto the axle. The Capture washer was machine to fit exactly on the axle rod extender and is bonded onto the wheel pant just as Vans has you do with his. The capture washer distributes the loads on the wheelpant with this plug and socket design."
If you want a set, contact Dave Czachorowski at 302-437-6087 or http://www.rivethead-aero.com
|
|
|
|
|
As for my design above, I posted a follow-up post with these comments. Just thinking points if you're considering it.
Also, a couple other things to consider:
#1.
I
had a couple replies on the length. The original was 3-5/16".
The length including the AN970 washer is
3-3/8".
If you still want to use the washer, you'll have to grind the extension down by 1/16".
#2. On the VAF site thread, some people questioned using an AN5 bolt vs. an AN4 bolt. Considering the improvement in the part, I'm sure an AN4 would work, but I am doing it AN5 just for added strength "just because". You probably can't go wrong either way, but other than having to order a proper length AN5, I can't see any reason why not to just go that size. The ONLY thing I can thnk might be an issue is in a drastic event, the AN4 might shear before your wheel nut gets ripped off, whereas the AN5 may crack your wheel nut off and you could lose a tire. But you'd have to take a direct hit on that extension before you'd have a big worry.
#3. As Dan Lloyd pointed out, you don't *need* to taper this thing and make it cone shaped. He used 1" material and just made it straight. So it IS possible to do this very cheap and easy. Those who know me know I didn't care much about weight before, and that still holds true about the couple ounces of extra aluminum. But, I figured the tapered one would look pretty, and be a little lighter too. (Not as light as the hollow one from yesterday though) Either way, there should be plenty of strength in the new part. Also, the taper on mine makes it an easier retrofit on mine, because I have existing epoxy holding the outer washer to the fairing, so I need to stay less than the washer's OD or I may have to grind epoxy. So for the DIY guy, you can go many routes with this part... none of them really wrong, AFAIK.
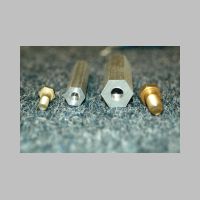
Here's one more option done by an RV-10 builder "Niko". When this part of the kit snuck up on him, he went a different route and got some 3/4" diameter hex from McMaster Carr and used an AN6 bolt on them. While not as wide in the base the those above, it's larger bolt is much stronger and the overall part is many times stronger than the original. Another good option that would save money over some of the other methods. Proving once again that if you're skinning felines, you can use a variety of methods.
|
|
|
For those involved in the group purchase who want to pay their share via paypal, send your payment using this link here: