Service Bulletin SB 14-8-29
Completed 9/6/2014
approx. 1070 hours
This fall thanks to my buddy Vic spotting some light rusty
cracks in his engine mount, Van's found one area of potential
failure for some of the RV-10's out there. It should be
noted that there are now well over 700 RV-10's flying, and many
have accumulated over 1,000 hours and countless landings, so the
fleet is aging and has gained a lot of experience over the
years. That's why it was a bit unusual to find something
that snuck up on everyone. The reason in, the failure is
in an area that wouldn't normally be closely inspected by most
builders for many many years, unless there were a highly obvious
defect. Thanks to Vic's keen eyes though, this one didn't
slip through the cracks. Following the forums, I've found
that there are so far about 3 people that this has affected, so
it's a rare issue, but an important one. It also has only
affected people who flew out of rough grass strips on a normal
basis.
The situation is this:
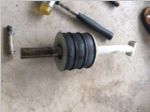
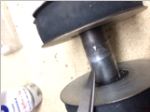
On the engine mount is a metal plate where a stack of 4
elastomeric rubber donunts compress up against. These
donuts also have a bonded on brass plate (it could be aluminum
but I don't think so), on them, that lays flat against the
engine mount, and the bottom of the shaft attaches to the nose
gear leg. When you hit a bump, the forces are transferred up
that shaft to compress those donuts against the engine mount, as
a shock absorber.
Above that metal plate is a circular well surrounding the shaft
that sticks up through the mount. On top of that shaft
sits a big ol' Abraham Lincoln style top-hat piece of metal with
a bolt that goes through it and the shaft to hold it on.
Under that top hat sits 1, 2 or 3 washers, to take up any
looseness in the rubber donuts...it forces the donuts to stay
compressed against the engine mount tightly, even under no
weight load. Over time, these donuts compress...initially
a lot, then less over time. As they compress, you have to
keep adding washers to keep that area tight, or the gear leg can
bounce with no compression on the donuts, causing even more
force to be applied to the face of the plate in the engine
mount. If you let it get loose, you will be at a higher
risk of failing that plate in the mount.
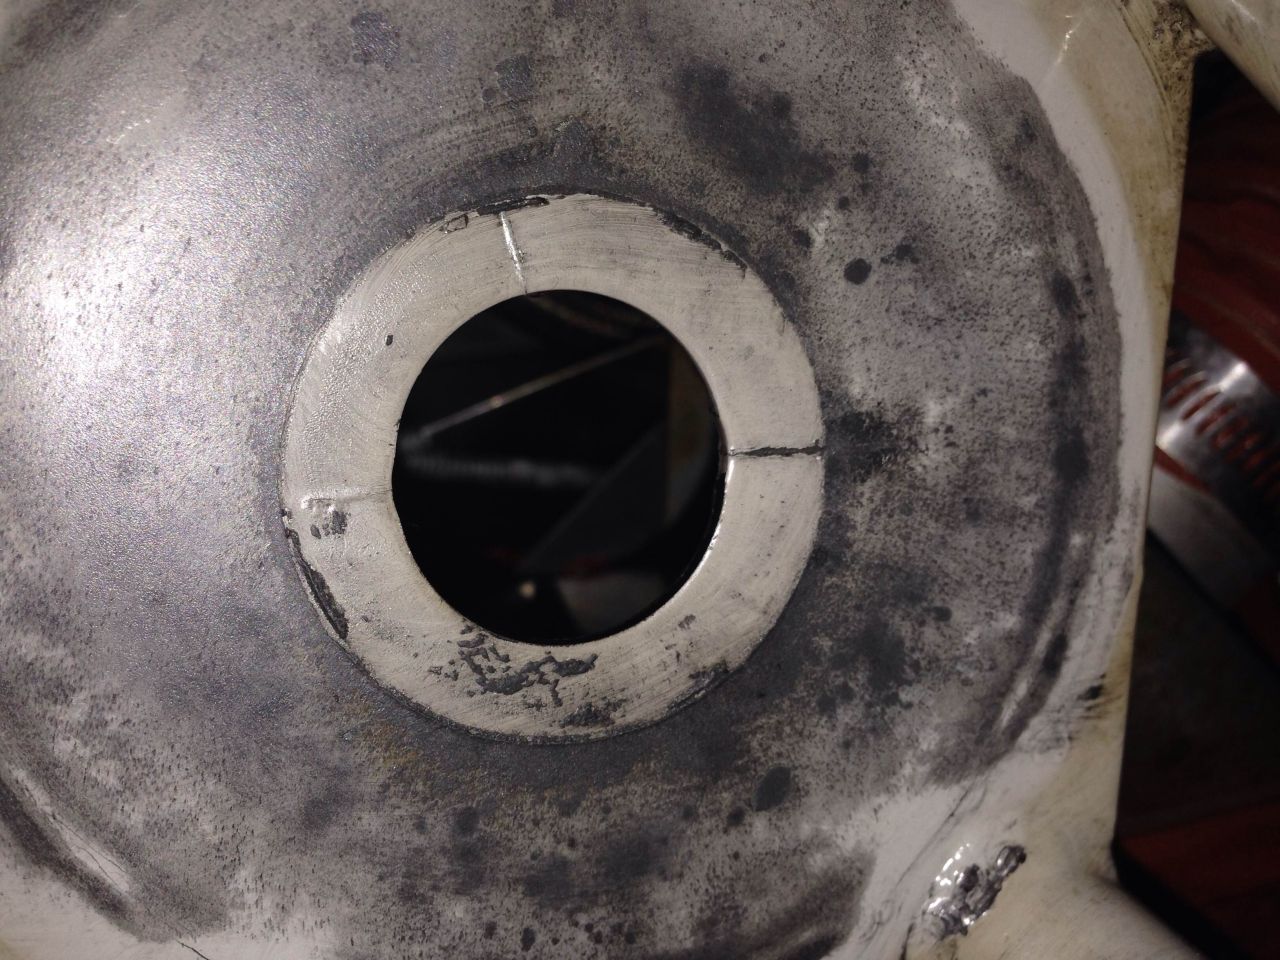
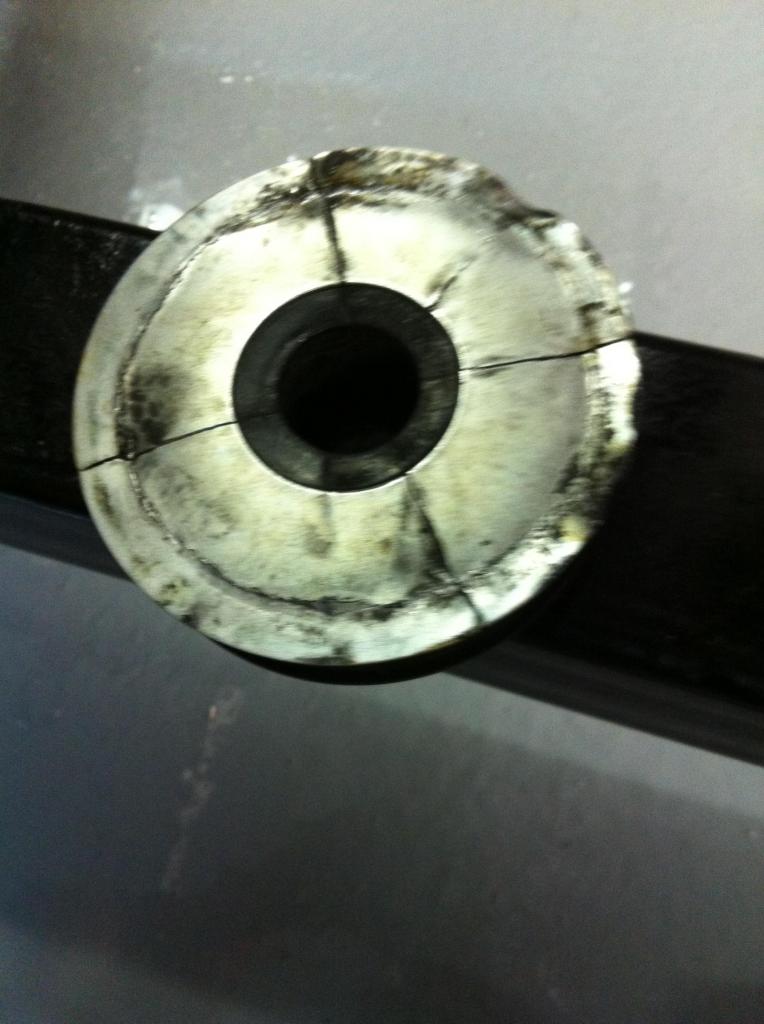
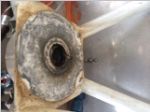
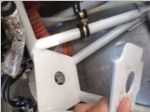
The builders with cracks, had nose gear that had been pushing up so hard with those elastomers, due to rough runway ops, that the plate on the engine mount was flexed upward until cracks radiated out from the center hole...in one case the metal was almost falling out on it's own.
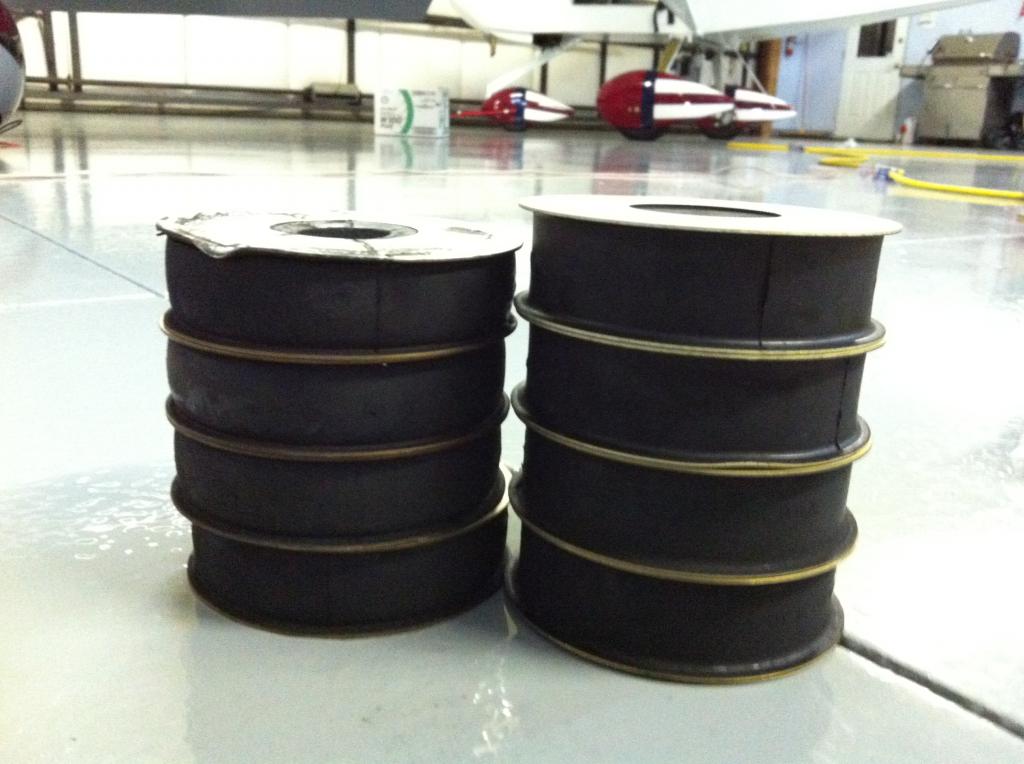
Here are some pictures of the cracking found, and of elastomers
that had compressed quite a bit

Now the issue is bad enough with just cracking, but, if the
pieces of metal get lost from the engine mount plate, that top
hat can pull through, and potentially cause the nose wheel to
swing back under the airframe, which would make for a very noisy
landing!
So, along comes SB 14-8-29 to fix
the issue.
This SB basically has 2 parts to it...one for people with
cracks, and one for people without. New engine mounts
aren't subject to the SB, so they did fix this for future
builders. The crack-fix version has some welding involved
and will take a lot more time. The no-crack version, which
most people will need, is much simpler.
I was lucky that even with 1070 hours, and a bunch (maybe 50 or
so) grass strip landings, with many at near gross wt, I didn't
have the problem. I've also always kept weight off the nosewheel
on landing, and during taxi, so that I'm sure helps too.
 |
 |
 |
 |
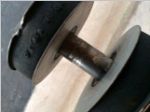
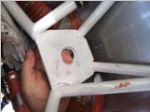
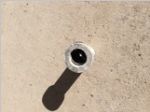
| These are pictures from
mine. The first photo shows the elastomer
plate. This was a poor situation since day
one...those plates interfered with the mount tubes. I
should have ground them back but didn't...I let the plates
deform, but it still scrapes the mount a little.
Bad. You can see the areas where the plate touched
the mount. When I disassembled the top-hat, the
shaft was oily from previous engine oil leaks. The
shaft underneath the donuts was not oily. You do NOT
want oil or grease there...the donuts need to grip the
shaft to provide increased resistance. My plate was
also discolored due to oil leaks, and although the paint
was still somewhat on it, it was wearing thin. For
many people this paint may be worn off already. |
|||
 |
 |
 |
 |
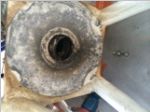
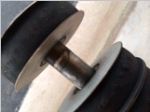
| There is one area I still have
future concerns for. If you look at the shaft after
lifting up one elastomer, there is some slight thinning of
the shaft, right at the top of where the first elastomer
is. This is the area that passes through the hole in
the engine mount. There is of course no bushing or
protection or wear surface that can be replaced, so over
time this shaft will wear and need to be repaired or
replaced. I can't think of a good way to do a field
upgrade to that area to keep it from wearing. With
1000 hours on the shaft though, I'm thinking that perhaps
at every engine overhaul it will be time for a new shaft. |
|||
 |
 |
 |
 |
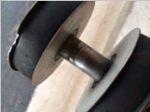
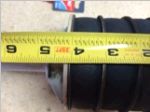
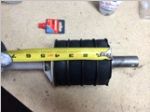
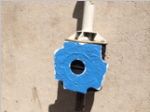
| I measured the elastomers, just
for future reference. I had the "no cracks" fix, so
I installed the doubler plate, which is about TWICE as
thick as the original plate. For that fix, the
doubler just lays up against the existing plate.
They send a roughly accurate cut plate that goes around
the tubes, but I did have to grind a little extra away to
clear some welds so that it would lay perfectly
flat. Van's does not spec anything to hold the plate
in position or keep it from rotating, either. Notice
the hole is a bit larger than the original hole...this
helps make it easier to align. I'm not sure if it's
better or worse from a wear perspective on the tube
passing through the hole. Better that there is less
area to wear against, or worse because the wear will be
more focused on a small area... After grinding
the plate to fit, deburring and painting it, I chose to
put a very thin layer of RTV between the plate and
mount. Proseal would perhaps be a better option but
would be hard to remove later if necessary. It
should not be necessary though. After putting the
RTV'd plate in, I jacked up the tail of the airplane to
give it plenty of down pressure to squeeze out any excess
RTV so there was absolute minimal gap, to keep this plate
tight against the other. The RTV is there to keep
moisture out and keep it from spinning, is all. Then
it was time to lubricate the washers, and tophat and top
of the shaft (especially around that wear area) and
re-install. When re-installing it will take upforce
on the tail, to get the bolt through, if you have proper
preload on the donuts. If it does not take lots of
force, you need to add more washers and try again.
That's it...one less future problem to worry about. |
|||
 |
 |
 |
|