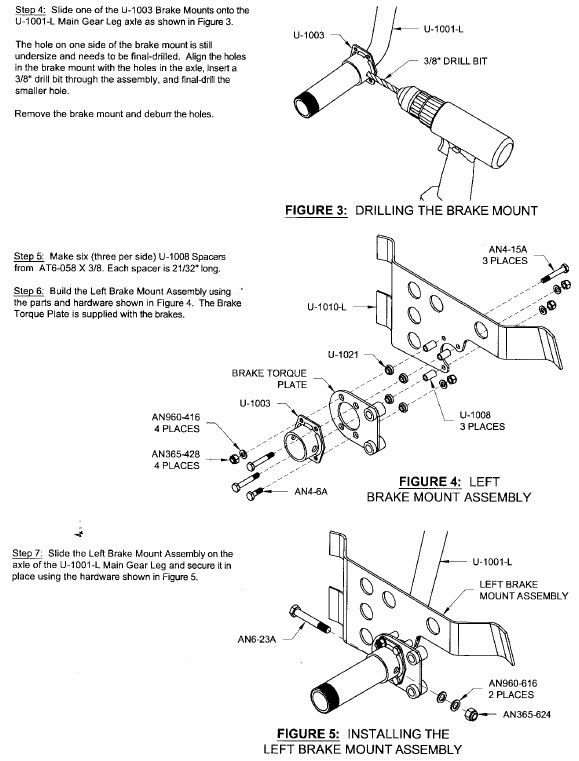
RV-10 Wheel Fairing Mount Repair
Finished 11/7/2010 - 686 hours approx.Updated 11/23/2010
Somewhere in the last 100 or so hours, I've been noticing that my wheel fairings can be rocked up and down between the nose and the tail, rotationally around the axis. You notice it when you are wiping them down and cleaning off the bugs. The fairing kind of clicks up and down, and you feel the looseness and slop in the way that the fairing mounts to the gear leg. If you remember from building the gear legs, brake mounts, and fairing mounts, you mount a cleveland brake mount to the gear leg, and then from that you have some aluminum spacers p/n U-1008 that you fabricate from some aluminum tubing, to a length of 21/32" (.656"). These are 1/4" I.D. and 3/8" O.D. The issue is, with the weight of the entire fairing being held by these 3 spacers stuffed up against the fairing mount U-1010-L (and -R), and also held by the stainless screw on the axle extension, there's a lot of weight rocking around on 3 spacers that have a very short arm from the pivot point. This means that all that rocking will eventually wear those spacers into the aluminum part that holds the fairing...causing damage.
This issue is one that will probably eventually bite every RV-10 builder who doesn't fix the issue before it starts. After doing this work, I believe that this is something that should perhaps be improved in the original construction, and there may be an opportunity for an aftermarket RV-10 part maker to help with a better fix.
I first became aware of the problem a couple years ago when another RV-10 builder, I believe Bill D., found this problem on his plane. At the time, I had quite a few hours and hadn't been having any real big issues, so I took a "wait and see" approach to it, and finally it got to be a problem more recently, so it was time to act. Luckily there wasn't any significant damage to ruin any parts, so a fix isn't too complicated. I think if you build it well and keep the parts tight, you can probably minimize the damage for a while. Mine certainly weren't serverely damaged, but the first time I heard of this problem I think maybe Bill had a little more damage than this...not sure. Either way, if you only have the stock setup, make sure you keep those nuts torqued every annual until you do a permanent fix, so that you don't get excessive wear.
Here is a short video in .mov format where you can see the rocking of the mount as I wiggle it.
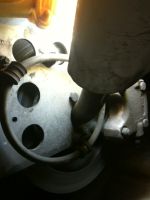 |
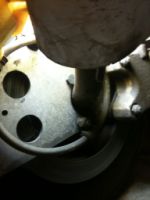
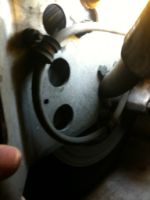
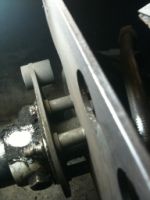
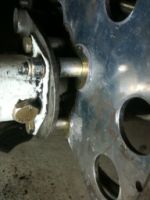
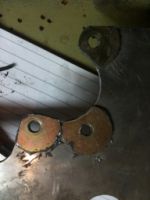
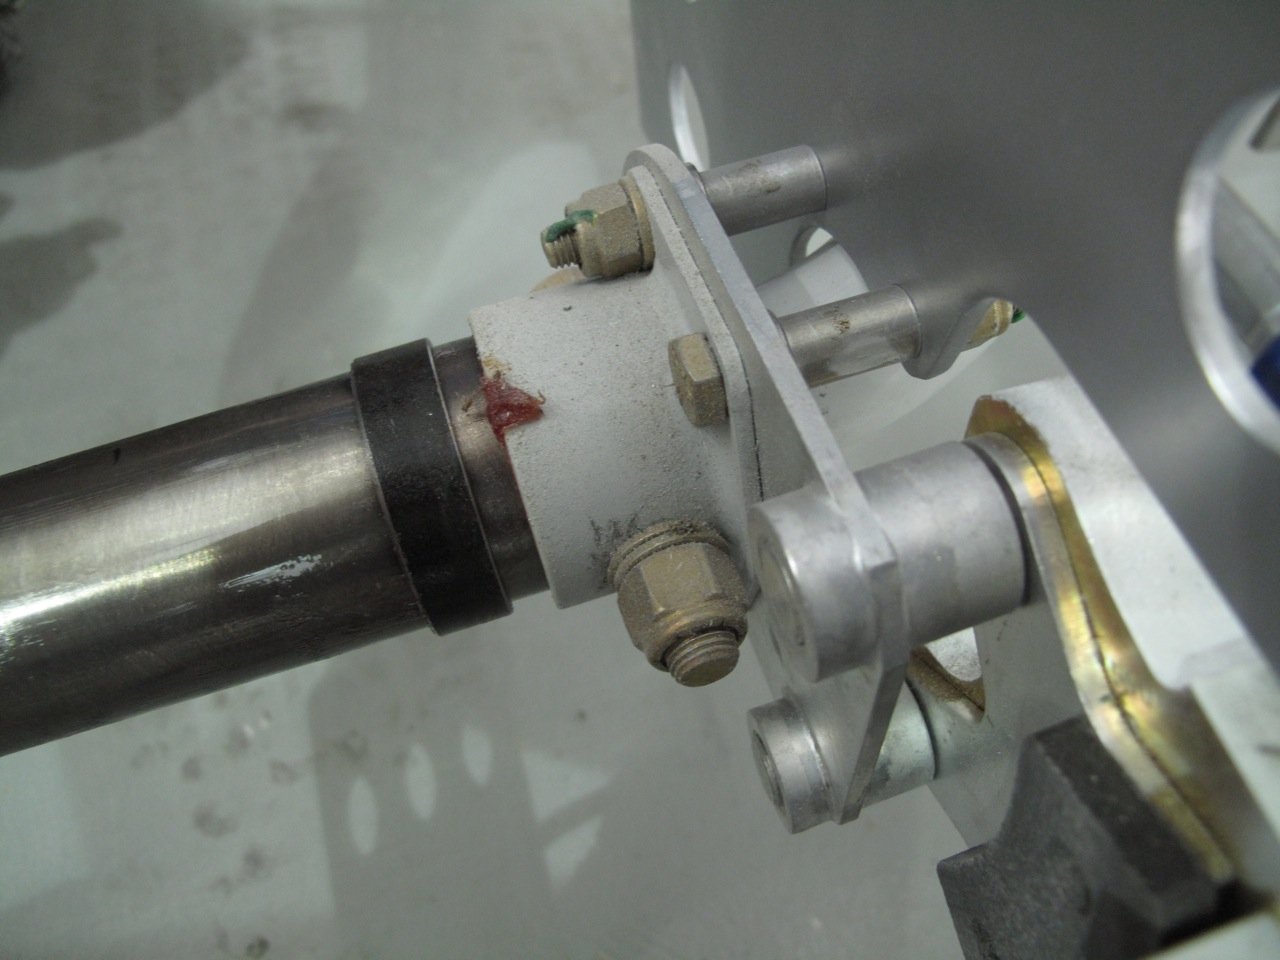
Here are some pictures of the area, taken before I started fixing it. In the 4th picture below you can see the slight wearing of the aluminum plate where the spacers were digging in.
 |
 |
 |
 |
To fix the problem, you have to basically take all the parts off the axle, including removing the U-1003 holding bolt so you can slide it down the axle enough to remove the bolts holding the fairing mount U-1010-L, as some of the bolts won't come out due to clearance issues, without moving U-1003.
To fix the issue, the ideal fix would be to make new spacers out of 1/2" O.D. x 1/4" I.D. hardened steel (maybe stainless would be great if you could find them). The reason is, the top-hat shaped bushings U-1021 that go into the brake torque plate, are 1/2" I.D., and the bolts holding this assembly are 1/4" bolts. I didn't have good access (especially on the weekend), to custom parts, or even good hardened parts, but I did have a Fleet Farm (Farm store) near by that had all sorts of hardware individually packaged. I found a couple of options and bought them both, for less than a buck a pack.
My first option was that they sold some steel spacers zinc plated that were the same size as my aluminum spacers and 3/4" long...these could be trimmed and would be probably better than the alumimum spacers that were on there. My aluminum spacers had started to mushroom out on the ends from torquing them down.
My second option was that they also sold steel spacers that were 3/8" I.D. and 1/2" O.D. that would slide in a pressed-fit manner, right over top of my existing aluminum spacers. This was the option I used, and it has a side benefit...the bolt is steel and the inside of the spacer is aluminum, so it's unlikely that they'll rust together some day. If the spacers were steel, I'd probably lubricate them with grease before assembly to make sure that they're removable in the future.
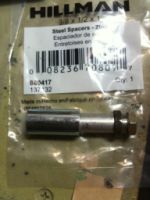
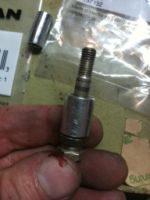
As you can see in the photos below, the 1st photo shows the big steel spacer and how it fits over the aluminum spacer.
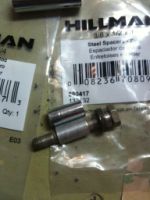
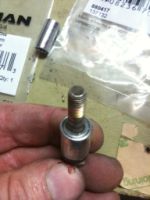
The 2nd photo shows the variety of parts I could choose from. The big spacer came in 2 lengths, one long enough that I could cut 2 from one piece, since I needed less than .652" of length, and these were 1.5".
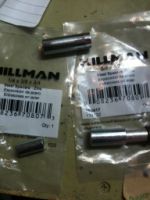
The 3rd photo shows the plain small steel spacer that I could just trim to fit if I wanted.
After I went the route of cutting a large spacer to fit over the standard aluminum one, the bottom 2 photos (#5 and #6) show the resulting parts that I re-installed. The steel outer shell will keep the aluminum from being able to mushroom out, too.
 |
 |
 |
 |
 |
Now, to keep this from being a long-term chronic problem that damages my U-1010-L, I added some steel washers to the inside, and shortened the length of the original spacers to .600" to accomodate the added thickness caused by the large washers. I bonded the washers to the part using JB Weld after slightly scuffing the aluminum part, and bolted it all up to let it cure. Worried about interference from the fit of the entire round washer, I pinched the washers in place with temporary bolts and trimmed around the original curves with an angle grinder until the curves were very close, and then I used a scotchbrite wheel to match them up and make everything smooth around the outside of the U-1010-L.
As you can see in the first photo below, everything is bolted up to cure, and the spacers now have more surface area, and a good steel wear surface to protect the U-1010-L. The part on the other end is already hardened steel and won't be a problem.
After doing this job, the wheel fairing is now perfectly solid and shouldn't be a problem again...maybe it won't even need re-torquing.
A side note: It may be a good idea to swap out the nyloc nuts for good all-steel high temp locknuts. I didn't see any problems with mine, but if you have a brake issue, you may generate a lot of heat, and it may be enough to melt the nylon. Again though, I saw no evidence of this on mine.
 |
 |
The only real sad part about this problem is that just like the poor design of the original axle extensions, and the original front axle spacers, this is another part on the RV-10 that will turn into a chronic problem for many RV-10 builders...and sadly, there are so many of them that won't read this that it's going to affect a lot of people. It would be nice if some different steel tubing or steel spacers were supplied with the kit along with instructions on the use of washers or something to prevent wear, but I'm guessing this will never happen. On the upside, the Axle extensions were fixed by a huge number of people, with 3rd party parts being available to fix the issue, and the Matco axle does a great job of taking care of the nosewheel problem. Maybe we'll get an RV-10 parts maker that will come out with some custom machined steel washer parts and steel spacers, so that new builders can just buy those parts and have the improvements from day 1.
11/23/2010 Update
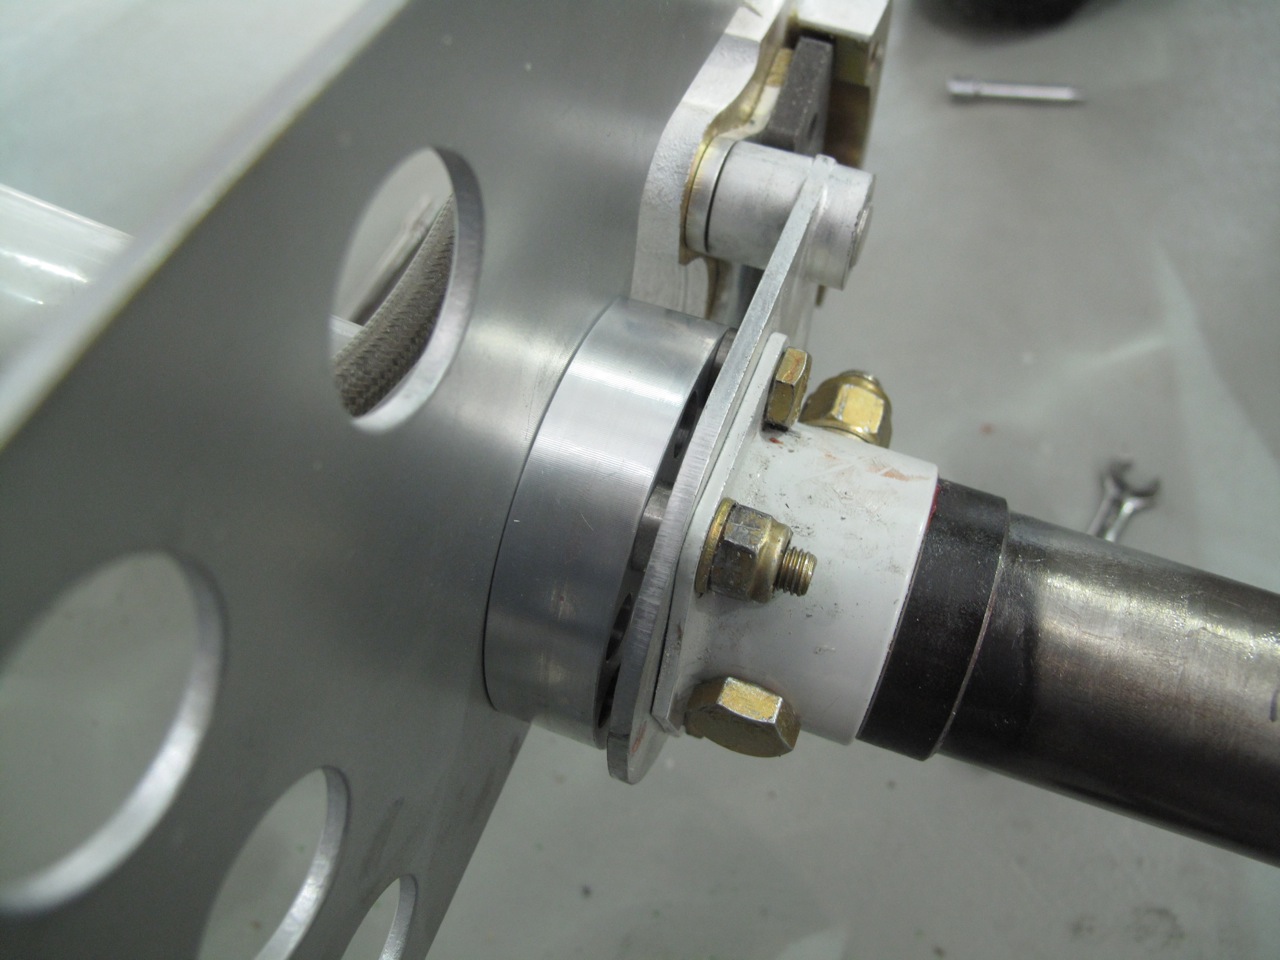
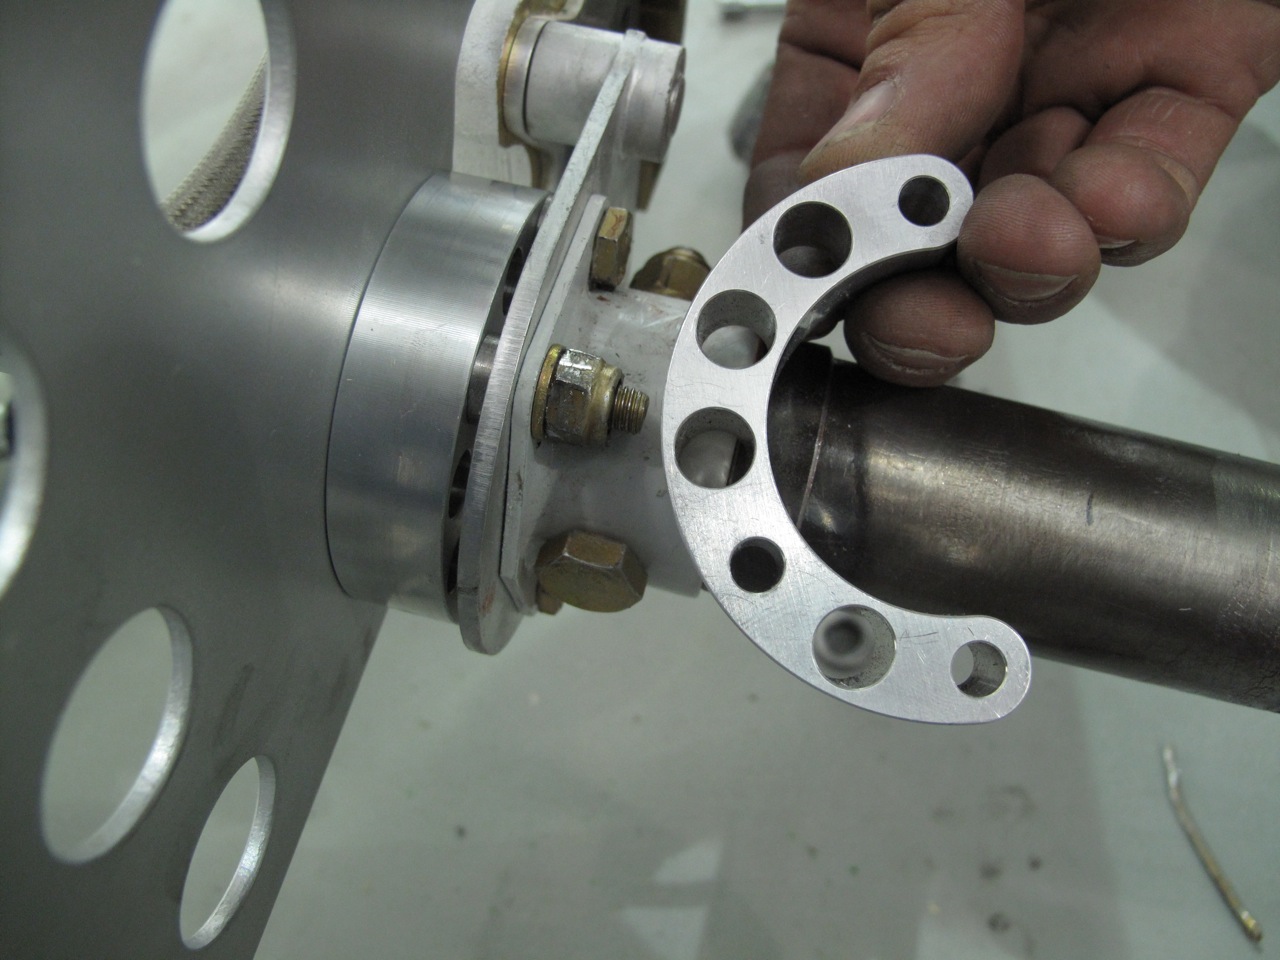
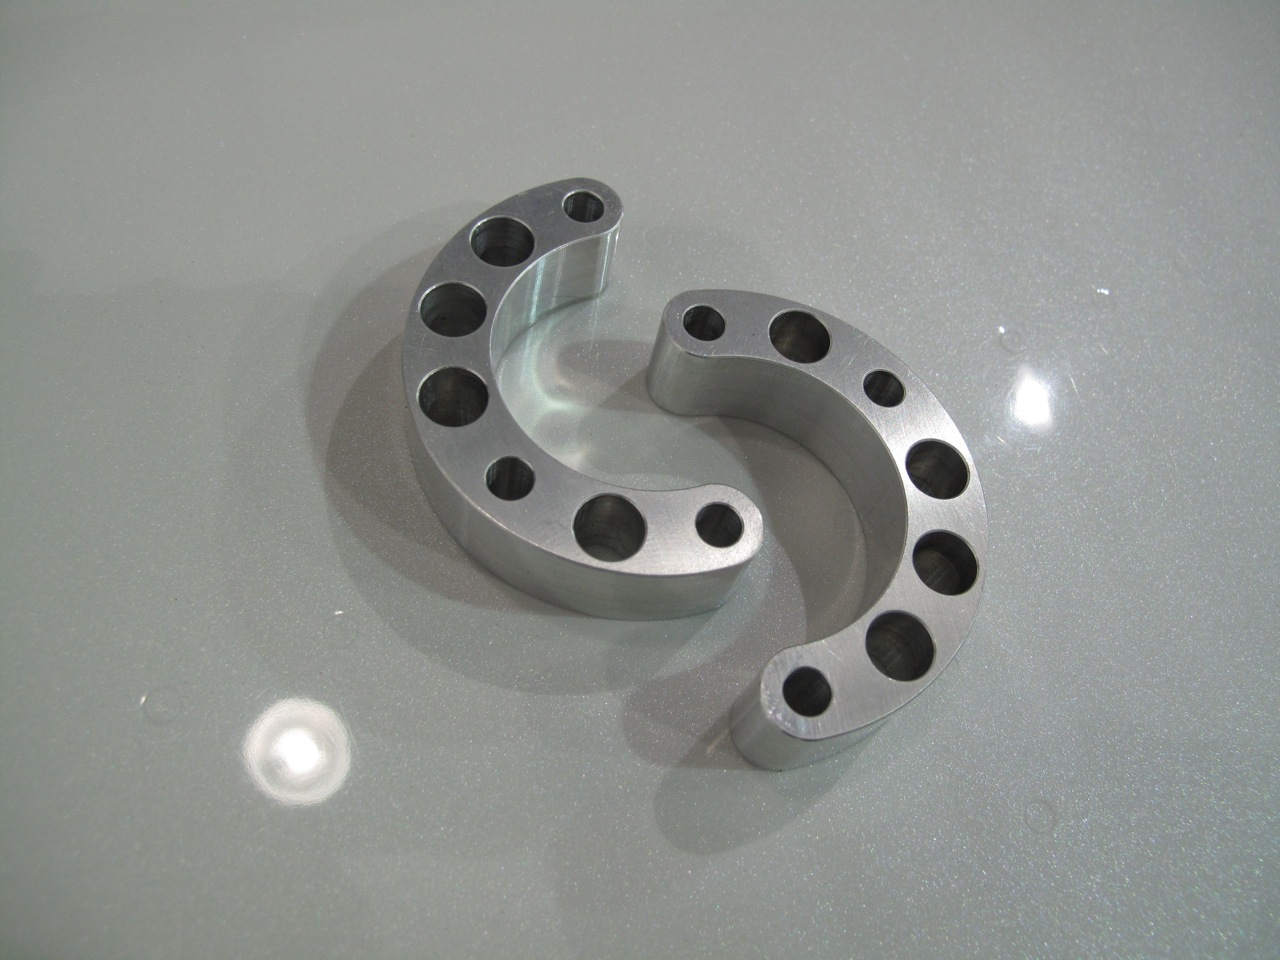
There are now places for a builder to actually BUY the parts to fix this problem. First to market was PlaneAround.com with the spacers pictured below. These are a one-piece aluminum spacer that provides a lot more surface area against the aluminum bracket. It fits right in and should provide a good long-lasting fix. PlaneAround.com is the producer of probably the most successful door latch replacement available for the RV-10.
There is also work underway by PlaneInnovations.com which should be producing something soon as well. They produce a variety of parts including the axle extensions very similar to the ones I had helped get made many years ago.
Here are photos of the spacers by PlaneAround.com
 |
 |
|
 |
 |
Site Home | N104CD Home