Oil Leak Found and Fixed
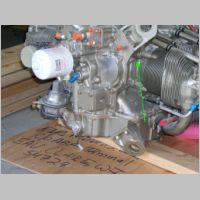
I've had this oil drip since day 1. Not a big drip, just a seepage, but when I'd stop and park it would leave a small drip line of oil down my front gear leg. Early on, I tried to clean up the block and find where it was coming from, and for a while I thought I had it. It seemed like the oil was seeping out from the tips of one of 2 studs that come from the inside of the engine. So I prosealed them, and imagined that all seemed slightly better. Still it wasn't gone, though. It wasn't enough to dirty my entire engine compartment...just the rear right of the engine and some scat tubes behind it. More of an embarassment than a problem.But I finally got desperate enough to find it that I bought an Ultraviolet Dye Detection Kit from the local Carquest Store, for the oil, and a UV light. The supercool dye is supposed to be mixed at 1oz per gallon of oil. So I bought 2 bottles, which was on the low side of what I could use. The UV light I used was something I thought was a ripoff at first, but turned out to be fantastic. Supercool sells a penlight UV light, but it cost me $24 (regular $28). I had a hard time stomaching that much for a stinkin' penlight. I also had a fluorescent and standard Blacklight bulb from the local hardware store. Those didn't work nearly as well as this nice, compact, LED penlight.
I tried to find the leak by warming up the engine. I didn't know what to look for at the time, and expected the dye to be a bit brighter, so I may have missed it. So I flew for 15 minutes. Big mistake....that put TOO much oil all over the place. So I wiped it up and ran it on the ground for 4 minutes or so. Again, too much as the dripp had blown backwards and run down the engine case, so I could't tell it's exact origin.
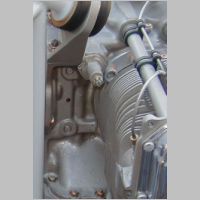
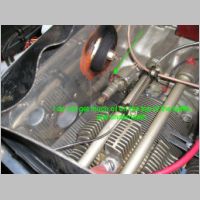
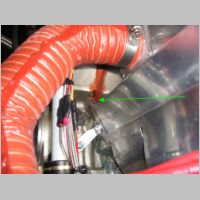
I finally traced it down by running it only briefly, but while wiped down and warm....maybe 30 seconds, and found that oil started to flow from the slot in the baffle right exactly next to the lower rear corner of the oil pressure adjustment system. Under this thing is an AN900-20 (aka MS35769-31) copper crush gasket, with a 1-1/4" ID and 1-1/2" OD. After removing the mechanism, it looked like it hadn't been crushed enough, to my A&P.
I got a new gasket, tightened it an extra 1/8th turn or so from what it was, and now it's leak free. I did fine one
thing happening, as I did this though. The baffling in that area had been touching the adjuster. So there was one
spot where the edge of that gasket had a small worn nick into it from the sharp edge of the baffle. It had worn a matching minor nick into the adjuster housing. So be sure to trim a good space beween any sharp edge of a baffle and anything else it may rub on. You can fill the gap with RTV.

|

|

|

|