Wheel Fairings, Headrest Monitors, Fairing Tests, and Panel Shots
Updated 3/24/2006
Here's a compilation of what's been going on with the
project for the past 3 weeks. The flying has been great!Fairings
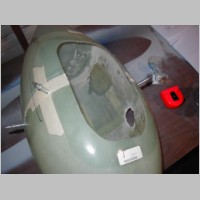
The wheel fairings are turning out to be the least fun part of the building so far. I'd rather build a set of doors than do another set of wheel fairings...so that should give some builders an idea of what not to look forward to. There's a lot of plumb-bob measuring, trimming, and fitting involved and the alignment is more critical than you'd think. The fiberglass quality, although not too awful bad, will be surprisingly FULL of pinholes. I just picked mine up from painting today and they still had some pinholes, even after maybe 12 hours of filling and sanding. As for aligning, initially I thought that since I didn't have a plumb-bob at the hanger that I'd try to just measure from the tip and tail of the wheel fairings to the centerline on the belly of the plane. Turns out that this will give you fairings that are toed out, I believe. After drilling my 4 inside holes and getting them fitted, I got to a step where I just NEEDED a plumb bob, for the leg fairings, so I send my errand girl (the wife) out for one. Well, after measuring how the alignment turned out on the wheel fairings, it was apparent that mine were toed out an equal amount. I considered leaving them, since they were equal, and it was maybe 3/8" or so toed, but then decided I should try for a higher standard. I re-aligned them and used a dremel to oblong and move the holes to the proper location for what was not too far from perfect alignment. It's VERY hard to get a perfect alignment and even a perfect plumb-bob reference mark set made, but I think I was very close. Then I filled those old holes with Epoxy and Colloidal silica and redrilled and countersunk them in the new location. After bolting them on for the test flight, they were within 1/8" or so for the most part on the tip to tail parallel measurement. Maybe one side was closer to 1/4". Like I said though, they're VERY hard to get perfect. The nosewheel was the easiest one of them to do.
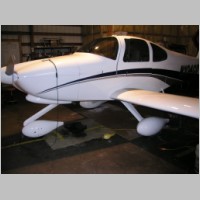
Then I flew it with them on. It absolutely makes a large difference in speed. I haven't gone out for a full, "let it accelerate to top speed", "balls to the wall" speed test, but I was easily pushing into the mid 175 KTS indicated with the whole family onboard. I also found that if you're going to cruise at higher speeds, you'll probably have better luck getting to speed if you push the power in WAY high and get the thing accelerated well, and then back off the power to cruise and actually slow it down. I think it's common for planes to have a "hump" to clear, where you can try to slowly accelerate but it takes increasingly higher power to accelerate to the next speed level, but to maintain it after being at a high speed isn't as tough. Even in my old plane, I had the habit of climbing to my assigned altitude +100', then trim it out, and then dive it to the assigned altitude and tweak the trim, and this seemed to make it much quicker to getting to cruise speed. I'll have to try it both ways in the -10, but it appears this will be helpful.
Anyway, with the fairings off, I was very much in trim, both rudder and aileron. The ball was maybe just swung enough to the right to touch the line, and resting your foot on the rudder corrected it. After the fairings, the ball was 2/3 out the right side. I then added a 4" trim block to the tail, and brough it in to maybe 1/2 out or so, but it still isn't perfect. I called Gus and he advised that I should just add more trim block, which I think is reasonable. You can tweak the wheel fairings, but the main fairings are not going to have a huge effect as they're very close to the center of pressure for the plane, so moving them one way or the other won't change things a ton. He said the gear leg fairings may do more for me than anything else. So, I'll proabably go back and re-tweak the leg fairings a bit this summer. For now, you'll see me at Sun-N-Fun with a trim block on the rudder, or perhaps even adding rudder trim someday.
I'll have painted photos soon.
|
|
|
|
|
|

|
|
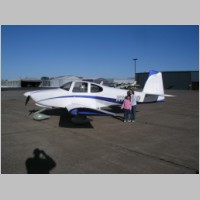
Update 3/23/2006 - Painted and Installed!
|
|
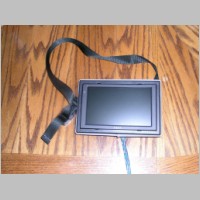
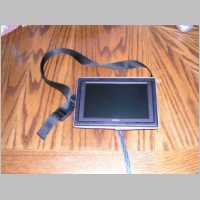
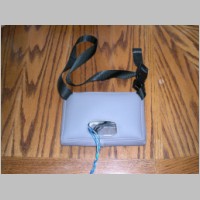
Headrest Monitors
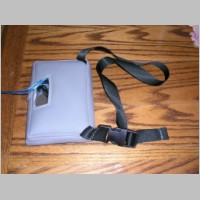
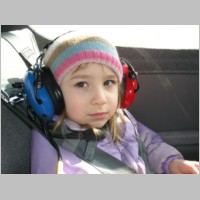
Here are some quick photos of some headrest monitor pouches Abby made. The monitors are NESA Vision NRM-7002 7" Wide Screen monitors, and I got them from SonicElectronix. I can't recommend the monitors over any others on this page, as these are the only ones I've used, and I can't recommend them as a vendor over any other, but they did a great job with my order. I got these for their lower resolution, as I plan to use them with VCD format MPEG-1 video, using both an Iomega Screenplay, and a Creative Zen Vision. The Iomega is kind of cheaper feeling in qualtiy, and has no built-in batteries or screen, but it's lower cost and has a 60Gb drive. The Creative Zen Vision is an amazing piece of hardware with built in batteries and screen and you can even import CF memory from your camera and view pictures on it. They both also play photos and MP3's. The Zen Vision only has a 30Gb drive, and the worst part is it REQUIRES windows XP. This really made me mad at the time, but considering it has a built in screen, the Zen vision will provide entertainment for the people in the front, and the iomega will be for the kids in the back with these monitors.I think if you plan to mount monitors IN your seats, you'll need to either use small ones on the top headrest, or regular ones but not have a tall pocket on the seatback and mount them lower. I opted for something portable, so I can use it in the car too. Abby did a great job building these for me, as I wanted something that could also be easily held in a lap and padded.
|
|
|
|
Flights and Misc
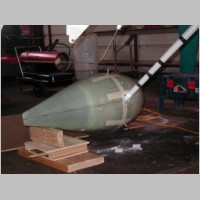
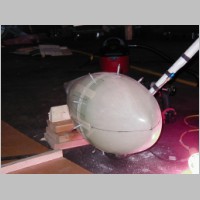
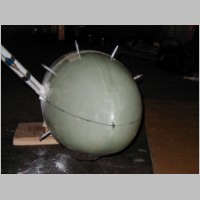
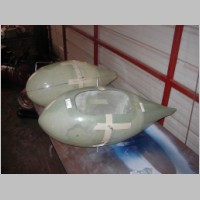
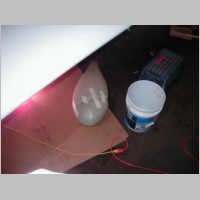
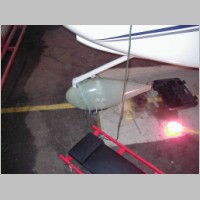
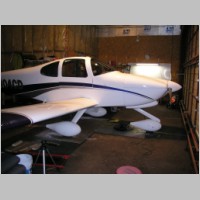
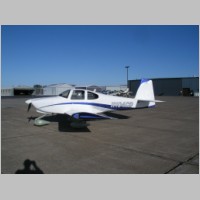
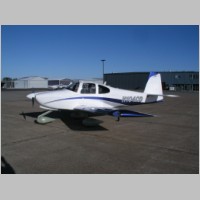
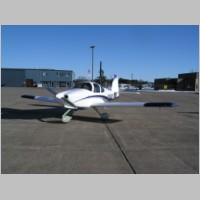
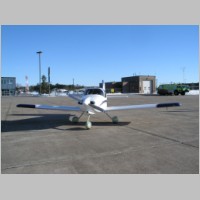
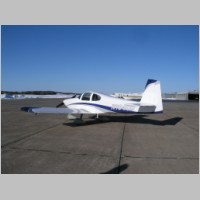
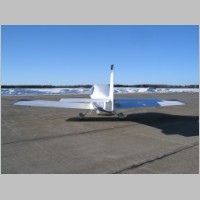
Here are some shots of the test day for the wheel fairings. It does make the plane look a lot better, even with the green fiberglass. They're now painted and will be going on before this weekend, so it will look even better soon.
|

|
|
|
|
|
|
|
|

|
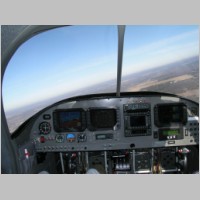
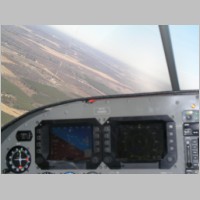
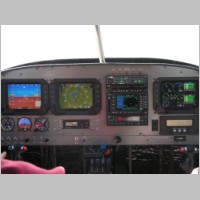
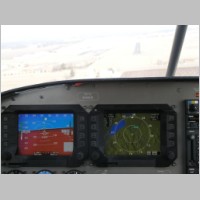
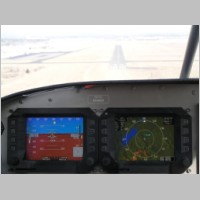
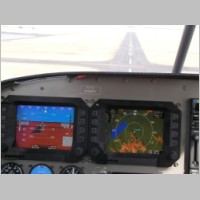
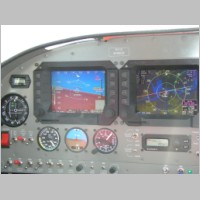
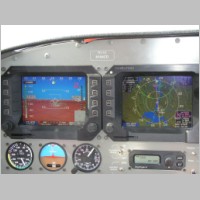
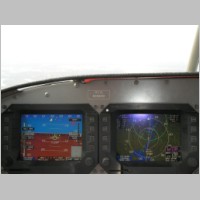
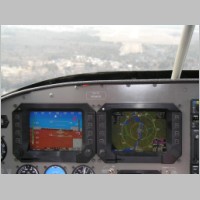
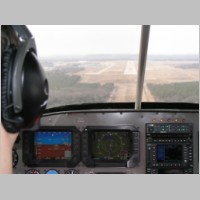
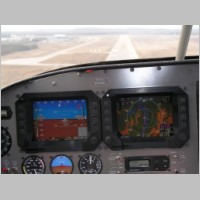
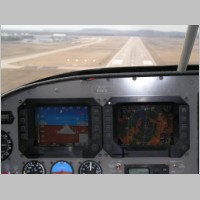
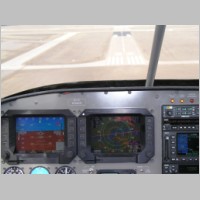
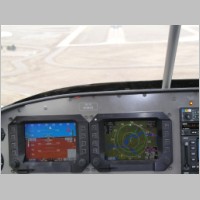
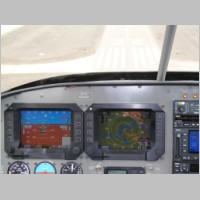
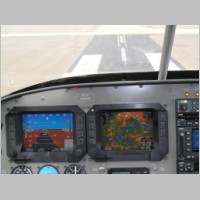
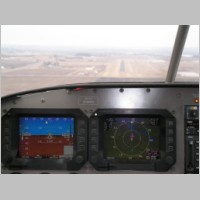
Panel Shots
I took these photos one day trying to get some good ones, but the weather and everything else didn't cooperate well with me, as I was in a time crunch. There are a lot of boring pictures here, but I took some so you real interested panel people can dig in and look at them. In many of them, I'm flying down the approach to a runway, in a couple of them I'm navigating near a tall radio tower that is shown on screen and the system is calling out "Obstruction". I'm finding that the obstruction, stall, terrain, and engine warnings provided by the Chelton are very helpful in letting you know about things as you keep your head outside the cockpit, or focused on the instruments as you need to be at times. Other than that, there's nothing special about the photos. The approaches weren't loaded and flown in their entierty, so you may see some things on screen that don't make 100% sense. Some day I'll take some better ones when the stars are aligned properly.As for recent panel events, you probably read previously that I successfully got GTX330 traffic displayed on the Cheltons and GNS480. This works fantastic, and after you see it you won't want to go back to not having traffic. Recently though I took a night flight and activated my WSI signal. Unfortunately, there wasn't any extreme weather ANYWHERE in the US that night, so I didn't get to see any pretty pictures, but I did get to at least see that it does it's datalink. I also thought it was pretty cool when I punched some buttons for local airports on the Chelton looking for airport info, and it displayed the current winds and altimeter info. I need to look again, but I think it'll also display if the field is VFR or IFR. Again though, there wasn't enough bad weather to tell.
On the weather news-front, I have the AV100 WSI system. You may have heard that WSI is merging somehow with Sirius radio. (I don't know the details of the merger) Apparently they are going to convert the WSI system to run on the the Sirius system and it will require a new receiver, the AV300 in my case. Also a new antenna. The cool part is, if you have new hardware in 2006, or activate a unit for it's inital activation in 2006, they'll send you a free antenna and receiver, so I'll qualify for that upgrade. It's nice to know that vendors won't leave you in the cold every time. I hear the MSRP for the new receiver is in the $5,000 range, and owners of old systems that don't qualify will be able to upgrade for something in the neighborhood of $1,500, but that will include some free time and things like that. So anyway, check in the future with WSI for details.
For anyone interested in WSI, I did find an entire AV100 system for sale at a local airport on the board, at KLVN. It was something like $1,600, which isn't a bad deal. You may want to see if it's been activated or not, because if not, it could be a very cheap way into an AV300 this year. If it has, you'd be buying a receiver and activating a plan, but still get a discount on the AV300, so it still may pay off. If you're thinking of WSI, it may be worth the legwork to investigate. Contact the FBO there to see if it's still posted.
Oh, and the SV-10 system. Here's what I know...
They have 40 units reserved for introductory pricing which will be in the neighborhood of $26,000 for a dual-screen system. It's the same hardware, but comes with a wiring harness custom fit for the RV-10...assuming you want to mount the GADAHRS under the panel somewhere, and put the magnetometer in the wing. It also comes with with their new GADAHRS, so no Crossbow issue, and a better antenna than I got...a nice Comant. I think it also comes with some logging software for viewing your log files, but I'm not sure about that. I do know that the price will go up after they sell their initial units, and last year's special only lasted a couple months. I haven't heard about anything in the OSH timeframe yet. Contact Josh at D2AV for more details.
There's also a .pdf HERE.

|

|

|
|
|

|
|
|
|
|
|
|
|
|
|
|
|
|
|
|
|
|