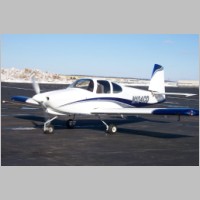
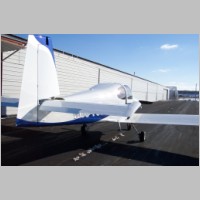
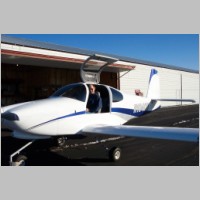
DAR Inspection and First Flight!
Total Build Time: 1700 hoursCompleted 2/12/2006
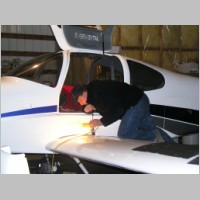
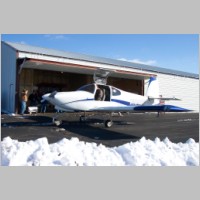
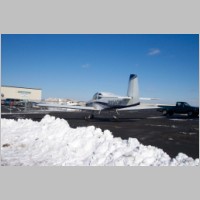
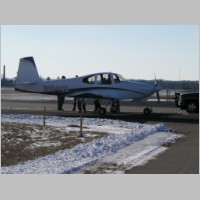
Well the day finally arrived for the DAR's inspection. The build process was almost exactly 1700 hours complete, and that's using slowbuild wings but a quickbuild fuselage. The interior is done, but left out so I can check for leaks before I install the carpeting. The wheel fairings are not started, and there is no overhead lighting installed, but otherwise the kit is basically complete. I had really worked hard to prepare for the inspection, making sure my W&B paperwork was in order and all the required forms had been sent on. I kept a checklist of items that needed completion, to ensure they were done. When inspection time came, I was fairly confident that everything would be fine.
Sure enough, the inspection went great. Good thing too, as a bunch of my friends and their families had showed up to see the first flight if it happened. Here's a write-up of inspection comments I wrote:
Now that I'm done with my DAR inspection, I would like to quick pass on the things that the DAR commented on regarding the inspection and the kit. It was his first RV inspection, so he learned a bit too. He's a Cirrus factory DAR, and he flew down in a Cirrus SR-22.
I only had one ding on the inspection. Those flex fuel lines that I used....with my 45 degree fittings on the tank, which I do like how they route that way, puts the fuel line running right past that snap bushing hole in the bottom of the wing root fairings. This causes the fuel line to lay next to the fuel vent tube. I didn't have any separation, and he wanted to see some. I could either use zip-ties to stand them off, or what I did was great he said, which was to just squeeze in some red Hi-Temp RTV (between them), which dries really quick. That was it for the dings...fixed in 30 seconds.
Then he had some questions and suggestions...
- 1) Rudder Pedal Cables - He had noticed the rudder cable was very slack. On the RV-10 of course, there is no tension on the rudder cables unless you push them. You push one pedal and it pulls the other pedal in due to the rudder movement. Apparently on a Cirrus, they have a similar setup, but in order to ensure that you can't pull the pedals backwards and jam,twist, or wrap a cable on something, they take the 2 inside pedals and hook a spring to the firewall area. That gives the pedals a positive return and keeps the cable taught. After flying it, I see no reason we'd need this, but actually, it could be nice. He said ours is an "open loop" system, and adding those would help to make it more "closed loop". Good catch for him, but all I had to do was educate him as to how RV's are constructed. One other builder commented on this and also made a lot of sense. If you had return springs, and one broke, it could cause the rudder to be forced to swing in one direction....so it may also be better without the spring.
- 2) On pushrods such as the flap pushrod, and aileron pushrods, where you thread in a rod-end bearing, he thought that it would have been a good idea to drill "witness" holes. Just small holes in the rod that are far enough back so you can verify the rod end isn't just about to unthread and fall out. He didn't mind that I didn't have them, but he suggested it...and in my opinion, that was a great suggestion. You may want to incorporate that into yours.
- 3) Nyloc fasteners on control surfaces - Whenever you're fastening something that rotates, like the elevator hinge bolts, and the rudder/flaps/ailerons, they prefer to not see Nyloc fastener nuts. In their opinion, just like your rudder cables are connected, you should be using a castle nut and a drilled bolt, with a cotter pin. I've heard this before, and it does make sense...even though a Nyloc should be locked and stay locked, if it got sticky, when you move the control back and forth, it could cause the nut to work loose over time. He reminded me of that Cirrus crash in Texas where after maintenance the aileron came off. Apparently that was caused by something similar...or at least by the hinge bolt falling out.
Hopefully these tips may help some of you get yours past your DAR with the same ease.
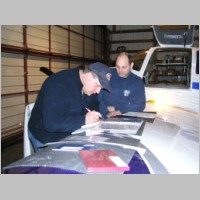
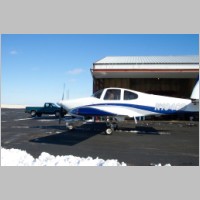
As part of the inspection, we had to pull the plane out and do a taxi test, and Jeff, the DAR got in to verify the full static RPM and to see if the brakes would hold during a full-power runup. Everything checked out OK.
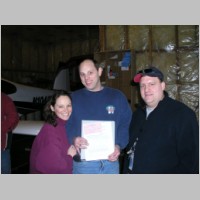
With the inspection complete, I got my fresh Airworthiness Certificate and Operating Limitations, and everyone pitched in and started installing the various access panels.
|
|
|
|

|
|
|
|
|
|
|
|
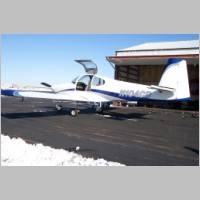
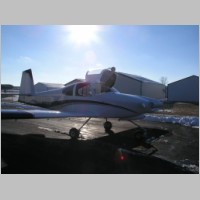
First Flight Time!
(See the bottom of the page for Videos)
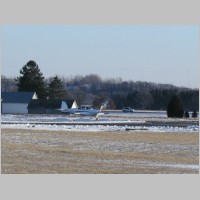
Sorry there aren't more good photos and videos. The planets had not properly aligned for one of thos beautiful first flight photo experiences. We'll have to settle for a future video that we take some time to prepare.
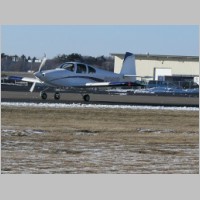
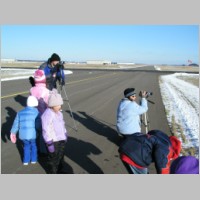
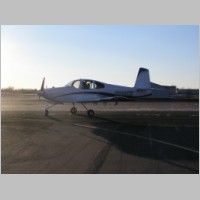
Now the first flight was here. The group that had gathered had grown more restless as we moved outside into the colder/breezy Wisconsin air. I was pretty warm without a jacket, but that's just because of the adrenaline factor. I taxied out and during taxi noticed that my charging system wasn't charging anymore. A quick troubleshooting with a meter didn't reveal any obvious issues in the cockpit, and I had a nagging memory that perhaps my alternator connection on the snap-in control harness hadn't been snapped in hard enough. We pulled off the cowls quick and sure enough, the alternator field wire and OV warning light harness needed another 1/8" to snap it in place. With that in place, everything was a go for takeoff.
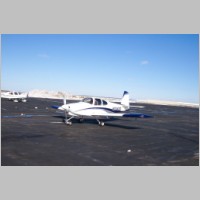
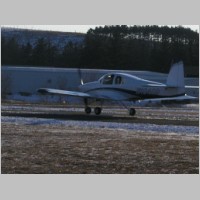
I taxied down to the end of our shorter runway, with a more favorable wind angle. A runup revealed no problems. You sit there, look everything over, and I have to say that the fleeting though of "is it all ready?" didn't last but a heartbeat. I knew I had prepared, and I knew it was time. Taking the active, I eased it to full-power. It rolled to speed quickly and I pulled back slightly to get the nose off the ground. Then I got the surprise of my life. I lifted off the ground, got into ground effect for a second, and as it came out of ground effect I had a sudden surge of climb and acceleration. It was as if the prop had grabbed hard and was tearing it's way into the sky. I've never flown an aircraft with this much power and performance, and having no passengers the performance was phenomenal! Yes, even though N220RV had performed great, this was a definite difference in power level. Within what seemed like seconds I was at 3500' AGL, as I was climbing at 2200 fpm. It flew absolutely hands-off, with no need for aileron or rudder trim, although aileron trim is installed on the plane. I flew some lazy circles around the airport while fiddling with my radios, climbing higher and higher. It takes almost no time at all to reach altitude in this plane. No more trying to decide if it's worth climbing to 7000' in the summer to beat the heat. This plane will make quick work of that. I leveled it off and without wheel pants had speeds in the range of 150kts. It's expected to add between 12 and 18kts with the wheel pants from what I heard. I also have to figure out what power settings work the best. After a few minutes I decided that I needed to show my face to the crowd that had come in support today, so I set up for landing. I did some rough calculations to convert the MPH that I had been forced to fly by last week, into kts, which is the way I like. In the end, I gave it a target airspeed but basically flew it by feel, and it worked perfectly.
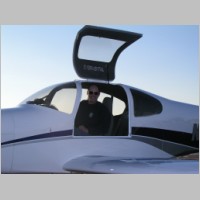
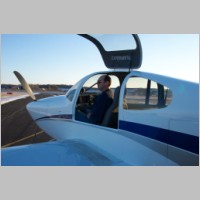
I set up for my first landing, slowed it down and put her gently back on the runway for a completely non-eventful landing, just the way it should be. It was a perfect time to not make a fool out of myself, and I pulled it off. I had to take it back up one more time just to waste the rest of the daylight, and I put over an hour on it for the day.
The Chelton system worked great, and when I turned on the Autopilot it flew using both GPSS and GPSV and tracked a course to the airport chosen on the EFIS. The EIS was working great as well, although I have some probe calibration settings to do to get all readings to come in correct. Since this posting is late, I have actually flown it another day and got to play more with the radios and EFIS. Everything seems to work real well. It's impressive how much functionality the new panels can cram in.
With the first flight(s) behind me, the rest of the month can slow down a bit. I have wheel and leg fairings that need to be complete to get my speed in shape for my up and coming trip.....Sun-N-Fun in Florida, in the first week of April. I plan to be there, and as a special added bonus, I will likely have my RV-10 displayed at Van's Aircraft booth for much of the show. I hope to see lots of you there.
As a side note, I was #26 of the completed RV-10's to fly. I was the 170th RV-10 Kit sold. The day Van's updated their website with the counter for completed RV's to include my RV-10, the counter was set at 4500. That's 4 Thousand 5 Hundred KNOWN completed RV's flying. It's an amazing group of builder/pilots we have.
|
|
|

|
|
|
|

|
|
|

|

|
|
Videos
1st Flight Video (Short .MPG - 28Mb)
1st Flight Video (Short .WMV - small 6.8Mb)
1st Flight Video (Short .WMV - larger 22Mb)
1st Flight Video (Longer .WMV w/inspection runup 25Mb)
** if you have problems with the .wmv videos, try using Internet Explorer