Bahamas 2015
and
Equipment Upgrades Spring 2015
With winter finally once again behind us, it was time for our
first vacation of 2015, but before we get to that, I have some
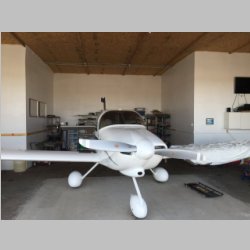
good eqiupment upgrades to the RV-10 to report...| During the build of
my RV-14, I've tried to keep things in my RV-10 and 14 as
consistent as possible between planes. This will not
only make it easier for the family to transition between
them, but make wiring similar, functionality similar, and
make the other aircraft a good "spare parts" store for
swapping or troubleshooting eqiupment. This has led me to
consider some upgrades as I go along, because some of the
equipment I have in the RV-10 has changed. Here are
a few I've upgraded this spring. |
||
 |
 |
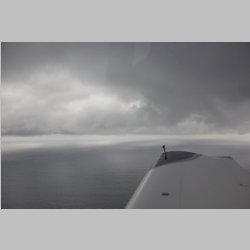
 One of my monkey assistants ^^ |
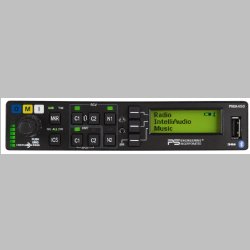
| First up was the
Audio panel. As you have probably read in my past
note about my entertainment
system, I had a PS Engineering PMA8000BT audio panel
that provided bluetooth audio from our iphones, and
allowed me to make telephone calls to clearance delivery
before takeoff very easily. Well, I really LOVED the PMA8000BT. It functioned flawlessly for me, and I used many of it's features such as playback of audio transmissions, and things like that, all the time. But when it came to buy one for the RV-14, they now offered the PMA450. Yes, they also make an experimental one without the Marker Beacon receiver, but I personally feel that if you're equipping an IFR plane, you don't leave out any tool that helps you on approaches, and the marker beacons are placed on an ILS for a reason, so I got the 450. This was a VERY hard choice to make, since I really didn't think a menu driven interface would be as good as discrete buttons. But I bought one for the RV-14 and since they are pin-for-pin compatible with the 8000BT, I swapped it in to the RV-10 to see how it worked. There was a learning curve, and day one, I actually was worried that I had just purchased a frustrating downgrade. Yes, I read manuals, and I like reading manuals. But, in many cases, I first will wing it, and THEN read the manual after I've suffered sufficiently. This is one of those times that strategy backfired. The improved features over the PMA8000BT are these, that led me to buy it (in order of importance to me). 1) You can change the Bluetooth ID to whatever you want, rather than just a generic PMA8000BT. Yes, I know, that's nit picking, but having 2 planes with the same ID would be a pain to know which one to connect to. 2) You can have separate music from Pilot to Co-Pilot. There are still only 2 music inputs, and only one is bluetooth, but that can be solved by adding a bluetooth to 3.5mm puck. In the RV-14 I may actually use this feature, but in the RV-10 I doubt I ever will. 3) The PMA450 has "IntelliAudio". With a stereo headset, this allows you to hear both radios as if they are coming from different areas around you. By placing COM1 on one side of your head, and COM2 on the other, it makes it much easier to keep track of 2 radios. This was a gimick as far as I could tell, after using it for the first time. (more on that soon) That was about it for the big things. The menu inteface was the biggest "style" change. That proved to be very frustrating at first. So how did it go?? Well, thanks for asking! The bluetooth on the PMA450 works excellently! I don't think that most of the time my PMA8000BT would auto-connect to my phone just by me sitting in the plane and firing it up. The PMA450 does, so since I usually have bluetooth turned on, on my iphone, it auto-connects and is ready to use right away. Now if someone texts or calls me while I am preparing for flight, I don't miss it...and I don't have to juggle anything to get connected to call clearance delivery. There is also no TEL button that you need to hit to make a phone call with bluetooth. The separate music? Well, I've tweaked it around a little, but haven't used it to split music between me and the co-pilot yet. The menu functionality is great on that though. Now on to the menus. I *hated* them the first day I used the unit. I'd start trying to change settings in flight, but turbulence and READING the menus caused them to time out all the time, leaving me back at the main screen and I'd have to start the menu tree process all over again. VERY frustrating. But then I called tech support and whined about it. Not only did they show me that you can configure the timeout, which is set to 3 seconds at the factory by default (I now use 8 seconds), but they immediately took my feedback, considered it, and decided to change the default to 6 seconds on all of the new units they sell. Now that's someone interested in good customer service for all! How is it now? Well, 8 seconds gives me plenty of time to read the menus, and as time goes on, I can shorten it if I want. Now the menus aren't frustrating at all. That wasn't my only menu complaint, however. In the past, I very often switched muting modes. There is Intercom Mute (turns off music whenever someone speaks), Radio Mute (turns it off only when something comes in on one of the COM radios), or Karoke mode (Mute OFF on the PMA8000BT) where the music just keeps on a playin'. On the PMA8000BT, I just needed to repeatedly hit the <MUTE> button to change modes, and it would tell me in my headset via voice which mode I was in. I change this many times on a flight sometimes, depending on how busy I am on the radios or if I'm on an IFR clearance or whatever. I was VERY frustrated that now I had to run the menus to make this change....UNTIL....once again, tech support fixed the problem, and the problem is ME. The new menus work perfectly for this. There is a MUSIC config button. If you hit that button 3 times on startup, you get KAROKE mode. 4 times and you get Radio Mute. Either way, from the main menu, it's still a one-button operation to roll through the menu choices. You see, they had stacked those 3 hard buttons with menu trees in such a way that these common features were STILL a one button operation. How intelligent! So how about IntelliAudio, you ask? Well, after using it on a few flights, I thought it was pretty stupid. I set up the sound zones but couldn't hear any difference. I called tech support and all they could ask was "Are you sure your headsets are set to stereo". And of course, me being the most perfect gadget operator in the world, would ABSOLUTELY have made sure my headsets were set to Stereo. In fact, that's one of the first things I did to ALL of my Bose A20's when I got them. I mean, who wouldn't!?!?! And I'd SURELY be able to tell if they weren't stereo, because we listen to music all the time and it sounds AWESOME! Right....I'm sure you know where this is going... Yep, my headsets were set to Mono...and once I set them to stereo, it was a WHOLE NEW WORLD! On our Bahamas trip, we flew in formation with me as Lead a lot, so I was operating the radio, flipping the Xmit button from COM1 to COM2 a lot so that I could talk to the flight members, and get our clearance, squawk, and take handoffs to other ATC zones as we flew. I found that for the first time in, well, EVER, I was able to much more easily listen to COM1 and COM2 simultaneously and actually hear the words I was hearing. There's a LOT of time that there is overlap and you are listening to both radios at the same time, but with IntelliAudio, it was easy to know which COM I was hearing, and I have COM1 set to my Left ear and knew that of all the radios, that's the one I needed to focus on the most. Juggling communication was now much easier! There is one more thing I will need to change down the road. Presently, I have my (on)-off-(on) momentary DPST switch on my stick grip set so that if I flip it up, it flip-flops the frequency in COM1 and if I push it down, it flip flops the freq in COM2. I find that in actual use, the GNS480 (COM2) is much harder to hit the buttons to swap freqs, so I will use the stick switch nearly every time on that COM. But on COM1, I don't use it as often. That said, it *is* a handy feature. But what I would find much MORE convenient is if during these formation flights, I could use that switch to flip-flop between transmitting on COM1 and COM2. Fortunately, not only do all of my radios in both planes support flip-flop, but so does the PMA450, with a SWAP function on Pin 20. (refer to the wiring diagram if you're contemplating this) My plan is now to have either a hidden switch or a panel switch that allows me to reconfigure the "UP" function of that stick switch to EITHER: COM1 Freq swap -or- COM1 <==> COM2 Swap. That way when I'm flying alone, on IFR or other flights, I can have my freq swap, but when I'm flying in formation I can have COM swap. So if you've made it this far, I won't put you to sleep with more about the audio panel, but lets just say this. First, this is the most awesome audio panel your money can buy right now. And Second, if you find that you don't like some feature, or it doesn't work for you, first, check yourself, because it's most likely that YOU are the problem. I know *I* was, and after eating a plateful of humble pie, I'm now thrilled with my decision to upgrade to the PMA450. |
||
 |
 |
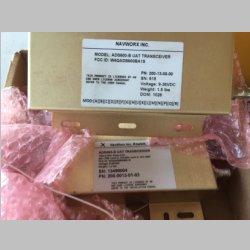 |
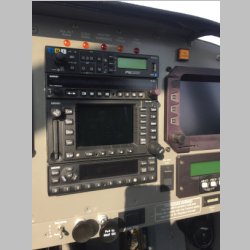
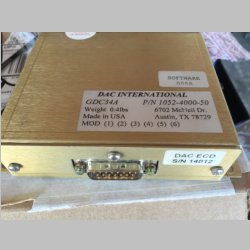
| Next on the list -
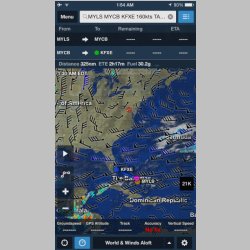
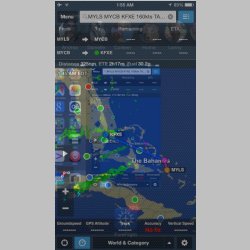
My NavWorX ADS600B ADS-B system! This one was a little more complicated upgrade, but it's nice to be done with it. I've been flying with ADS-B now for many many years. NavWorX first came to OSH to connect thier receiver with my Chelton screens in October 2008 to see how it worked, and even back then when there was only one UAT in our area (at OSH), it worked with my system. Then in May 2009 I got my ADS600B system and connected it to my Chelton. Prior to this, I got my traffic only from the GTX330 transponder, connected via ARIC through a DAC GDC34A converter into my Chelton's traffic input port via RS232. When I added the NavWorX box, I worked with them to basically REPLACE the DAC converter. The NavWorX took traffic in from the GTX330, and mixed it with ADS-B traffic and sent it via the Ryan TCAD protocol to the Chelton at 38,400 baud. It was a great setup. The reason I did that was because I had (and still have) WSI weather in the RV-10 on the Chelton...so for me, ADS-B weather isn't the big motivation, traffic is. I can only use one weather system on the Chelton, and I would rather have universal weather coverage than coverage only at altitude or where I can see a GBT (Ground Based Transceiver). I used that box for years, soon after doing a modification so that it could obtain the squawk from my GTX330 via RS232 and change the squawk to the same code on the ADS600B. It was great to have traffic coverage and over the years as the FAA rolled out NextGen, the coverage became pretty good actually, at least from a traffic perspective...I didn't know how good or bad the weather coverage was. Fast Forward to 2015 and when NavWorX applied for the TSO for their software, they removed the code that allowed it to replace my DAC converter. It could no longer speak the traffic-only protocol at 38,400 baud. This irritated me at first, because I had a very old generation of hardware and for 2020 would need to upgrade it, but when I upgraded it would require a re-wiring job. I had already purchased an ADS600B for my RV-14 project, but that one will be wired for both WX and Traffic. But the 2 units weren't identical. Old s/n units from NavWorX have a few pins that are different in the pinout, so they aren't directly swappable. They have matured over the years and added features. So it was finally time to re-work my RV-10's install to bring it up to current. At least then I'd be ready for the 2020 mandate...once my internal GPS was swapped for a certified model. (more on that later) The rewiring took me a whole day, but when I was done, I now had one big benefit. I did have to re-install my DAC GDC34A converter, because now if I only want Traffic in, the traffic is output from the ARINC module on the ADS600B, into the converter, and from the converter into the Chelton. That works perfectly, as before, and now I still have traffic coverage on the Chelton. The benefit comes from adding a wifi module to the normal RS232 display port on the NavWorX, which now also gives me full ADS-B weather and Traffic on an iPad. This turns out to be *really* cool. First of all, the old (I should say ancient) Chelton software has a limitation of 100 TFR's. If there are more than 100 TFR's being transmitted by WSI, it will display NONE of them. That really SUCKS when you fly a lot of x/c flights. *really*. No, they won't fix it, because not much is being done on the old IDU-1 Chelton systems anymore. Luckily they were so far ahead of their time back when they were made (in 2000) that they are still pretty good. But these bugs are frustrating. Now, with an iPad, I can receive all the TFR's, but additionally get satellite imagery and the other data types that the Chelton is not capable of displaying. So it turns out to be a pretty cool upgrade. Another side benefit is that now both of my ADS600B systems are identical in pinout, and current. Now, regarding that 2020 compliance. I have been told that soon...maybe a month or two, there will be a NavWorX software update. I'm presently on version 4.0.4. Once 4.0.5 or 4.0.6 comes out, it will allow the existing hardware GPS that is in my box to be 2020 compliant. So this is great news. It is now cheaper than ever to be 2020 compliant! I am looking forward to seeing how it works. I did do the test of my new system by sending an email to 9-AWA-AFS-300-ADSB-AvionicsCheck@faa.gov and asking them to check my system. (By the way, only the US Government could come up with such a discombobulated email address!!) Thus far it does report that it isn't 2020 compliant (I knew that because the GPS reports a SIL error...I'm SIL 0). But the one thing that seems to be failing on my test right now is Baro Alt. I'm 68% approximately failing on my Baro Alt. I'm receiving my Baro Alt via ARINC 429 from my GTX330 (which receives it from my encoder), so this is puzzling. At least it's not *required* to be compliant right now. Worst case I will need to wire my encoder directly to my ADS600B rather than having my altitude come from ARINC 429. Now, if you want to see pictures of the iPad in action, using both FlyQ and WingX, you'll find the photos right after this next blurb. Oh, and I almost forgot to mention!! NavWorX ADS-B can connect multiple devices at one time. We pulled up WingX on 4 devices simultaneously (2 iPads and 2 iPhones) and were able to display traffic and weather on them ALL! |
||
 |
 |
 |
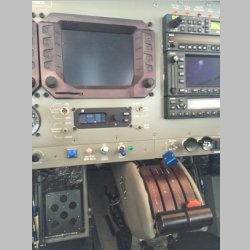
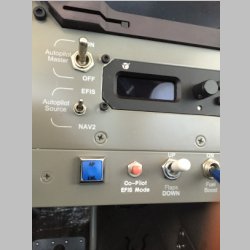
| My Final upgrade for the spring
was my autopilot. Previously I had a Digiflight II
VSGV which worked PERFECTLY with my Chelton. This
took some work back in the old days, as there were many
software revisions done by TruTrak and Chelton to make
them solid. I was very leery of this upgrade,
but...the new AP had just a couple of pins different than
the old, and I wanted both planes to be identical.
That way if hardware needs swapping, it can, without
rewiring. For the RV-14, I was forced to buy the Vision 385 Autopilot by TruTrak. This was nearly identical, but had different guts, and had a couple added features. 1) this autopilot now has altitude preselect. 2) This autopilot does the servo-reversing in software, if required. 3) This autopilot has the "blue button". What's the Blue Button do, you ask? Gee whiz you have a lot of questions today! The Blue Button is a new feature that does automatic Autopilot leveling. You see this type of feature now on some of the newer avionics. If your airplane is not in control because you are losing your references, maybe experiencing vertigo, you just have to hit the blue button. Once you hit it, the autopilot engages and will automatically level the airplane. No, it's not a feature I expect to ever use, but, with the girls in the house flying the plane(s), I think it's not too bad of an idea to have it. I experienced vertigo, "the leans", spatial disorientation, a few times during my IFR training, and it would have killed me at the time, had I not been with an instructor. This button, if they choose to do instrument training and flying, could literally be a life saver. So, it was a very easy swap, and now the RV-10 is ready to go and the RV-14 will have the same AP. |
||
| FlyQ
ADS-B Screenshots |
|||
 |
 |
 |
 |
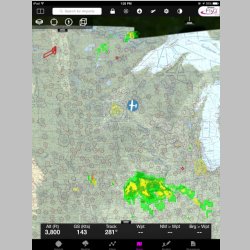
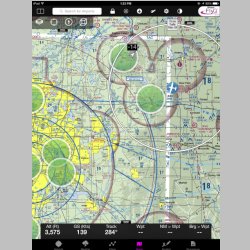
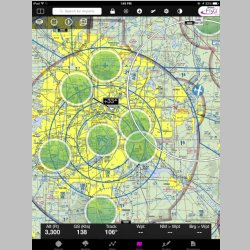
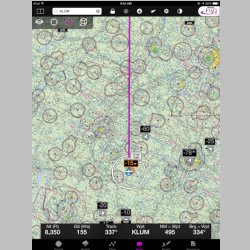
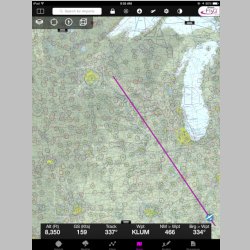
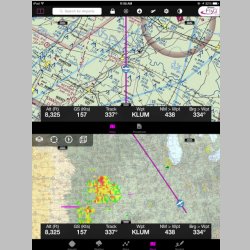
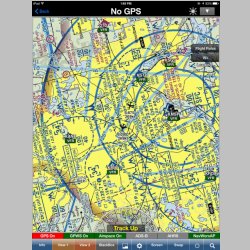
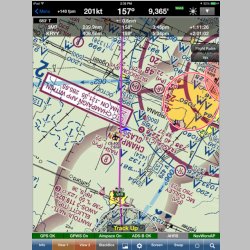
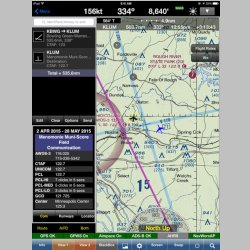
So here are some FlyQ screenshots from my iPad. You can get a feel for the display of how METAR's are displayed at airports to indicate flight conditions, and see how traffic is displayed. The traffic display is just a simple arrowhead with the altitude difference. It does include a leader line that is a velocity vector so you can tell which direction it's going and approximate the speed. Also, you can see that the weather radar does display. The unfortunate thing is that so far I have found FlyQ to be very unstable. If you kill all your apps, and then hard reboot your ipad, and then connect to the NavWorx and launch FlyQ, you *may* get it to run. Without ADS-B it ran for a while just fine. But, as soon as you turn on ADS-B you may or may not be in for a crash-fest. I found that the app repeatedly crashed, leaving be back at the iPad app home screen. Re-launch and it may crash again in seconds. There were a few periods where it worked for a little while, but, at present I could *never* use this for IFR flying. It's just not stable enough. |
|||
 |
 |
 |
 |
 |
|||
| WingX
ADS-B
Screenshots |
|||
 |
 |
 |
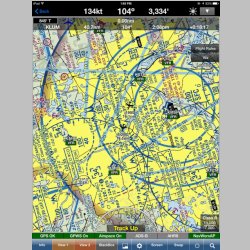 |
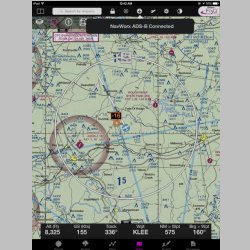
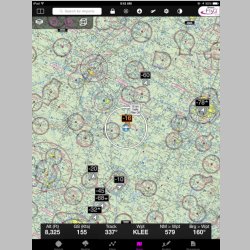
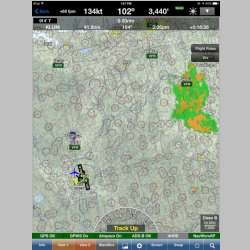
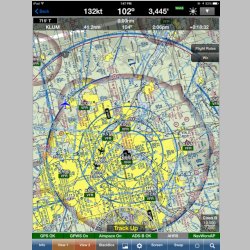
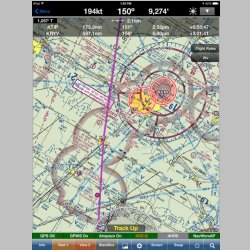
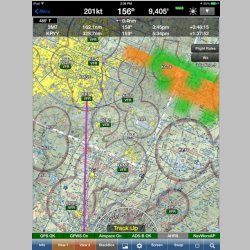
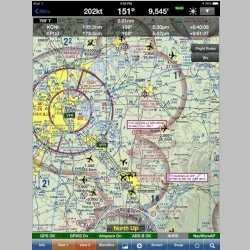
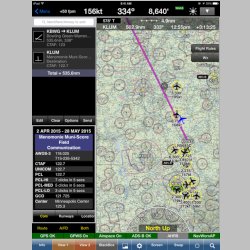
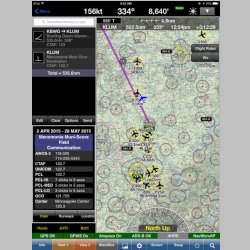
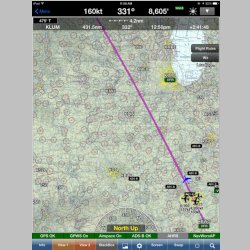
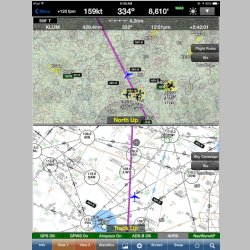
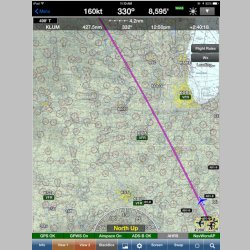
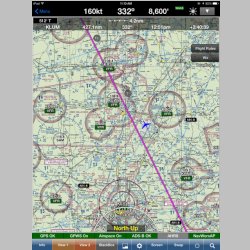
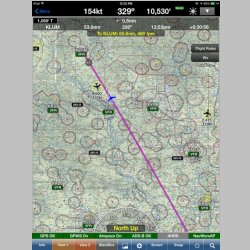
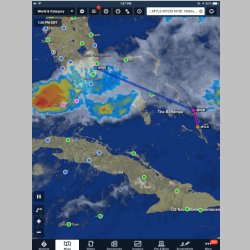
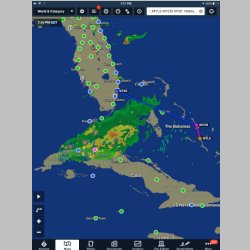
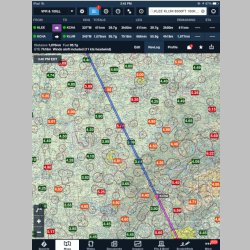
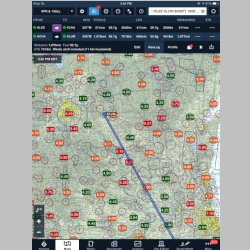
WingX actually works VERY well with ADS-B connected. The weather displays fine, and the traffic display is better than FlyQ. With WingX you are given the other aircraft's distance, altitude, speed, relative altitude, and direction of flight, all displayed with a neat little airplane. Additionally if you look below, my original flight path took me RIGHT over a TFR and I noticed it on the ipad, routed slightly Left of it, and passed right by the TFR's. I could also click on the TFR and read about the restrictions. WingX I've used for a while now and I find it to be excellent in the cockpit, and perfect for IFR flights, and I would say that even with ADS-B integration it still performs fine and it would be great for use for flying IFR. |
|||
 |
 |
 |
 |
 |
 |
 |
 |
 |
 |
 |
 |
 |
 |
 |
|
| Misc
iPad Screenshots |
|||
 |
 |
 |
 |
These are just some misc ipad screenshots I took while on the trip. Some of it was just watching weather go thru. Some was just island info or pictures, and some was fuel price and weather stuff from ForeFlight on the way home as I looked at fuel prices. Just thought I'd include those so it completes the screenshots from all the EFB's that I have. ForeFlight is my go-to app for weather planning and flight plan filing. It's by far the best while on the ground. It's not so slick in the air at some things, but to get more features you have to buy "pro" which prices it higher than WingX. WingX I think I paid $199 for 3 years. Also, the big digger for ForeFlight is that they attempt to be "proprietary" on their ADS-B integration. That's a huge turn-off for me. It's trangle-holding you into only buying hardware from one manufacturer...stratus. This just recently changed where they now will also partner with FreeFlight for ADS-B, but FreeFlight is a much more costly system to buy, and in the end gives no benefit over other brands. So yeah, I'll keep foreflight, but only the basic version. One other HUGE digger about it... When you buy Foreflight, you can use it on your phone and ipad, but only ONE phone and ONE ipad. I like to have 2 iPads loaded up and current on charts so that if one stops working, I can use another. My wife and I both carry an iPad so that works well. With WingX, I can install it on ALL my phones and iPads...same with FlyQ. Maybe some day I'll even drop Foreflight altogether, but it does do a great job at routing and flight plan filing. |
|||
 |
 |
 |
 |
 |
 |
||
Now to USE all the new toys, and head to the Bahamas!!
 |
 |
 |
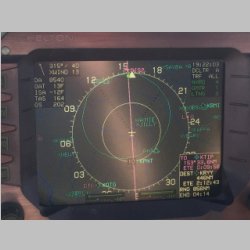 |
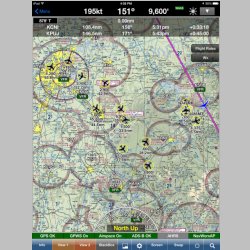
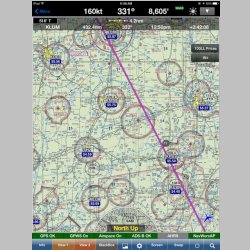
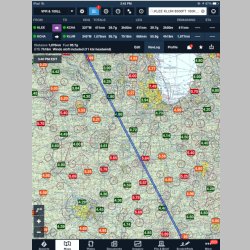
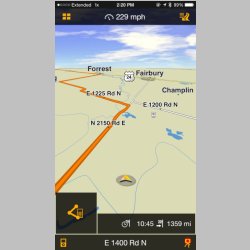
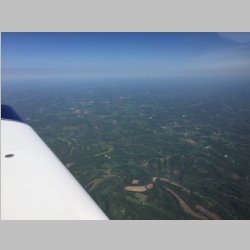
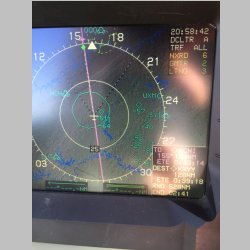
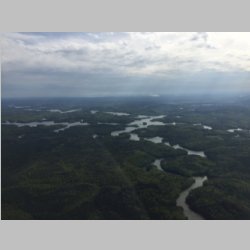
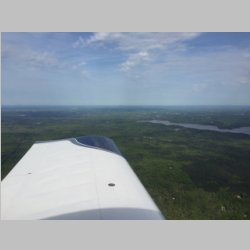
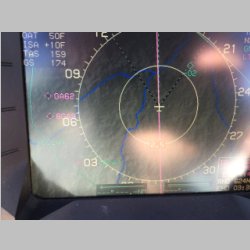
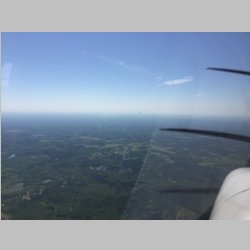
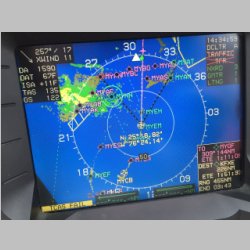
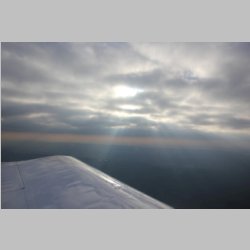
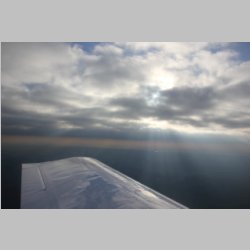
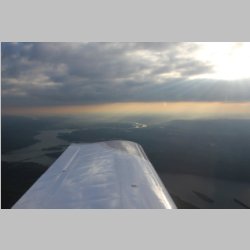
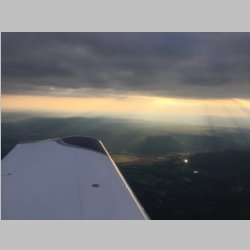
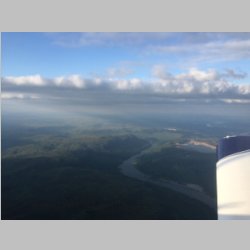
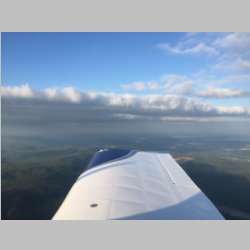
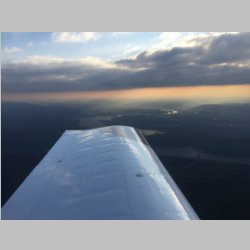
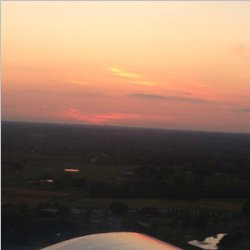
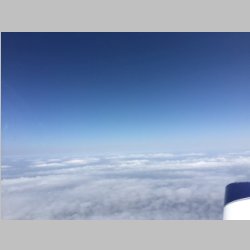
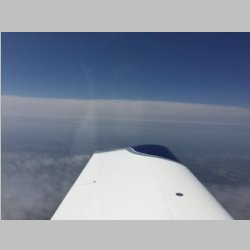
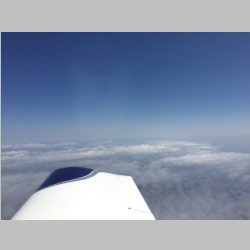
We piled into the plane and headed south. We had a GREAT tailwind...between 30 and sometimes up to over 50kts of tailwind! Now THAT's how you start a vacation!! Just for kicks I routed my iPhone's Navigon GPS app to Lenny's house and got my iphone all freaked out. It was yelling at me to "Turn Left at the T-Junction", and "in 2.2 miles, turn Left". It could barely keep up re-calculating our route as we flew as the crow flies. Funny to watch. One thing that's hard to understand is why anyone wants to live in Illinois or Indiana. We fly over all the time and it's nothing but a flat, brown, wasteland. Then you hit Kentucky and it's a whole new beautiful thing. Kentucky and Tennesee are absolutely beautiful to fly over. The photos below are AFTER you are over Kentucky, whereas the one above is over Illinois. Notice the high traffic density displaying on my screen as we approach Chattanooga. |
|||
 |
 |
 |
 |
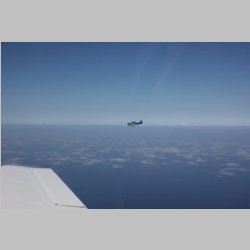
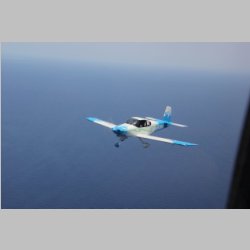
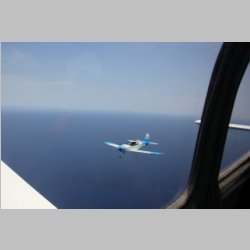
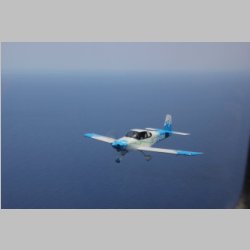
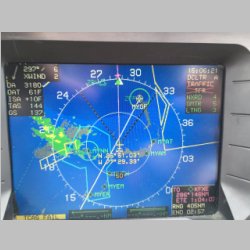
We arrived in Marietta, GA for the night and Hangar'd up with Brian and Brandi for the evening. Below you will see 2 photos. It was an interesting oddity with ADS-B. Brian has a Dynon 1090Mhz ADS-B system. Mine is a 978Mhz system. They don't talk directly....but see eachother via the FAA's software through a ground based transmitter. In the 4th picture you can clearly see Brian ahead of me at my 11 o'clock, but he showed up at my 2 o'clock on the screen. This didn't happen ALL the time, but did happen while in Atlanta's airspace. I think we noticed it later on as well near Miami. Not sure what the cause is, but *assuming* that the GPS's are putting out the proper position info, it shouldn't be that way. |
|||
 |
 |
 |
 |
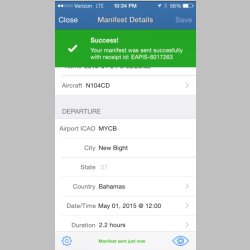
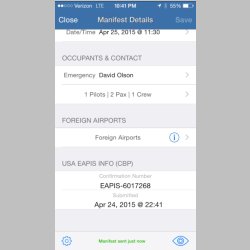
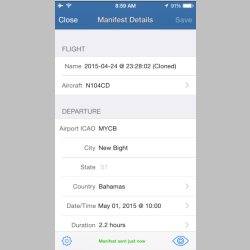
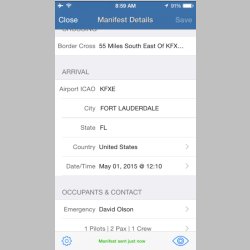
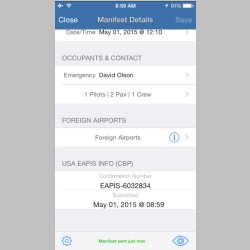
Sadly, the night before we were preparing for our international flight, and we discovered that the eAPIS app "iAPIS" for iphone is no longer supported. But, we were lucky enough to find an alternate app called FlashPass.net. There is one big downside to this app over iAPIS though. This app is an app, but it's mostly web driven, so it's completely non-functional without internet access. With iAPIS I could prepare my manifest while offline, and then just transmit it. With Flash Pass, you can't do anything at all without internet. If it only cached the data you needed, that would be a big improvement...at least then you could look back at your filing or start creating a new one. But, Lenny and I signed up for Flash Pass and entered all of our data on a PC, then pulled it up on the iPhone app (it's cloud based, so that's a big plus, and works well on iPad too!) to file our eAPIS. Almost instantly we got our confirmation email, which you should also store with you for the trip. If you have to re-file, they have a clone function so you clone your previously filed manifest and can then re-file the new one. I believe Flash Pass also works on Android, so it should be a great tool for pilots who fly internationally. It's FAR easier once you've entered your information, than using the government site. It is free for 30 (or is it 60) days. Then they have pay as you go, or package plans you can use. Pay as you go I think is $3.99/filing. A 5-pack is $15.99 (why not 6, then you could do 3 total trips??), or you can pay $60/yr for unlimited filings. |
|||
 |
 |
 |
 |
 |
 |
 |
 |
 |
 |
 |
 |
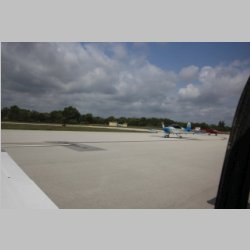
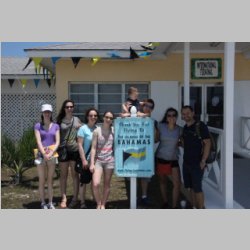
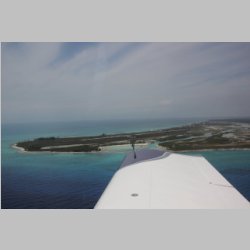
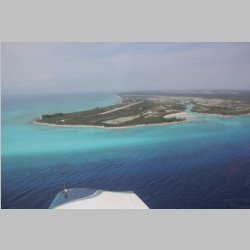
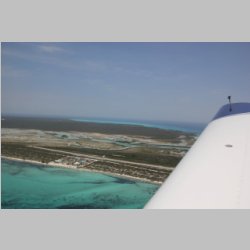
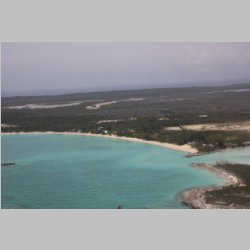
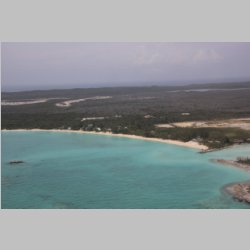
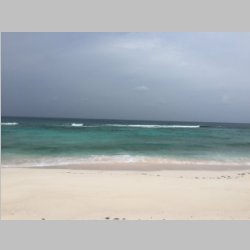
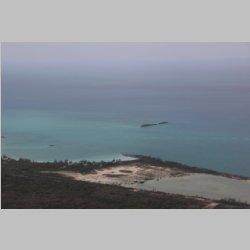
The next day we had perfect weather, and after a short flight, we were clearing customs at MYAF....Andros Town Bahamas. This was the friendliest customs staff we've ever encoutered in the bahamas. Unfortunately for you and I, my camera was still set to a very wacked out set of settings, used when I was photographing the Northern Lights a month or so ago, so many of our pictures are burned out and don't look good at all. But below are some of the better ones. |
|||
 |
 |
 |
 |
 |
 |
 |
 |
 |
 |
 |
 |
 |
 |
 |
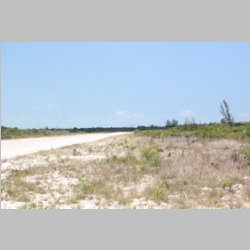 |
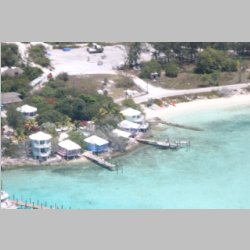
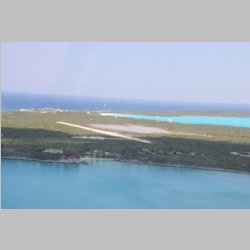
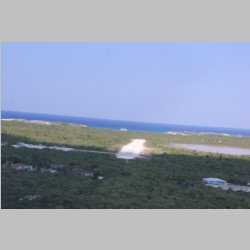
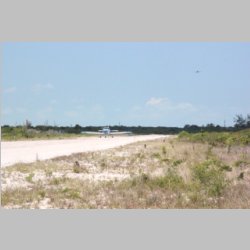
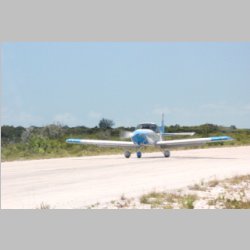
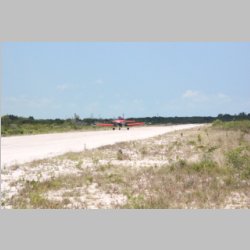
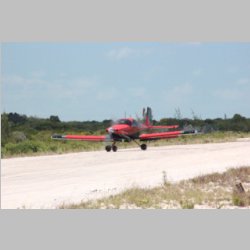
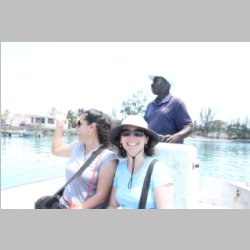
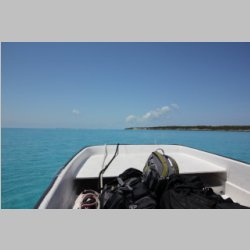
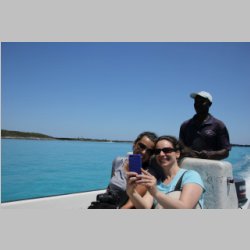
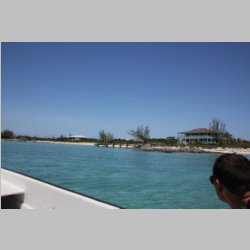
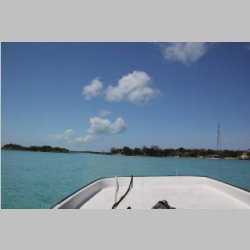
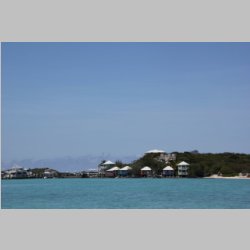
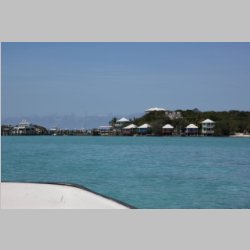
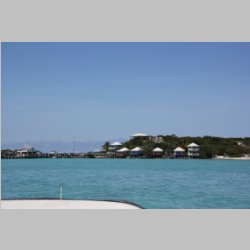
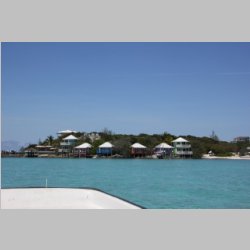
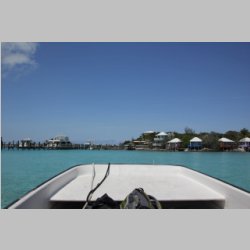
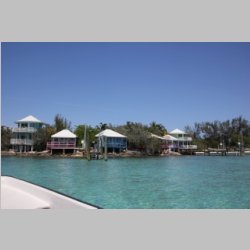
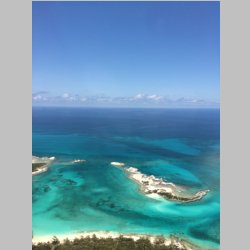
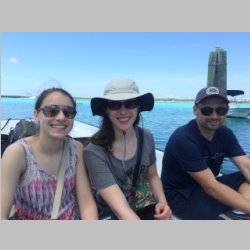
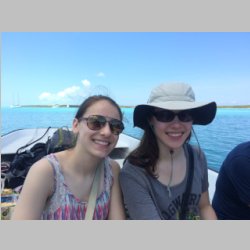
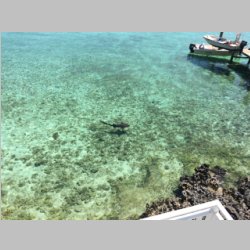
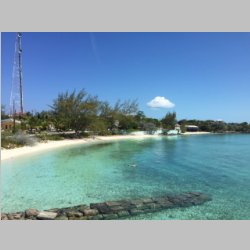
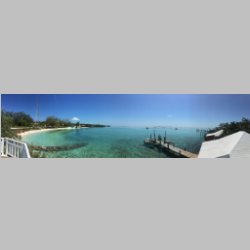
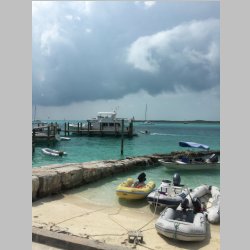
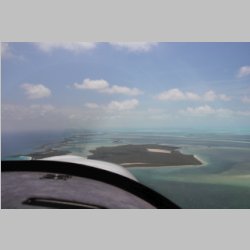
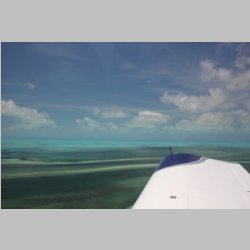
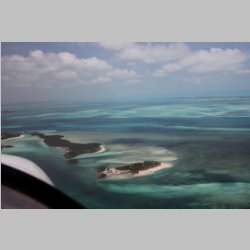
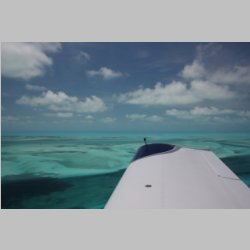
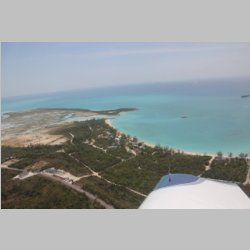
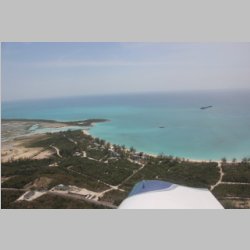
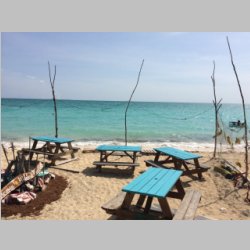
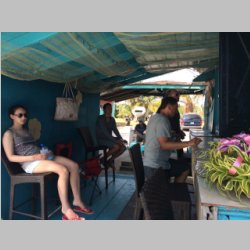
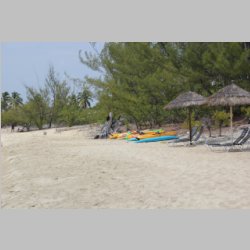
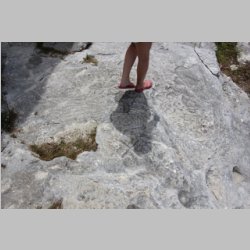
Just before our trip, the Staniel Cay was closed for runway repairs. I thought that would be a bummer at first, but in the end, it worked out well. There is an airport just South of Staniel cay called Black Point, MYEB, that we could use and from there a boat would take us to Staniel Cay. The day we arrived was BEAUTIFUL and the seas were flat, and it was a very nice smooth boat ride to the island. The day we left was much more windy, but even so, the boat was heavy enough that the ride wasn't too bad. |
|||
 |
 |
 |
 |
 |
 |
 |
 |
 |
 |
 |
 |
 |
 |
 |
 |
 |
 |
 |
 |
 |
 |
 |
 |
 |
 |
 |
 |
 |
 |
 |
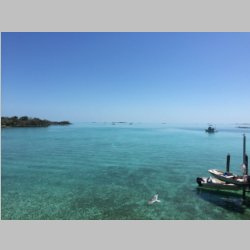 |
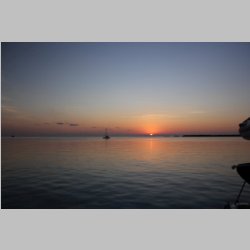
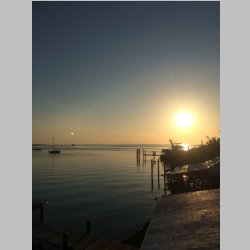
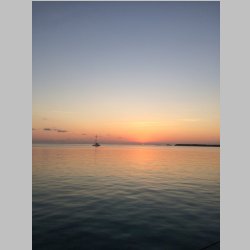
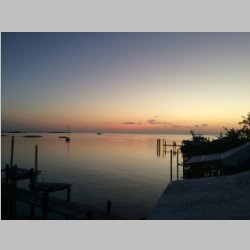
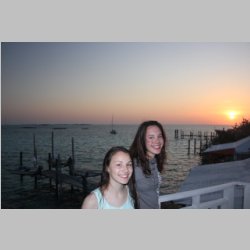
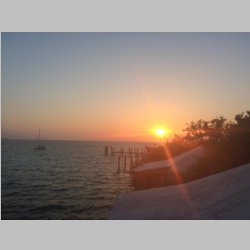
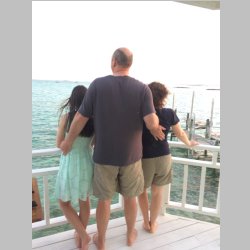
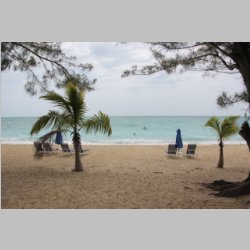
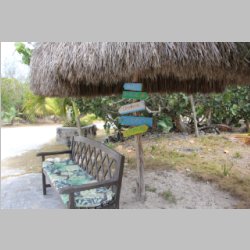
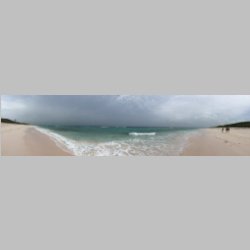
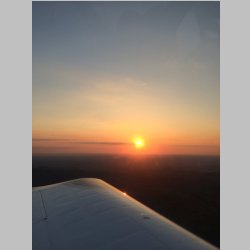
Arrival day ended up being the most beautiful weather, with the lightest breeze of all of the days of the trip. We had the standard "totally awesome" style sunsets, and it made us very happy to be back in the tropics! Staniel Cay has changed a lot in the past few years. It's grown considerably. The dining area that they built is very nice, and the food is now beyond excellent. The cabins are also fantastic. Where it has gone downhill is in the general maintenance of some of the other entertainments... Many of the rental boats had things wrong with them. One of ours was missing an anchor and had panels knocked out and was in general disrepair, another had a completely broken bimini top attachment that needed replacement. And of course when we had a guy come to fix it, he could have drilled the rivet out, but his drill wasn't charged. Meanwhile, of a complete fleet of bikes on site, only 2 were serviceable and those were also in disrepair, with wobbly seats and such. It's sad to see things like that be left in poor maintenance because it can affect both a customers experience, and perception....but I perceive that just as Staniel Cay is growing and becoming bigger and better, it's also slightly deteriorating and becoming maybe less laid back and homey. It's still a place I recommend to see, but it's less and less of a "have to go back" destination. |
|||
 |
 |
 |
 |
 |
 |
 |
 |
 |
 |
 |
 |
 |
 |
 |
 |
 |
 |
 |
 |
 |
 |
 |
 |
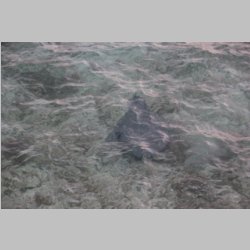
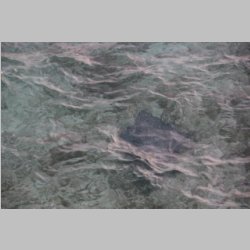
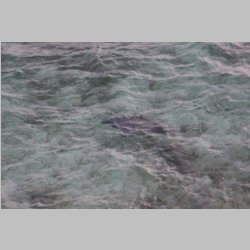
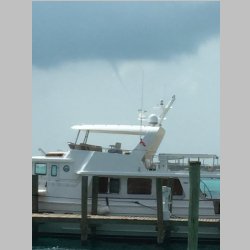
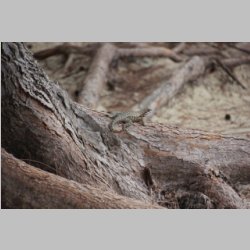
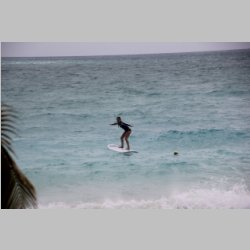
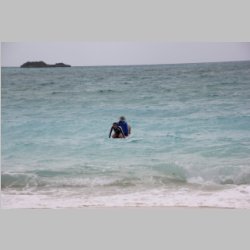
Above and below are some more pictures of the Staniel Cay area. We did the normal Swim with the Pigs, Snorkel Thunderball, and due to the winds being from the west, even got to Snorkel a reef on the Atlantic side of the island. Above you can see an Eagle Ray that swam by our cottage, and blow and above are a couple of pictures showing a waterspout that was trying to form one day a couple miles away. Very neat to see that!! |
|||
 |
 |
 |
 |
 |
 |
 |
 |
 |
 |
 |
 |
 |
 |
 |
 |
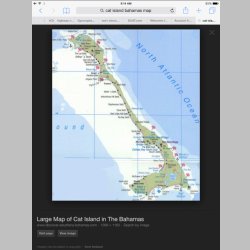
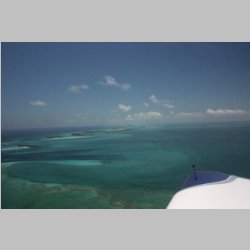
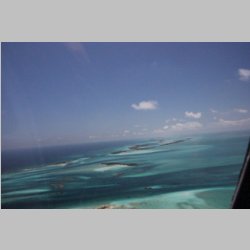
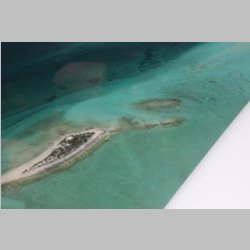
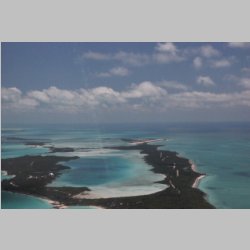
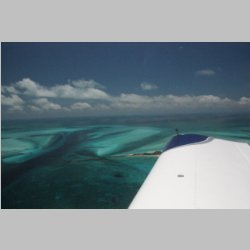
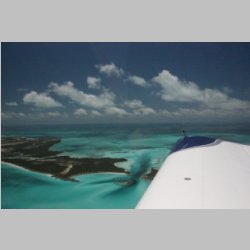
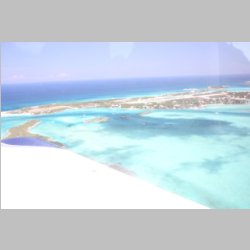
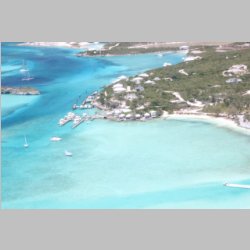
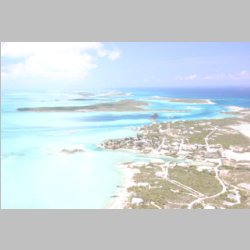
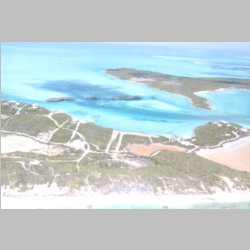
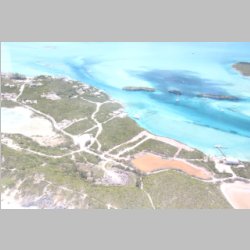
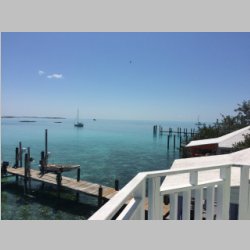
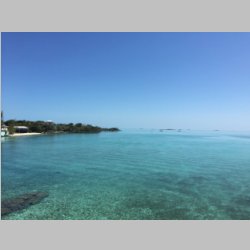
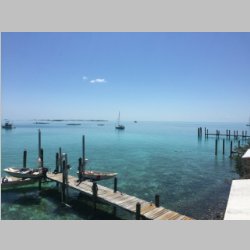
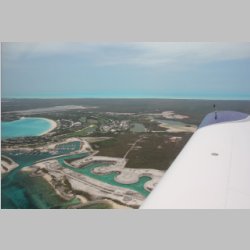
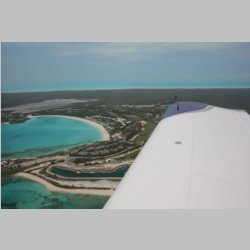
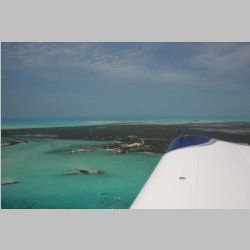
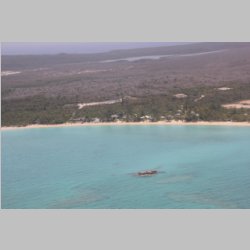
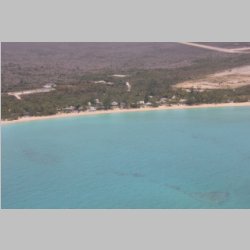
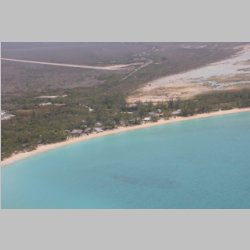
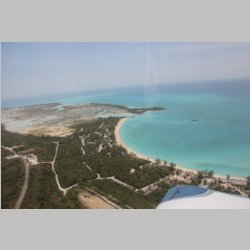
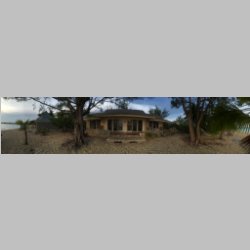
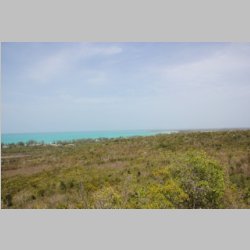
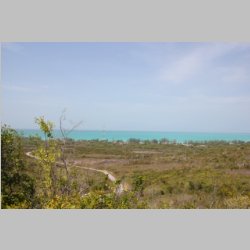
Before long we were up and flying to Cat Island. We first traveled down to Stella Maris (MYLS) for fuel, and then up to New Bight, Cat Island (MYCB) to stay at Fernandez Bay Village. A few of the pictures just above and below are as we flew over Hawks Nest at the south of Cat Island, and the rest are of the bay where Fernandez Bay Village is located. |
|||
 |
 |
 |
 |
 |
 |
 |
 |
 |
 |
 |
 |
 |
 |
 |
 |
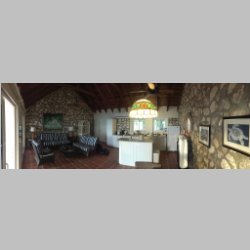
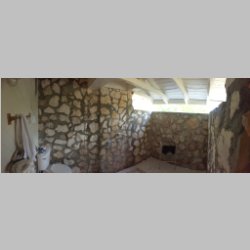
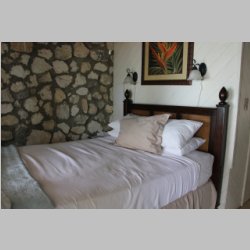
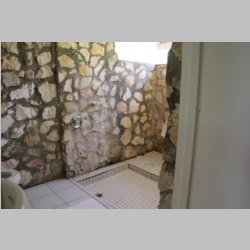
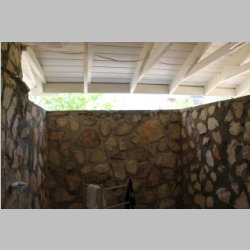
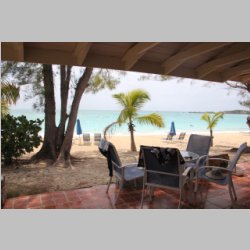
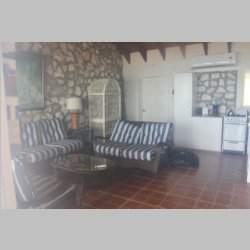
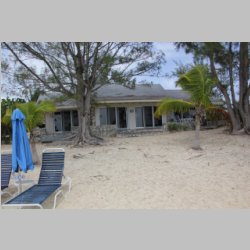
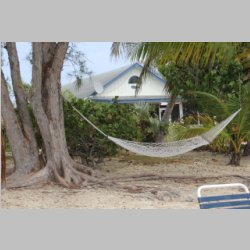
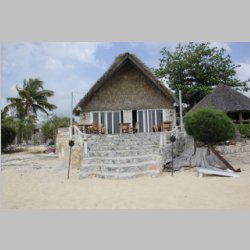
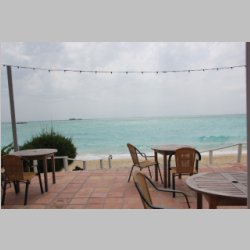
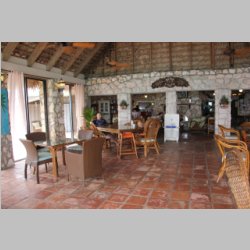
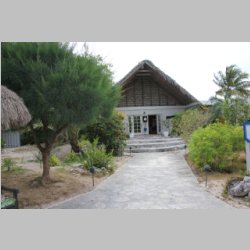
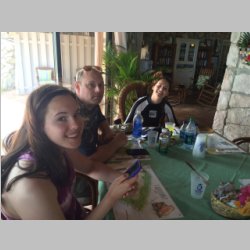
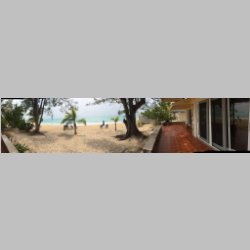
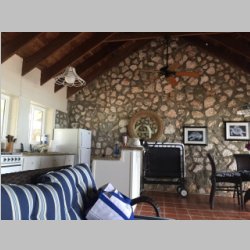
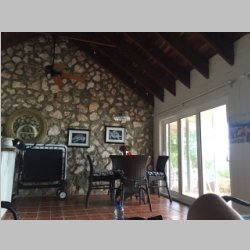
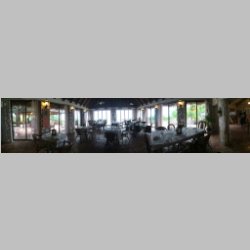
Fernandez Bay Village is a fairly top notch, more European styled resort. As you can see from the panorama, the views and cabins are incredible. We stayed in the "Beach House" which gave us 2 bedrooms and bathrooms, with a large central air conditioned seating/kitchen area for when we wanted it. The bathrooms are very cool, being half outdoor. You literally can shower with the outside air, and there is no need for bathroom fans this way. :) The high wall still gives you the privacy you need, and the cabins are laid out where none are too close. |
|||
 |
 |
 |
 |
 |
 |
 |
 |
 |
 |
 |
 |
 |
 |
 |
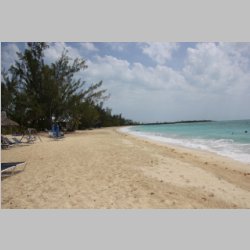 |
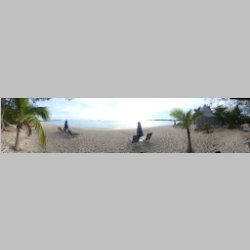
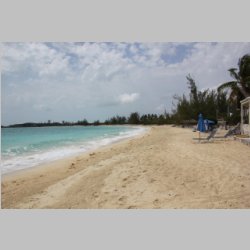
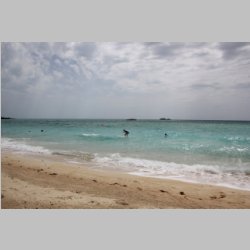
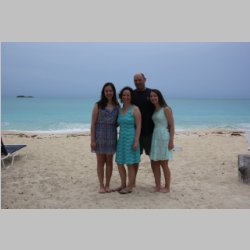
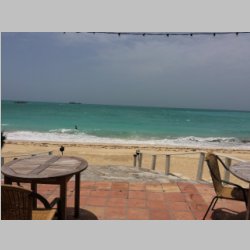
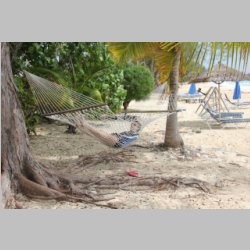
With the winds for the second half of our trip being higher, we were unable to do our SCUBA diving, despite hauling the equipment to the island. But it did allow for some great beach time! |
|||
 |
 |
 |
 |
 |
 |
 |
 |
 |
 |
 |
 |
 |
 |
 |
 |
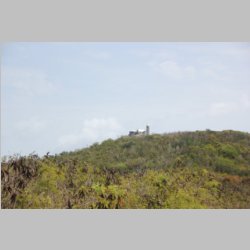
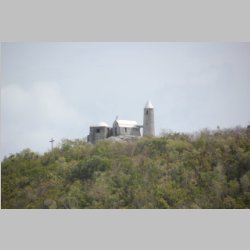
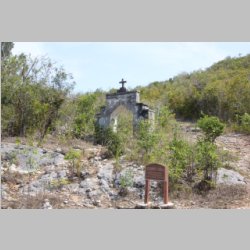
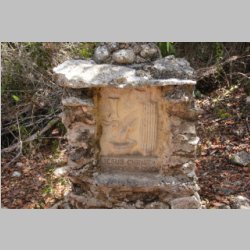
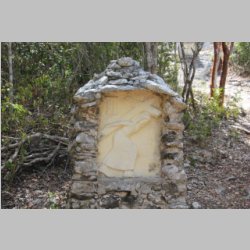
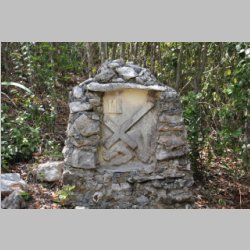
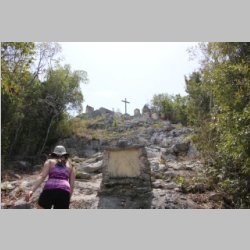
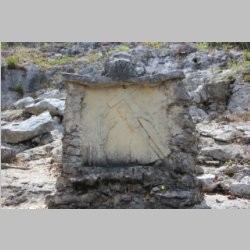
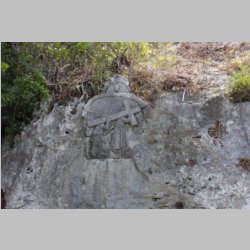
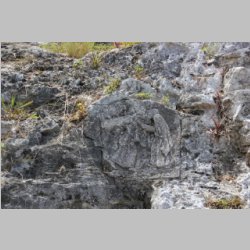
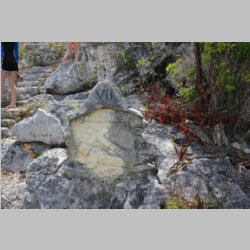
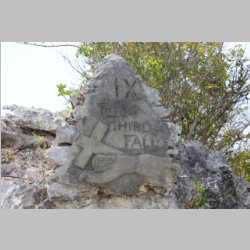
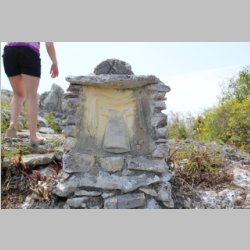
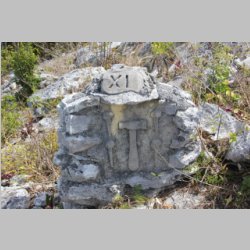
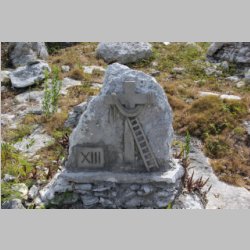
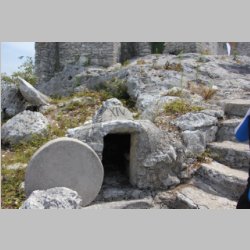
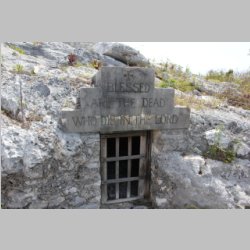
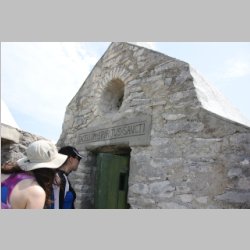
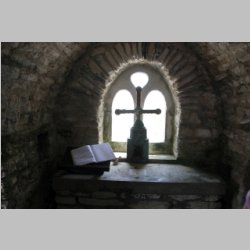
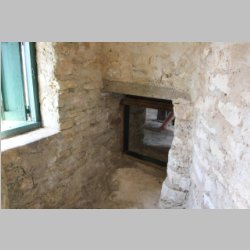
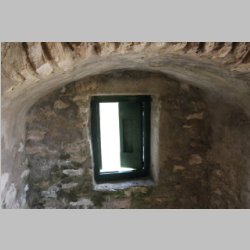
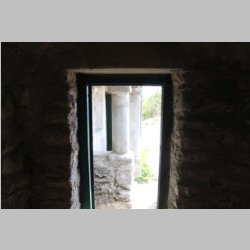
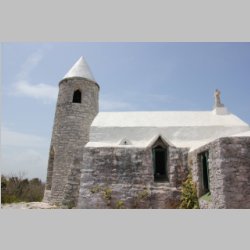
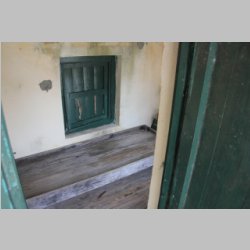
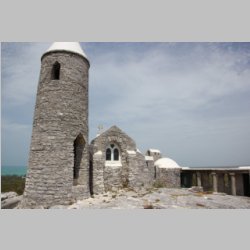
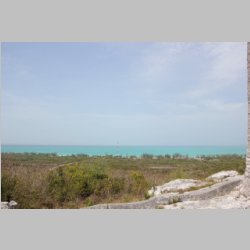
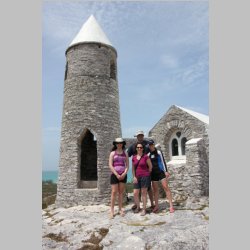
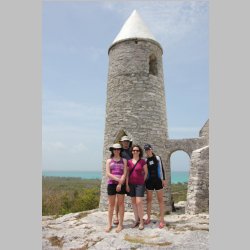
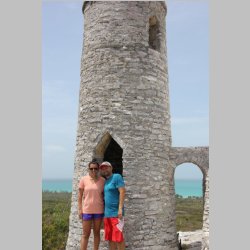
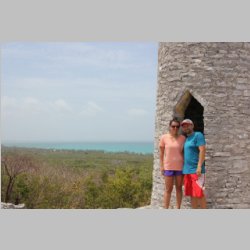
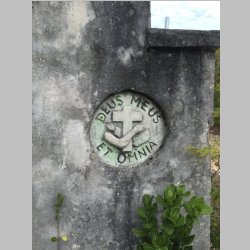
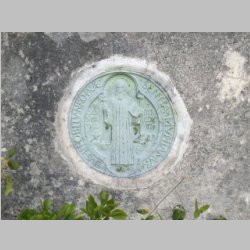
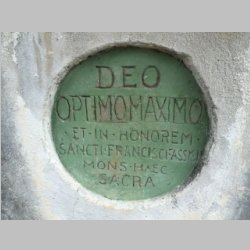
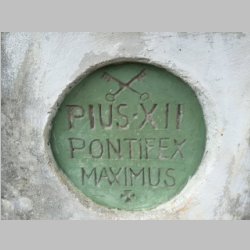
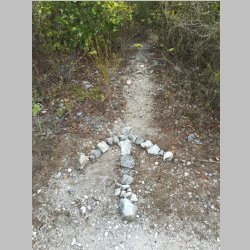
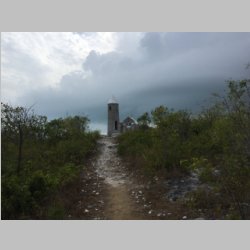
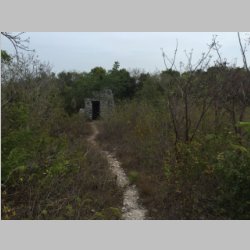
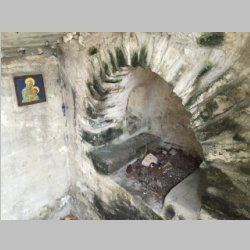
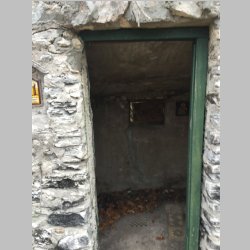
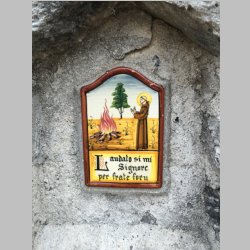
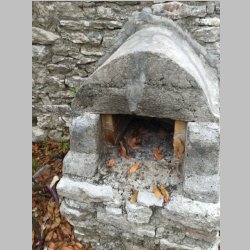
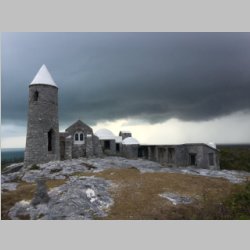
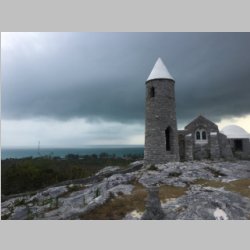
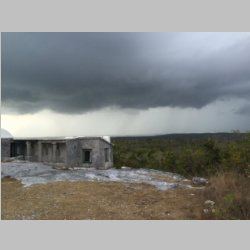
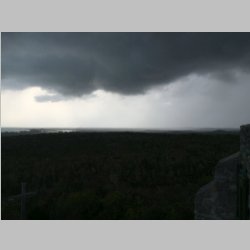
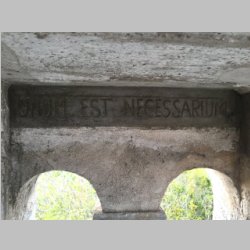
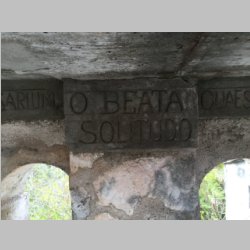
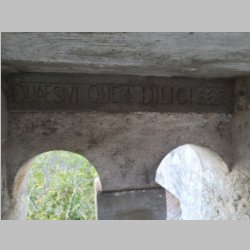
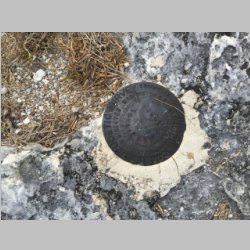
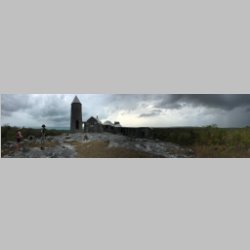
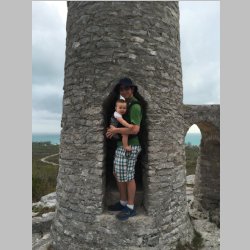
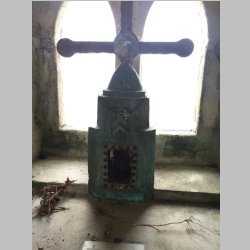
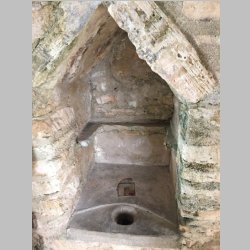
These few days at F.B.V. we had great internet access and were able to keep a close eye on the weather that was coming. It rarely rained, but there was always something that was coming that we could watch. Below you will see some pictures of The Hermitage, on Mt. Alvernia on Cat Island. There are 2 sets of pics as I went there twice to check it out. Now I'm not a Catholic, but I could definitely appreciate the dedication of the Fransiscan Brother Jerome who built this monastery by hand, on top of this hill, which is also the highest point in the Bahamas. He did a spectacular job on it, and there are many inscriptions, and as you climb the hill you pass by the 12 stations of the cross. If you read about Brother Jerome, he wasn't always a Roman Catholic, but he came to the US and converted along the way. He was originally from Britain. Anyway, it is said he was a good man who did a lot of good things, and seeing this place was a real treat. |
|||
 |
 |
 |
 |
 |
 |
 |
 |
 |
 |
 |
 |
 |
 |
 |
 |
 |
 |
 |
 |
 |
 |
 |
 |
 |
 |
 |
 |
 |
 |
 |
 |
 |
 |
 |
 |
 |
 |
 |
 |
 |
 |
 |
 |
 |
 |
 |
 |
 |
 |
 |
 |
 |
 |
 |
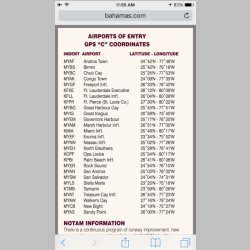 |
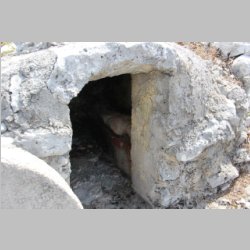
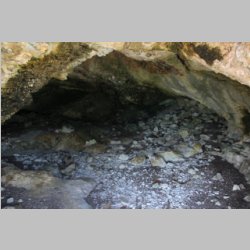
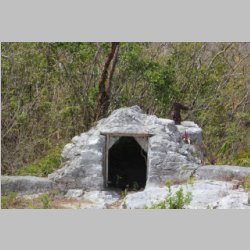
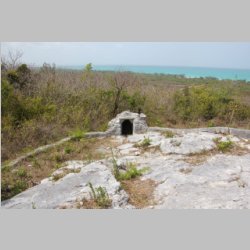
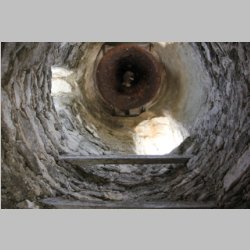
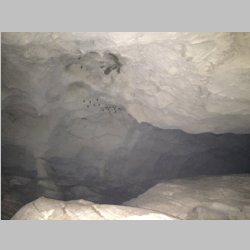
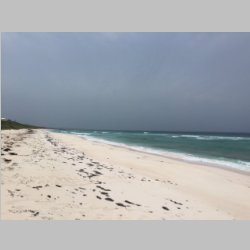
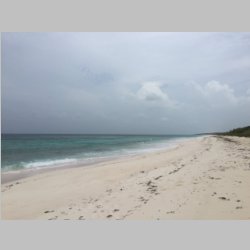
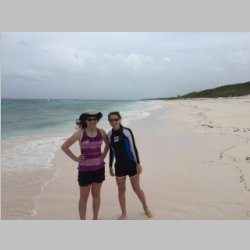
I just threw in the iphone screenshots of the emergency numbers because it may be good reference. One of our other adventures was my oldest, who's now 16 and driving, was able to drive a "backwards" car on the "wrong" side of the road in the bahamas. I'm not sure how cool she thinks that is, but I think it's cool, and I wish I could have had that chance at 16! Below is a cave we went in called the "Bat Cave" towards the north on Cat Island. It's pretty neat how it's a small cave that goes way back into the hill and opens up into very interestingly shaped caverns. There indeed were bats hanging from the ceiling, and when Lenny fired up his frequency generator app on the iphone and cranked it up on high freq, they started swirling all around the cave! Then it was over to the Atlantic side of the island to see the pink sand beaches. I took a video but decided not to post it due to it's size...but the sand was as soft as marshmallow, and as you stepped your feet would sink in about 4 or more inches. It was just SO incredibly soft! |
|||
 |
 |
 |
 |
 |
 |
 |
 |
 |
 |
 |
 |
 |
 |
 |
 |
 |
 |
 |
 |
 |
 |
 |
 |
 |
 |
 |
 |
 |
 |
 |
 |
 |
 |
 |
 |
 |
 |
 |
 |
 |
 |
 |
 |
 |
 |
 |
 |
 |
 |
 |
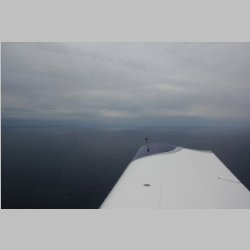 |
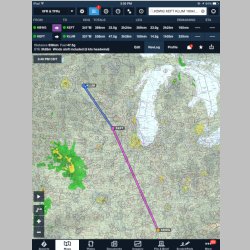
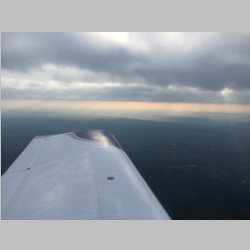
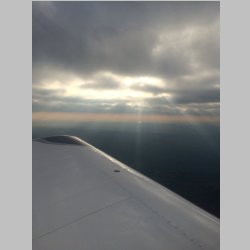
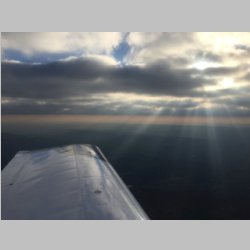
With a slight change in departure time, we had to re-file our eAPIS, made easy by Flash Pass, and then it was time to head back to the US. We'd been expecting some weather, and truly, the "safest" way to get home that day would have been to file IFR, and climb up to 8,500 or 10,500 and just head straight home. But with a group to get back, we decided to just stay VFR. Luckily in the bahamas, even though it's easy to have 1000' ceilings, it's very rare for a ceiling to go all the way to the water. There is almost always a few hundred feet to fly under. So I modifed our route to more or less follow the island chain up Eleuthera, to Abacos, and then at that point we'd be North of most of the weather and the ceilings should climb, based on what we saw on the forecasts. it turned out this was almost EXACTLY what I expected. The worst ceilings were about 700-800', and that was only a couple miles worth. Much of the flight was done at 1000', within sight of the islands...and visibilities were almost always a minimum of 5 miles in the misty areas, to 10-20 miles in most of the areas. So the flight home was very smooth and uneventful, just as I figured it would...and after passing the South point of Abaco island we were able to climb a bit. We decided to just stay at 2500' at that point as we were almost home. I was able to get our discrete squawk from Miami Radio, but we never were able to reach Miami Approach at our low altitude to have them with us on the way in. We did however contact KFXE tower more than 20 miles out and were able to talk to them. KFXE Customs was the usual....the sensless unloading, for no real benefit. They were also short of baggage carts, which lessened the fun...and, they don't come out to the plane. We're always told to "stay in the plane until they come to you", but at KFXE they never come to you. Other than that, customs was cleared easily and the system wasn't too bad. |
|||
 |
 |
 |
 |
 |
 |
 |
 |
 |
 |
 |
 |
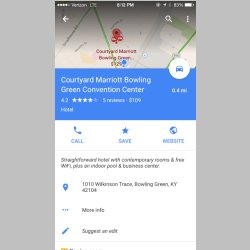
We continued on after that on our Northbound trip home, and flew through the absolutely spectacular hills of Tennesee. It really is hard to describe how beautiful it is there. We ended up deciding not to try to make it home, as it would be after midnight if we did. So we called up Co-Mar aviation at KBWG, Bowling Green, KY, and they told us that not only could they get us a hotel and/or rental car, but that the hotels were close by and they would drive us to the hotel. SCORE! I gladly took on the required 10 gal of fuel to waive our service fees and they gladly brought us to a great hotel. We had a fantastic dinner at a Montana Grill, which was a cool restaurant. That's one thing about this trip...we had the most fantastic food at both resorts, it was just incredible....combined with a great mexican place in Marietta, and a great Italian place in Pompano Beach. Probably the best eating we've ever had on any vacation...ever. |
|||
 |
 |
 |
 |
 |
 |
 |
 |
 |
 |
 |
 |
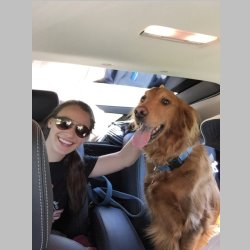
The next day as we took off we passed by the Corvette Museum, and Corvette Factory, in KBWG. From there on we had an easy, completely VFR flight home. And the airplane was put away to sleep, and our best friend was once again reunited with us to come home. He was darn happy to see us! And we were happy to be home! |
|||
 |
 |
 |
 |